Welcome to my blog!

News from a wargamer with a special interest in the military history of the Balkans. It mainly covers my current reading and wargaming projects. For more detail you can visit the web sites I edit - Balkan Military History and Glasgow & District Wargaming Society. Or follow me on Twitter @Balkan_Dave
or on Mastodon @balkandave@mastodon.scot, or Threads @davewatson1683

Thursday 28 February 2019

The Khazars

The latest in Osprey's Men at Arms series covers the Judeo-Turkish empire of the Khazars, which ruled much of the Steppes between the 7th and 11th Centuries AD.

Mikhait Zhirohov and David Nicolle outline the emergence of this state on the lower courses of the Volga and Don Rivers. They converted to Judaism in the 8th century, which placed them geographically and culturally between the Christian and Islamic states on their borders. They were probably Turks and were allied to the Bulgars and Alans.


They fought a series of wars against Islamic states to the south in the Caucasus, as well as the Byzantines and finally the Russ in the north. The armies were mostly cavalry, some with heavy armour and others as light horse. The core of the army was organised on a feudal basis, but in the later period included paid troops and mercenaries. Armies could typically be as large as 40,000 men with the ability to call upon as many as 100,000. While mostly nomadic, they controlled settled areas and built some fortresses and could call upon town based militias.

They used a wide range of weaponry including bows, spears, swords, axes and war flails. The archaeological evidence for each weapon is described, supported by pictures, diagrams and colour plates by Christa Hook.

In 965 or 966 the Kievan Russ defeated the Khazars and took over much of their territory, other than a few successor states in the Crimea and Caucasus. By the standards of the Steppes, this empire survived for a very long period. They deserve to be better understood and this book is a good starting point.

I haven't got any Khazars in my wargame collection. I do have some of their allies, the Bulgars and the Slavs, who migrated into the Balkans during this period. I have recently been padding out this 15mm army with some Bulgar noble cavalry figures from the Essex range.

Slav infantry

Bulgar light horse


Tuesday 26 February 2019

Operation Unthinkable


Those who watched the film 'Patton' will remember the scene when he argued at the end of the war that the Allies should 'finish the job' by attacking the Soviet armies in Eastern Europe. From this, you might think that this was an American notion.

In fact, Patton was an isolated voice in the US command. The one person, alone among Western leaders, who was prepared to consider a pre-emptive strike against Soviet forces was Winston Churchill.

The details of this plan are covered in Jonathan Walker's book 'Operation Unthinkable: British Plans to Attack the Soviet Empire 1945'. 


Churchill was particularly concerned about Poland as Stalin tightened his grip on that country. He felt Stalin was reneging on the Yalta agreement and he ordered the Chiefs' to prepare a plan that calculated the likelihood of the success of a pre-emptive strike within two months of Germany's surrender.

The Joint Planning Staff produced two plans. The first was 'Quick Success' - a short, sharp attack by the British Empire, US, Poland and Germany that would force the Soviet forces back to Russia and allow the Western allies to dictate the future shape of Eastern Europe. The second plan, 'Total War', assumed that the quick success plan had failed and only a Third World War would bring Stalin to the negotiating table.

The planners were, not surprisingly, pretty sceptical. A surprise would be difficult to achieve, and the only practical invasion route was in Northern Europe as the southern approach was too mountainous. Following an initial breakthrough, they estimated that a huge armoured battle would be fought east of the River Oder. Naval and air superiority was assumed, but that still left ground forces outnumbered by the Red Army by at least 2-1. There was little evidence of any loss of Soviet morale and equipment and organisation had significantly improved. The Total War option involved the frightening prospect of a winter invasion of Russia. 

The details are clearly set out in this book. Some of the assumptions, not least US support and British public opinion, are highly suspect. However, the Chief's concluded that a short war was 'beyond our power to win', leaving a commitment to a protracted war against heavy odds. On 9 June Churchill did an about-turn and accepted the report. He ordered new plans to be drawn up to resist any Soviet advance into Western Europe.

War could have broken out over any of the 1945 flashpoints, but it seems crazy today that anyone would have contemplated finishing one war and starting all over again a few months later. However, after Stalin's threats to Turkey and Iran, a year later it was the US that was preparing war plans. The Cold War had begun.


This is a fascinating study of plans that are not well known. It offers the wargamer some 'What-ifs' for those late war armies. I put together British and Soviet divisions for the sort of armoured clash the planners envisaged using the 'Rommel' rules of Sam Mustapha. Big grand tactical rules are necessary for conflict on this scale. The Russians won!


Saturday 23 February 2019

Viper's Blood

This is the fourth book in David Gilman's, Master of War series. Set in 1359, our hero Thomas Blackstone is commanding his company in the army of Edward III, which is embarked on another invasion of France.


The French King had been captured at Poitiers in 1356 and had agreed to hand over vast tracts of French lands as part of the ransom. His son the Dauphin was refusing to honour the treaty and so Edward brings a huge army to France. This campaign was less successful and got bogged down in sieges at Rheims and Paris. The country had been ravaged and his supply train was overextended in what became a winter campaign.

Blackstone is of course in the thick of the action. Capturing part of the Royal Mint and a nearby town. Once peace is agreed he is tasked with escorting a French princess who is being married off to the Despot of Milan as a way of financing the deal. Italian politics intervene and he is betrayed. A neat twist at the end leads to the inevitable climactic battle.

This is historical fiction at its very best. I had downloaded this book onto my Kindle some time ago and forgotten about it. Not a mistake I will make again as Book 5 is already out. Great characters, convincing action, intrigue and sex are all present with some really good writing. Highly recommended.

And inspiration for a game of Lion Rampant!


Wednesday 20 February 2019

Battle of Sedgemoor 1685

With a couple of hours to spare before my flight from Bristol, I stopped off at the Battle of Sedgemoor site. One that I have passed many times, but never actually visited.

This battle is billed as the last to take place on English soil. Not sure about that, but I suppose it depends on your definition of a battle.


It took place on 6 July 1685 and was the end of the Monmouth Rebellion. The Duke of Monmouth was Charles II's illegitimate son, and he landed in Dorset in an attempt to unseat the unpopular and Catholic James II. Monmouth was an experienced soldier, but this was a poorly prepared uprising.

His small, poorly equipped, army was cornered at Bridgewater in Somerset, by the Royalist army commanded by Lord Faversham and Lord Churchill, the future Duke of Marlborough. He then attempted a night march, something even well-trained units avoided in the period. Unsurprisingly, they got lost and were spotted by Royalist scouts who alerted the rest of the army quartering in the village of Westonzoyland.

After a short firefight across the Bussex Rhine (a large ditch), the Royalist artillery was brought up to inflict severe casualties on the inexperienced rebels. At dawn, the Royalist cavalry worked around both flanks while the regulars crossed the ditch. The rebels fled, and many were butchered during the rout and afterwards.

The Bloody Assizes, as they became known, sentenced 330 rebels to death and a further 849 were transported to Barbados, which was a good as a death sentence. The Duke of Monmouth was captured and beheaded. These deliberately cruel measures contributed to James’ downfall three years later, in the Glorious Revolution.

The battlefield today remains open farmland. The Bussex Rhine has gone, but you can see many drainage ditches as you drive across the flat landscape. There is a small monument on the battlefield, erected by public subscription in 1928. I had neither boots or time to walk to it, but these photos give an idea of what the battlefield looks like.


The church in Westonzoyland has an excellent interpretative centre, with interactive displays and replica uniforms and firearms. The church housed rebel prisoners after the battle. There are also information boards around the village. Well worth a visit.


This is not a campaign you will often see on a wargames table - bit of a one off. The Royalist army is not a problem for those who have armies of the period. The Rebels, in the main, would have worn their civilian clothes. 

Tuesday 19 February 2019

Sir Ralph Abercromby and the French Revolutionary Wars

When we think of British army commanders during the Napoleonic wars, the names of Wellington and his generals are likely to top the list. Carole Divall has reminded us, in a new biography, of Britain’s pre-eminent soldier during the French Revolutionary Wars – Sir Ralph Abercromby.


I first became aware of Abercromby when researching and collecting armies for Napoleon’s campaign in Egypt and the subsequent British intervention, during which Abercromby died. Captured in a stunning painting on the book cover, although he actually died on board ship after the battle.

This book is less a biography of Abercromby and more a study of British involvement in the French Revolutionary Wars 1792-1801. A conflict that has been largely eclipsed by the great events that we generally call the Napoleonic Wars. Abercromby is involved in most of the primary campaigns, but the author puts his actions in the context of British policy. ‘Perfidious Albion' was a consistent opponent of the revolution, but the means of waging that opposition often split the government. Some favoured intervention in Europe, directly and through subsidies - others an indirect approach that captured colonies and strengthened British trade and commerce.

The chapters in the book take the reader through the campaigns Abercromby was engaged in. This results in some very long chapters, but you get plenty of context including the all-important social and political history.

Ralph Abercromby was born in Scotland, studied at the Universities of Edinburgh and Leipzig. He decided on a military career and served in the 3rdDragoon Guards in the Seven Years War. By the standards of the time, he was a liberal and didn't serve in the American Revolution. 

He commanded a brigade under the Duke of York in the first campaign of the revolutionary wars. The Duke of York was an able administrator, but not a field commander. Abercromby was one of the few who came out of the 1793 Netherlands campaign with any credit. 

After the failure of the First Coalition the colonialists had their way with a campaign in the West Indies, commanded on land by Abercromby. As Spain had declared war against Britain, the Spanish and Dutch islands were up for grabs. Slave uprisings added to the confusion and the campaign had to secure British possessions as well. Disease was a more significant threat than enemy action, not helped by the plantation owners refusal to support locally recruited regiments. 

The fleet suffered many weather-related disasters en-route, and Abercromby did have a good working relationship with the navy, a rare feat during this period. It was in this campaign that he also struck up a friendship with John Moore, who was to serve with him as a Brigade commander in all his campaigns.  Abercromby achieved the pacification of British islands, reconquered St Lucia and captured Trinidad. However, he failed to take Puerto Rico, and it is doubtful if these modest gains justified the high losses.

For those who like a ‘what-if’ campaign, Abercromby then tried to persuade the government to support a war of liberation in South America.

After returning to Britain in 1797, he was appointed to command the army in Ireland.
A poisoned chalice if there ever there was. Ireland was ruled by the Protestant minority who used the yeomanry and other forces to terrorise the Catholic majority.
Abercromby attempted to instil some discipline into the army, but came up against the Protestant establishment and decided to resign his command.

The 1797 Second Coalition campaign in the Netherlands, again saw Abercromby leading the advanced guard under the Duke of York. This was another poorly equipped and planned campaign that achieved little other capturing the Dutch fleet and blooding the army. The weather was appalling, and the anticipated Dutch uprising failed to materialise.

As peace talks started, Abercromby was in the Mediterranean, initially to support the Austrians in Italy. The government did not want to leave the French in control of Egypt, so Abercromby’s army was diverted to Alexandria. Napoleon had long abandoned his troops there, although Menou still commanded a formidable force of veterans.

In a well-organised campaign, he defeated the French, and the army went on to capture the whole of Egypt. Abercromby was mortally wounded in the Battle of Alexandria and died later on the flagship HMS Foudroyant. He was buried in the fortifications of Valetta harbour in Malta, and there is a memorial to him in St Pauls Cathedral.

The final chapter appraises his career sympathetically. It had more positives than negatives, and he undoubtedly helped create the army that went on to greater success in the Peninsular and elsewhere.

As the Duke of York said:  "His steady observance of discipline, his ever-watchful attention to the health and wants of his troops, the persevering and unconquerable spirit which marked his military career, the splendour of his actions in the field and the heroism of his death, are worthy the imitation of all who desire, like him, a life of heroism and a death of glory."

This is an excellent study of a commander and a conflict that has mostly been forgotten. It is well written and thoroughly researched. Highly recommended.

It also gave me an excuse to dust down the wargame armies I collected for the GDWS display game at Claymore in 2010. Rebels and Patriots may not have been designed for this theatre of operations, but they worked very well.


Friday 15 February 2019

Cruel Seas - Regia Marina

As the Adriatic is my scenario of choice for Cruel Seas, the new Italian fleet box was a no brainer. Even after the Italian surrender, their boats were used by the Germans, often with less than enthusiastic Italian crews.


So what do you get?

The big ship is the Gabbiano Class corvette. My usual Warlord moan is the lack of instructions, which persists here. However, there are at least good close up pictures from all angles on the website and it wasn't difficult to assemble. Fiddly, with my big fingers, but doable.


Then the first of two types of transport barge, the MZ Mottozattera. This is very useful for the type of scenarios I play, with Italian convoys crawling down the Adriatic and between islands. Pretty straightforward assembly.


The other transport, or weapons platform, is the F-Lighter. These also operated in the Adriatic and are mentioned by British MTB commanders. They were slow but had some serious armaments.


Finally, the sleek and fast (45 knots), MAS motor torpedo boats. These were smaller than their allied counterparts, but faster.


I almost forgot the CR42 fighter. Warlord has just brought out some Stukas as well. The box comes with all the player aids that you need for this fleet.

Looking forward to getting in some games with these.


Sunday 10 February 2019

Royal Yugoslav armed forces prior to WW2

The Royal Yugoslav Army (VKJ) during World War Two is a bit of a niche interest, even for me! An army that collapsed in just eleven days in April 1941 is also unlikely to be any wargamers idea of a winning force on the tabletop. Other than a border skirmish or two in the 1920s, the army didn't fire a shot in anger during the inter-war period. 

If I am not selling the concept of my latest 28mm Bolt Acton army, I should say that there were times in the 1930s when war was entirely possible. In a feature article at Balkan Military History I describe two of these 'What ifs". 

In August 1939, Hitler proposed to Mussolini that Italy should invade Yugoslavia. Mussolini was delighted at the prospect but was advised that the Italian armed forces were in no condition for such an adventure. Mussolini frequently ignored his generals advice, so here is an opportunity to use those Italian armies in a new scenario.

After the invasion of Poland and the start of WW2, the British and French discussed the possibility of landing a military force at Salonika. This would be something of a re-run of the WW1 campaign. The French General Weygand led the planning, signing himself as ‘CinC of the East Mediterranean Theatre of Operations’. The Yugoslav government actively participated in the planning, recognising that if the Italians siezed Salonika, Yugoslavia could not be supported by the allies. This 'What if' potentially includes early war French, British and Greek troops.

Wargamers have never had it so good in terms of the range of miniatures available. However, there are limits, and an army that lasted only a few weeks in combat is at that limit. Fortunately, all is not lost. The Yugoslav infantry uniform is essentially the same as the French, for which there are plenty of options in all scales. A few Serbian WW1 officers with the distinctive cap, adds a bit of Yugoslavian colour.

My infantry will come mostly from the Warlord French range in 28mm, supplemented by Crusader Miniatures. This is the first squad off the painting bench.


FT17 and R35 tanks are again available from French ranges.

Artillery is more challenging as the obscure Czech pieces are not readily available. AGN Miniatures make the German adaptation of the 47mm ATG, the Pak 38(t), which although the gun shield is a bit large for the Yugoslav model, is pretty close. 


Much more to do as I stare at a pile of boxes, but a start has been made! 

There is no handy Osprey to consult on uniform details. The best source I have is Andrew Mollo’s Armed Forces of WW2, which has some good colour plates. Other background reading is in the article.

If you want to see and play with this army, it will be the GDWS participation game at the Falkirk Carronade show in May 2019 - 'Breakout from Zara'.   

Thursday 7 February 2019

Beasts Beyond the Wall

I have struggled with historical fiction recently. Other than the old reliables like Bernard Cornwell, a lot of books have left me less than satisfied. So, I was pleased to see that my old wargame opponent, Bob Low, has turned out a new volume. 

After a career in journalism, his Oathsworn series covered the Vikings well. Hardly surprising as Bob was a serious reenactor, and looks the part! His Kingdom series covered the Scottish-English wars, without the absurdities of Braveheart. His writing style is crisp and readable as you would expect from a journalist. On occasions, we get a little too much of his research, but after a while, you learn which parts to skip over. 


His latest book, Beasts Beyond the Wall, take him into a new period – the Imperial Romans during the rule of Emperor Severus (AD 208). Instead of taking the well-worn road of the legionary hero (Simon Scarrow et al.), he takes a group of freed Gladiators employed on a mission to rescue a Roman noblewoman and her son from the Picts. 

The Emperor decamped the Imperial court to York, and he was campaigning in Scotland. Our heroes are on the edges of that campaign as they travel north. They do battle with the Picts and the intrigues of the Imperial Court, manoeuvring for power as Severus dies. They are betrayed and end up back as Gladiators in Rome. There is a grand escape, but I won’t spoil the story. It’s going to be a series so we can’t lose too many characters! 


This is proper historical fiction. The characters are adequately developed, and historical accuracy is not abandoned. Roll on the rest of the series. 

I haven't got any Picts, but here is a somewhat younger Emperor than Severus and his Generals from my collection in 28mm.

Sunday 3 February 2019

Varpartnak 2019

The start of the war game show year for me is usually Varpartnak in York. I missed last year as I was down with the flu, so I was pleased to make the trip this year.

The racecourse main stand is an unusual venue, but very adaptable for a wargames show. Light and spacious with plenty of catering. I walked past the old venue for this show, the Merchant Venturers Hall, on Saturday night. It was neither light or spacious, although it did have plenty of character. 

While packed with trade stalls there are still some great games at this show. The winter modelling efforts are there for all to see.

Visually, the Bridlington table was stunning, although it is more of a diaorama than a game. 


I also liked the WW1, Middle East game.


On the desert theme, the Indiana Jones game was eye catching, although I am still not sure how the plane got there!


There were a number of smaller participation games that were doing good business all day. I am struggling to resist buying Cobi tanks!


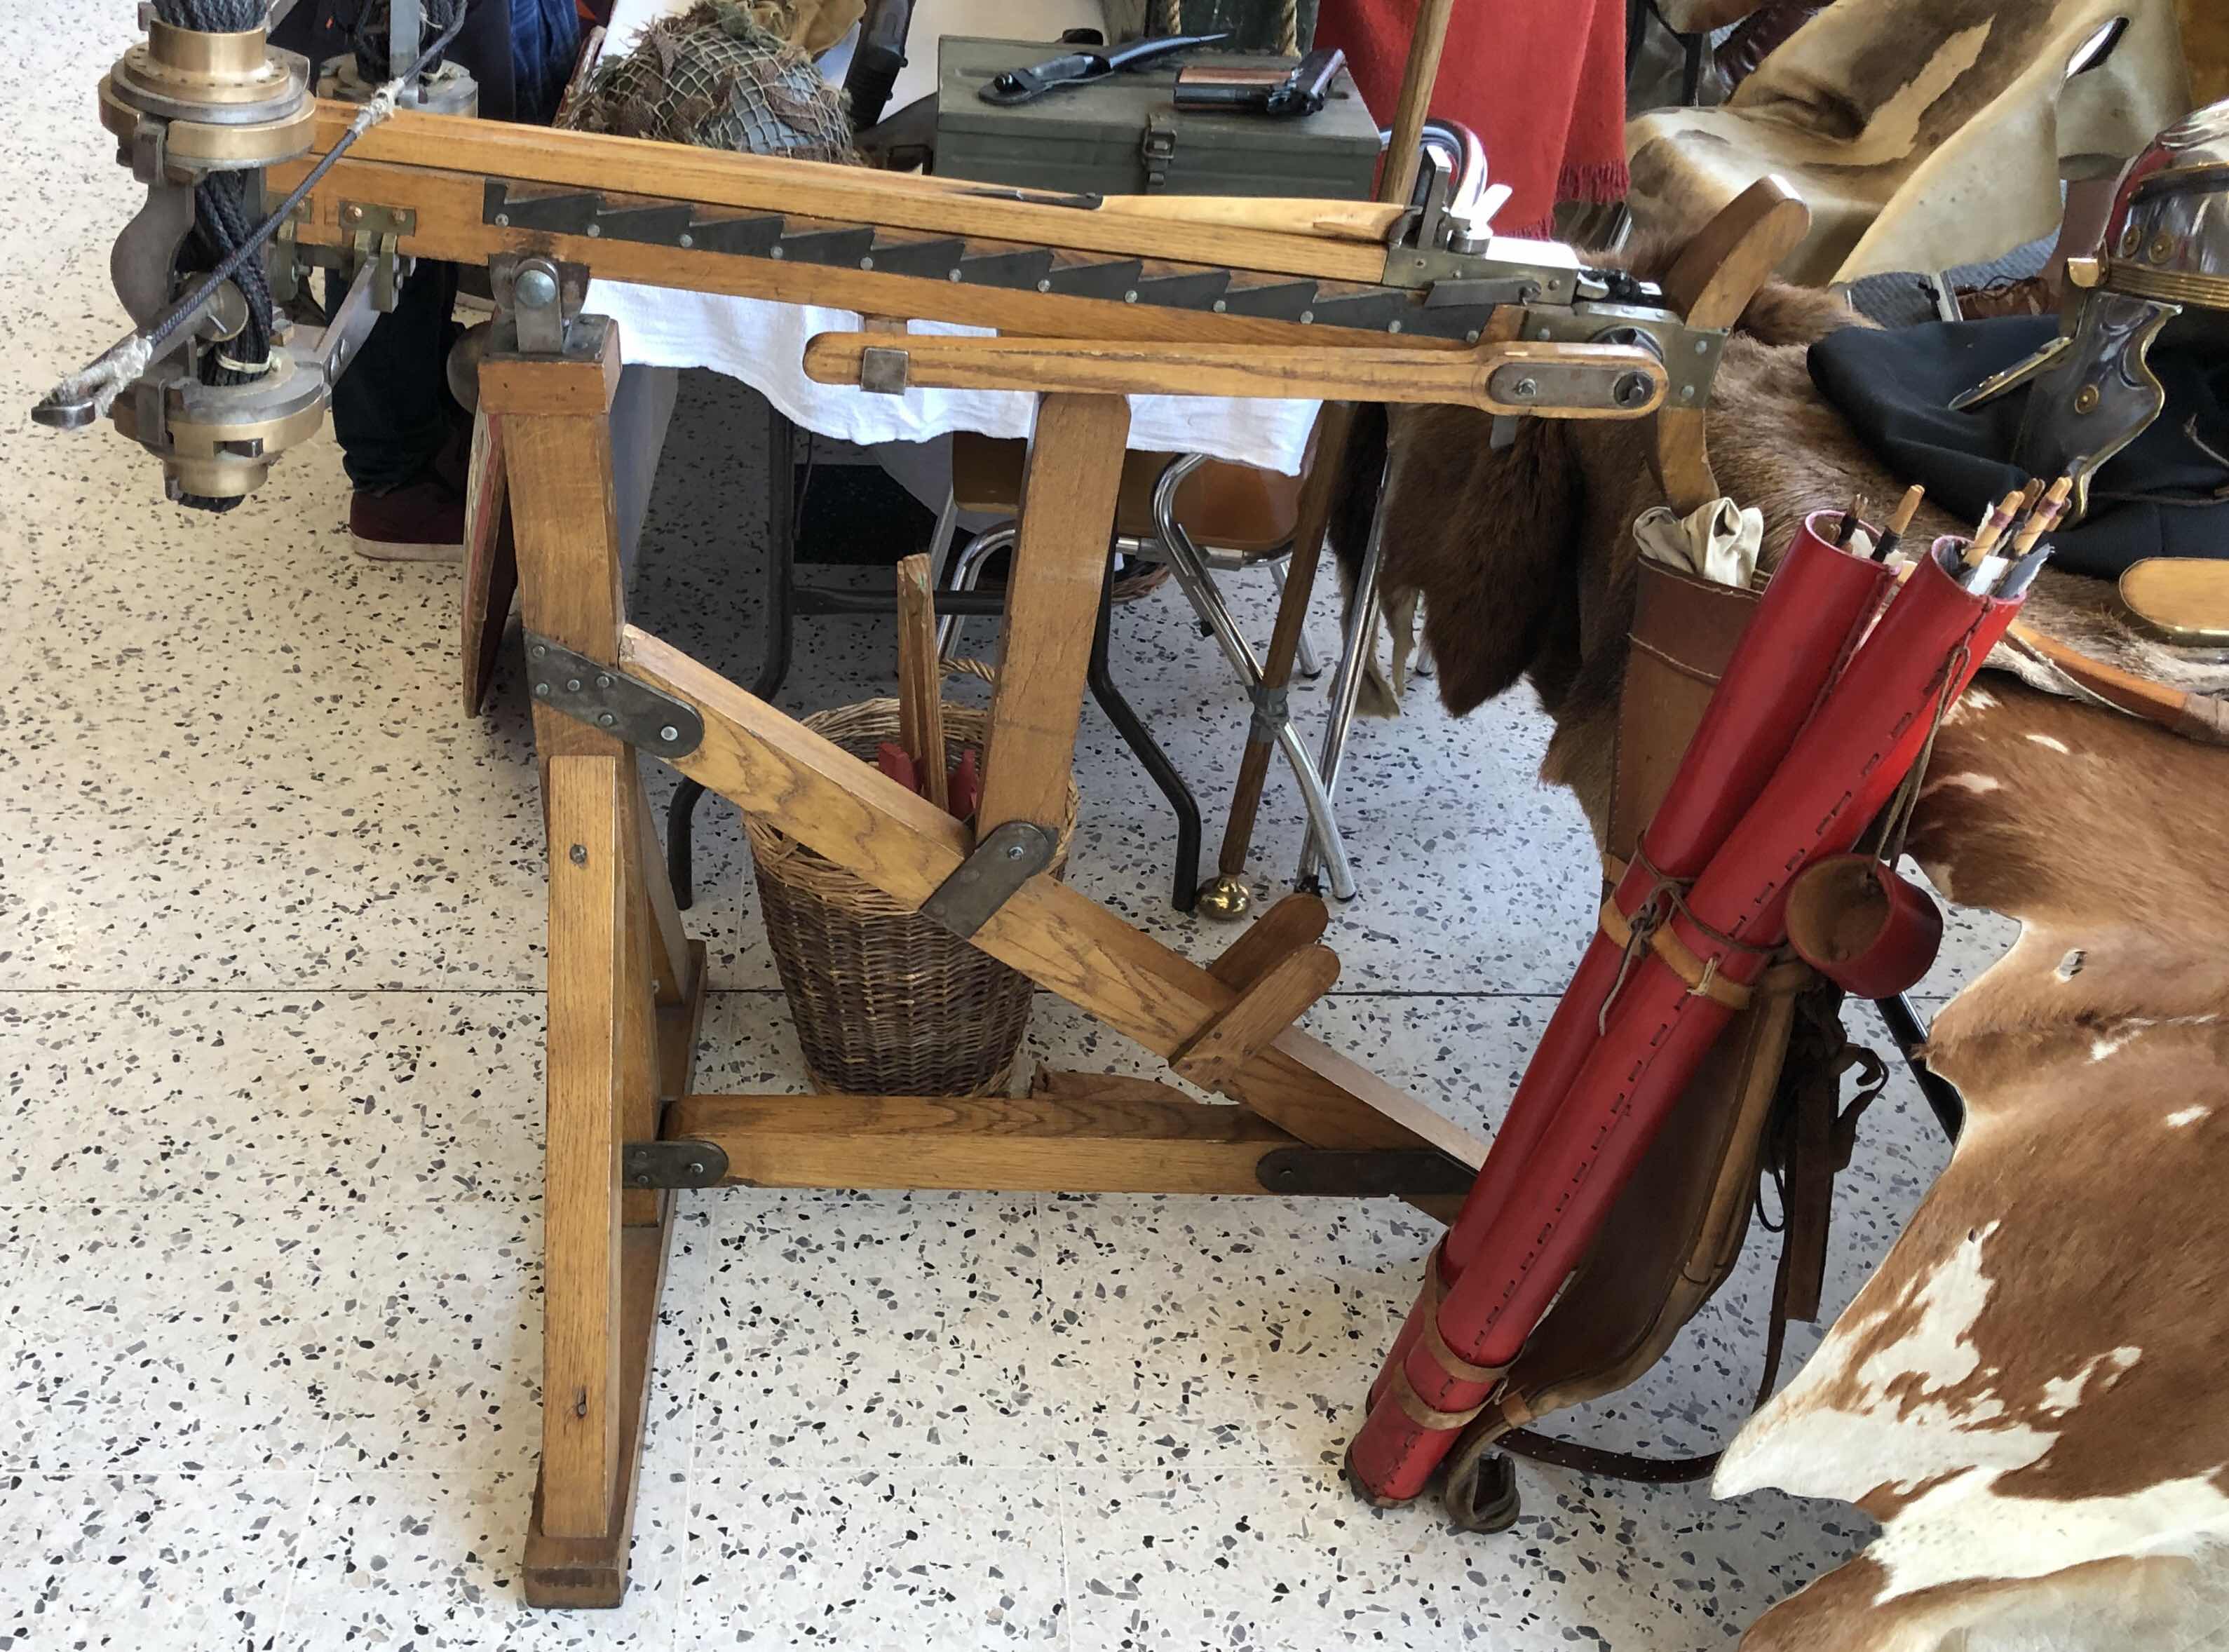
Finally, replica Roman artillery and other kit. Very impressive.


I was on the train, so resisted some bulky purchases. I did however succumb to a Viking shield maiden hearthguard for Lagatha from Annie. Some Bolton Cuthroats as well as bases etc. 

Well worth the effort.