Welcome to my blog!

News from a wargamer with a special interest in the military history of the Balkans. It mainly covers my current reading and wargaming projects. For more detail you can visit the web sites I edit - Balkan Military History and Glasgow & District Wargaming Society. Or follow me on Twitter @Balkan_Dave
or on Mastodon @balkandave@mastodon.scot, or Threads @davewatson1683

Tuesday 31 October 2023

Korean War Aces

 I picked up this 1994 Osprey 'Aircraft of the Aces' book at the IPMS show in Glasgow last Saturday. It is very timely for my Korean War project and the new Blood Red Skies set, 'Mig Alley', that I bought at Partisan. The additional rules needed are in the Wing Commander supplement.

At the start of the war, the North Koreans flew Yak-9 fighters, which were quickly replaced by the Mig-15 with Russian pilots. The US counter to this was the F-86 Sabre, although the F-84 continued to fly in Korea as well. The Mig-15 had the advantage of a higher service ceiling and a shorter distance to their bases. The USAF had the pilot skill advantage because the Russians rotated whole units rather than the American practice of rotating pilots, which allowed their experience to be passed on. 

The RAF fielded the F.8 Meteor, which proved to be no match for the Mig, although verbal Russian kill claims exceeded anything the RAF could possibly have fielded. Prop aircraft did, on occasion, manage to defeat jets, using their slower speed to advantage in dogfights. One example of this was Fleet Air Arm Sea Fury fighters shooting down a Mig-15 in August 1952.

The Sabre was improved with a hard wing that enabled it to better the Mig's service ceiling. This significantly increased kills and the number of US aces. However, post-war victory claims by UN pilots turned out to be exaggerated when new information became available from Russia after the Cold War. This wasn't dishonesty but rather a loose criterion compared with the stricter Russian system. Many Mig's that appeared to be mortally wounded actually limped home due to the light calibre of the Sabre's guns. The author calculates a final kill ratio in favour of the Sabre of 3.5:1, although closer to 1:1 if the F-80s and F-84s are brought into the equation.

As you would expect from Osprey, the book contains period photos and at least 50 colour plates. Mostly Sabre aces, but also Corsairs, Panthers, Tigercats and the RAFs Meteor and Sea Fury fighters. There is, disappointingly, only one Mig-15. I assume sources for these were more challenging to obtain. Overall, it's just the job for Mig Alley modelling and background for wargamers.

The Warlord Mig Alley box comes with two Sabres and two Mig-15s, along with decals. The 'North Korean' ones are pretty straightforward; the USAF ones are a bit trickier, but some decal fix helps. You also get all the playing aids required for the Blood Red Skies game.


Friday 27 October 2023

Ripped Apart - The Cyprus Conflict 1963-1974

 My latest book will be no surprise to anyone following my wargaming over the past year. Ripped Apart provides a richly illustrated account of the military history of Cyprus between independence from Britain and the events of 1964. Volume 1 examines the local military build-up and a series of armed clashes that shook the island in 1964 and lays much of the background to the events that would follow in the 1970s. There will be two further volumes, one dealing with the conflicts of the late 1960s and then a final volume on the Turkish intervention in 1974. All published by Helion Books.

The hard copies arrived yesterday. While digital has its place, I like to leaf through the hard copies of my work.

I focused on the Turkish armed forces and their operations, while my co-writer Dimitris Vassilopoulos focused on the Greek operations. Tom Cooper did the introduction and filled in the gaps. He also did most of the fantastic artwork, although I did persuade the aircraft buffs that some AFVs were required as well! The flyboys are all very well, but wars are won by boots on the ground 😂.


I emphasise 'focus on' because neither of us is writing from a Greek or Turkish perspective. If you want nationalist polemic, this is not the book for you. There are plenty of books that do that from either side. You can usually tell because so much text is in capital letters! 

In this volume, you get a generous introduction to Greek and Turkish history because the Cyprus conflict has to be put in the context of Greek-Turkish relations over a long time period. Then, chapters on the Hellenic and Turkish armed forces of the period. There is a chapter on the history of Cyprus followed by a description of the important British bases on the island and NATO bases in Greece and Turkey. These all had an important role in the conflict, and there are many British veterans who served on Cyprus, which continue to this day. I learned a lot from the archives about how British policy in relation to the bases developed and how they responded to Greek and Turkish interventions. Finally, we cover the operations on land, sea and air during the first crisis in 1963-64. 

I have been painting up some additional units recently to expand my armies back to 1964. I mostly use 20mm for this period, and there is a dedicated page on this blog for the wargaming aspects and some further reading.


Our midweek game scenario was the road to Kokkina. This was a vital harbour for smuggling weapons to the Turkish resistance organisation, the TMT. The Greek National Guard tried to capture the harbour and would probably have succeeded had it not been for the intervention of the Turkish Air Force. That is how the game played out, with the superior Greek numbers and artillery starting to break into the TMT defences, when eventually, the air support arrived to devastating effect.


The figures come from several ranges, including Elheim, SHQ, Liberation and EWM. Mostly from WW2 British Mediterranean ranges as that was how the student volunteers mostly looked like if a little less well equipped. I will be adding some more Liberation figures for those in civilian dress. The Marmon Herrington armoured car is from Butlers. The F-100C Super Sabre is from PM Model, an easily put-together model, which is robust enough for wargaming. It also comes with the early Turkish decals. 

Anyway, I hope that sparks some interest in what I think is a fascinating period.

Sunday 22 October 2023

Septimius Severus in Scotland

This is Simon Elliot's book on the two campaigns Emperor Severus made in Scotland. His swansong before dying at York after the second campaign. Only one chapter in the book is devoted solely to the actual campaigns; the rest of the book sets the scene. In fairness, the sources and archaeology are scarce, and the campaigns must be seen in the broader context. There was, of course, not Scotland as such, but we are describing campaigns in the area covered by modern Scotland.


The sub-title referencing 'Hammer of the Scots' is justified based on the quote from Cassius Dio's campaign narrative. 'No: we are not going to leave a single one of them alive., down to the babies in their mothers' wombs - not even they must live. The whole people must be wiped out of existence, with none to shed a tear for them, leaving no trace.' Edward I thought similarly, and he also died making the effort!


For context, Severus ruled in the latter part of the Principate Empire just before the chaos of the crisis of the Third century. He came to power in AD 193; his Scottish campaigns were AD 209 and AD 210. He died in AD 211. Elliot gives us an overview of the Severan period, one of overall success, and Severus was one of the more effective rulers of the Empire. He implemented several military reforms, beginning the process of change from the border force to the later defence-in-depth model. The three key elements are described: the legions, auxiliaries and the fleets. All would participate in the Scottish campaigns. Fortifications were also important, both permanent and marching forts. The archaeology of these forts has helped trace the route Severus took in his invasion.


In the early third century, Roman Britain had a large Roman garrison of around 55,000, plus another 7,000 men in the Classis Britannica regional fleet. This is about 12% of the total manpower for only 4% of the Empire's land mass. Perhaps because of this, the tribes south of Hadrian's Wall were pretty settled, with growing urban and agricultural development. However, the northern tribes often raided over the border. In particular, the Maeatae just north of the border and the Caledonians above the Highland line. These were confederations of tribes, fighting in a more open style than other 'barbarian' tribes the Romans faced, and they retained the use of light chariots long after others had abandoned them. 


Severus was a warrior emperor, and the limited evidence points to him wanting one last great military triumph before he died. A plea for assistance from the governor was, therefore, probably welcomed. He brought the Empire to Britain, with the Imperial court set up in York. He also had challenging sons who needed to be taken away from the fleshpots of Rome for campaign experience. He brought detachments from several legions with him to supplement the three already in Britain, as well as the Praetorian Guard and Guard cavalry (Equites singulares Augusti). A total force of around 50,000 men plus the fleet.


Severus advanced into Scotland along Dere Street in the spring of AD 209. The local tribes in the borders sued for peace, given the size of the force. The crossing point across the Forth is disputed, but Elliot goes for the route of the current Forth Railway bridge, which is some engineering achievement for what would have been a pontoon bridge. After crossing the Tay, Severus split his force into two. One column marched with him along the coast, with the fleet alongside. His son Caracalla led the other inland along the Highland line—a hammer and anvil strategy which worked well. There were no major battles, but the tribes did cause significant casualties through harassing attacks and ambushes. The experience was grim for both sides, and the weather seems to have been worse than usual. As I write this, the area is subjected to Storm Babet, flooding large parts of the route. 


The Romans did not intend to occupy the region above the Tay, although a naval base may have been maintained. The following year, the Maeatae and Caledonians rebelled, and Severus sent his son north again with the genocide order. He appears to have carried that order out, as little is heard from either tribe for years after this campaign. The Scottish weather probably did for Severus, as he died the following year at York. His sons quickly made peace and returned to Rome to scrap over the Emperorship.


I have been playing the Strength and Honour rules recently in 2mm. I don't have chariots, but my Dacians were repurposed as Caledonians for a game in tricky terrain for the Romans.


The warband on the Caledonian left managed a tricky manoeuvre to turn through the woods into the flank of Praetorian Guard. They even rolled a six in the combat, but the Praetorian discipline held firm. 


It was downhill after that for the Caledonians as the Romans ground their way northwards. 


I never thought I would take to 2mm, but I am enjoying these rules.

Thursday 19 October 2023

Putin Takes Crimea 2014

 This is Mark Galeotti's take on Putin's Crimea grab for Osprey, which almost certainly emboldened him for the later full-scale of Ukraine. This is the story of the 'little green men' as the news media described them then. In practice, the occupation was delivered by a mix of Russian special forces, Ukrainian defectors and local gangsters. 


The history of the Crimean Peninsular is fascinating in its own right. Even in Britain, many city streets have Crimean names thanks to the Crimean War. The Greeks were one of the earliest to colonise the Crimea, followed by invasions from the Scythians, Huns, Mongols and others. The Tartars were vital allies/subjects of the Ottoman Empire and spearheaded most of their assaults on Christian Europe. Russia used the Cossacks primarily as a buffer against the Tartars, although there were significant Armenian and Jewish populations even then. It was only in the Soviet period that the Tartars were ethnically cleansed from the region, and large numbers of Russians moved in. It was Khrushchev who gifted Crimea to the Ukraine in 1954.

A narrow majority of the Crimean population voted for Ukrainian independence, but disputes quickly broke out over the Black Sea Fleet. A partition deal was agreed in 1997, along with Russia leasing naval bases. However, tensions continued, leaving large numbers of Russian forces and many more retired ones in Crimea.

Galeotti describes the military doctrine behind the hybrid warfare that was the basis of Moscow's strategy in Crimea. There has been a parade of new terms – asymmetric war, sub-threshold operations, non-linear warfare – but the favoured term appears to be ‘grey zone warfare’, operations somewhere in that hazy conceptual no-man’s land between peace and full warfare. There was nothing 'grey' about the 20,000 Russian troops already based in Crimea. They faced a slightly larger Ukrainian force, although few were in a high state of readiness. Even those who were well-trained suffered from years of underfunding.

The new Ukrainian government made a political blunder by revoking the law that made Russian a second official language in regions such as Crimea. Pro-Russian elements used this as proof of enforced ‘Ukrainianization’. Provocateurs turned peaceful demonstrations into violent ones, and units of cossacks and the Night Wolves motorcycle club were used to fan the flames. Local gangsters were financed to set up local defence militias. These all provided deniable assets as cover for the Russian takeover, led by troops without unit insignia. Conventional units sealed off the peninsular as more troops were flown in or landed on the coast. The Ukrainian response was patchy and poorly coordinated, aided by naval commanders who defected to the Russians while the remaining Ukrainian navy ships were blockaded. There were brawls but little actual combat.

Crimea was a successful operation. However, it also proved disastrous for Moscow as it drew them into the Dombass insurgency and then used it as a blueprint for the 2022 invasion of Ukraine. Many in the military warned that the circumstances in Crimea were exceptional, but the political figures trusted by Putin became overconfident. Today, the Black Sea Fleet has largely abandoned Crimea and Ukrainian forces regularly attack Russian bases. Fortress Crimea has evaporated.

Mark Galeotti has written many books on the Russian military, and this book demonstrates yet again his detailed knowledge of the subject. The actions are clearly described with ORBATS, maps and illustrations. There is the basis of some 'what-if' actions for wargames, but I don't expect to see many 'little green men' on the show circuit anytime soon. 

Some of my 20mm modern Russian forces.


Tuesday 17 October 2023

Napoleonic Austrians

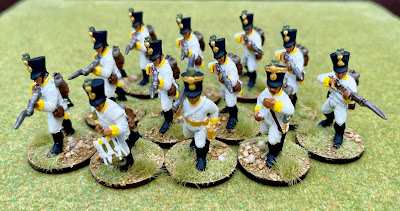
I have completed my Austrian Napoleonic project in 28mm, the final piece in the jigsaw of units to refight the battles I describe in my book, The Frontier Sea

The Austrians were a bit of a nuisance as they had several uniform changes during the Napoleonic wars. I have the earlier uniforms in 15mm, so for this project, I went for the post-1809 uniforms. Essentially a shako instead of the distinctive helmet.

This is a force for the small scale actions I describe in the book, for which my preferred set of rules is Rebels and Patriots. So the starting point is two units of line infantry.


The most common units on the border with the Ottomans were the Grenzer.

The Austrian Jagers with my favourite corsehut hat.


Of course every army needs a general, even if a General Staff officer is a bit much for this modest force! And a six-pounder gun, heavy enough for some punch but light enough to get over the very poor roads.


And finally, although not Austrian, the Ragusa scenarios in the book need Ragusan militia.


The militia are adapted from the new Perry Ottoman irregulars. The line infantry are Front Rank, recycled by Colonel Bill. I think the rest are Perry Miniatures. There wasn't much cavalry in Dalmatia as it is not really cavalry country. However, I might add a small Hussar units at a later date.

For uniform details, I would recommend Philip Haythornthwaite's three volume series of Osprey MAA. Supplemented by David Hollins' Osprey books on the infantry and artillery.


Sunday 15 October 2023

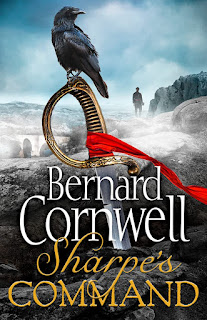
Sharpe's Command

 A new Sharpe novel is rare and a sign that my productivity this week would take a hit! This novel is based on the less well-known Almaraz action of May 1812 (a bridge over the Tagus in western Spain), led by 'Daddy' Hill. A rare example of a detached command under Wellington, who trusted Hill more than his other generals. Sharpe is a Major at this stage of the Peninsular War, and his small band of riflemen are tasked with scouting the French positions.

Due to captured dispatches, Wellington knew how vital the bridges and forts were to Marmont. It was a key supply base and how he could join with Soult. Wellington dispatched Hill with 7,000 men (two British and one Portuguese brigade with cavalry support) to destroy the forts and bridges. 

Sharpe is supposed to liaise with a guerilla band, which doesn't quite work out, and he gets more involved with the French than any scout is supposed to. Particularly as the Hill's advance was supposed to be a secret. However, I won't spoil the story.

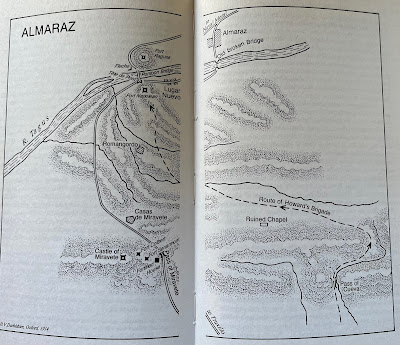
The map below is taken from Oman (A History of the Peninsular War, Volume V) and shows the castle at Miravete, which blocked the direct route to the river.


Hill masked Miravete and sent Howard's Brigade (50th and 71st Foot (Highlanders)) to bypass this strong position, although this route was impassable for artillery. The French garrison amounted to around 1000 men, including the 4th Etranger (Prussians), 39th Line and two companies of 6th Light, commanded by Colonel Aubert. Without artillery, the British were forced to attempt a capture of Fort Napoleon by escalade, always a challenging proposition, and they faced some additional challenges, which I won't spoil the story by explaining. Sharpe and a Highland regiment is an unbeatable combination!

Cornwell keeps pretty close to the historical outline, with Sharpe and a fictitious band of guerillas inserted, of course. This is all classic Sharpe, and fans will love it. 

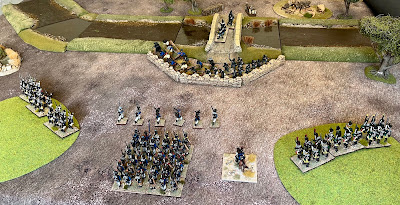
After reading this, there was no competition for the Sunday game. We used Rebels and Patriots to refight one scene from the action. Sharpe is attempting to hold the old bridge near Almaraz with some guerillas led by his wife. He is attacked by a much stronger force. You won't find this action in Oman or elsewhere, but it is a classic Sharpe fight. 

Rifles on the right of this photo, partisans on the left, Harper with a small unit in reserve. Four units of French line and a skirmisher unit attacking.

The French break-in and Sharpe retreats. This is unheard of in a Sharpe novel!

Harper to the rescue. One blast of the volley gun and the French retreat. It took another two rounds of fire before he drove off the other French unit.


If you want to read more about the historical action, Robert Griffith's book 'At the Point of the Bayonet' (Helion, 2021) includes the battle in his study of two of Hill's battles. 
Friday 13 October 2023

The Dutch-Indonesian War 1945-49

 This is a new Osprey Men-at-Arms book by Marc Lohnstein looking at one of the less well-known wars of liberation after WW2.

Dutch rule ended in the Netherlands Indies with the Japanese invasion in 1942. Indonesians participated in the Japanese administration and declared independence after the Japanese capitulation in 1945. A violent war ensued as Dutch forces attempted to reassert control over four years. Like other colonial powers, the Dutch discovered that there was no going back to colonial rule, and they were forced to recognise an independent Indonesia in 1949.

The author outlines the political background and the substantial Japanese occupying forces in 1945. A staggering 290,700 Japanese troops and civilians were based mainly in Java and Sumatra. The British Admiral, Lord Louis Mountbatten, was responsible for accepting the Japanese surrender and organising the return of the Dutch colonial administration. He used an Indian and an Australian corps for the task. They quickly realised that the Declaration of Independence had changed the reality on the ground.

The new Dutch governor, Dr Hubertus van Mook, sought to reach an agreement to reorganise Indonesia as a federation of semi-autonomous states, with a representative of the Dutch Crown as head of government. However, while this had some support from moderate politicians, the war had ended the credibility of the Dutch administration. 

The Indonesian forces reflected the different ethnic groups in the countries and were mainly armed with captured Japanese weapons. Cut off from supplies from abroad, they later relied on capturing Dutch weapons. They had some armour and a handful of aircraft and ships.

Dutch troops took over from the British in 1946. They were initially organised into seven brigades, each around 3,500 strong. By the end of 1946, they had around 146,000 men in Indonesia, made up of local recruits and Dutch conscripts, armed with surplus Allied equipment. They had limited air support, including Kittyhawks, Mustangs and B-25 bombers.  

The Dutch strategy envisaged using fast mobile columns to penetrate liberated territories. This was based on the view that support for the new Republic would be limited to the young and the intelligentsia. A similar mistake to the French and other colonial powers. Offensives were generally successful, but pacification was much more difficult. The war became a significant drain on the Dutch economy, just as the Cold War began in Europe. The UN called for a negotiated solution, and the US threatened the withdrawal of Marshall Plan aid. Their opponent, Col Nasution, would concede that ‘The reason that the Dutch were finally willing to withdraw their forces... was not because they were defeated by our army, but because... there was no longer any hope for them to destroy the Republic.’
As usual with this series, there are decent maps, ORBATS and colour plates of the main troop types. For wargamers, the Dutch had a mixture of Allied uniforms, and early Vietcong models would work for the Indonesian irregulars, with more traditional colonial uniforms for the Republican Army. I do like an obscure conflict, but this, while interesting, is a step too far for me. However, Vietnam gamers may find something of interest and, in the smaller scales, could get away with some common troop types.

Thursday 12 October 2023

Darkest Hour

 This is another in James Holland's WW2 fiction series. While I haven't been reading them in chronological order, this is the last one for me and covers the France 1940 campaign.

Our hero, Jack Tanner and his squad are back from Norway and assigned to guard RAF Manston and the surrounding coast. This series is pretty much Bernard Cornwell's Sharpe set in WW2. Here, we have an incompetent company commander, a decent Lieutenant, and a crooked CSM. The class system runs through the story, only marginally improved from the Napoleonic Wars.

Tanner starts by upsetting the troops involved in the theft of military supplies, a theme throughout the story. Then, the Germans invade France, and the unit is sent to join another battalion in Belgium. This series focuses on small unit actions, which are very well described. However, the bigger picture is addressed, with occasional chapters covering Lord Gort's HQ and his challenges with the French. Holland's take is more sympathetic than the history books to Gort - justifiably, in my view.

We also glimpse the other side of the hill in the form of an SS major commanding a reconnaissance company, who regularly bumps into Tanner and his squad. Needless to say, Tanner, very Sharpe-like, tends to do his own thing. The unit takes part in the retreat from Belgium and then the Arras counterattack, spearheaded by one of my favourite WW2 tanks, the Matilda.

I won't spoil the story that ends up in Dunkirk, with Tanner's unit in the rearguard. Spookily, I was reading this chapter the night before Partisan at the weekend, and there was a game based on this action at the show. And very good it was too.

I really enjoyed this series and hope James Holland will finish Jack Tanner's war. For now, the latest Sharpe novel has just arrived. Getting any work done this week will be a challenge!

Sunday 8 October 2023

The other Partisan 2023

 From not having attended any of the Newark shows, I have now been to all of them this year. I hadn't intended to go again this year, but my brother organised a few days of golf with pals near Leicester, so it would have been rude not to go on the way.

Partisan has a reputation for high-quality games, and it didn't disappoint. All the usual traders were also there, and I picked up Mig Alley for Blood Red Skies, some cowboys, various WW2 types for the Cyprus project, paints and other stuff. 

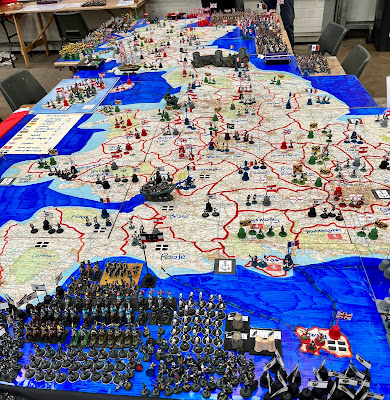
There were a couple of games that even impressed my non-wargaming daughter. One was a giant game of Risk. The board game will never feel the same again.

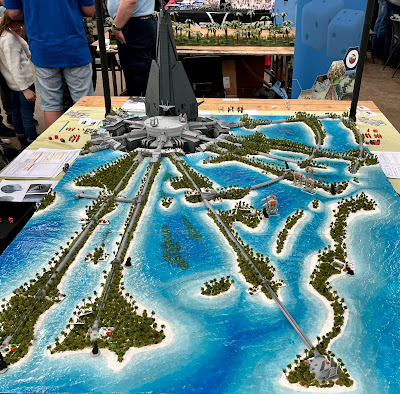
The other was a Star Wars game. She tells me it is from Rogue One, which means nothing to me.

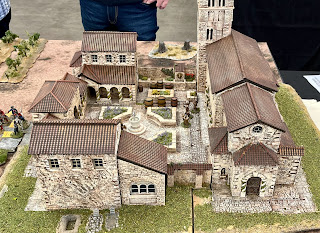
If there was a theme this year, it was castles. In all shapes and sizes, the 3D printers have been very busy.


Graus 1063


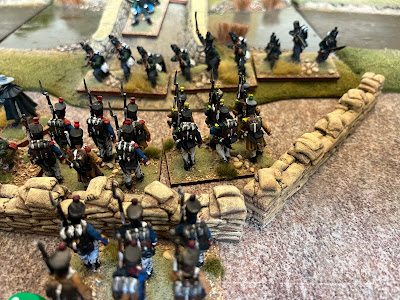
Sharp Practice 1860s

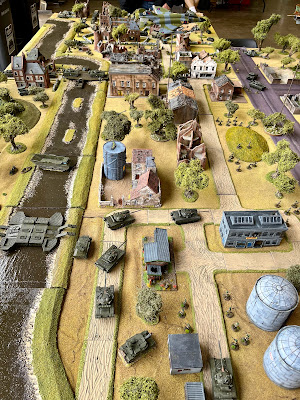
Others that caught my eye was a giant Cold War game in Germany. The planes were particularly good.

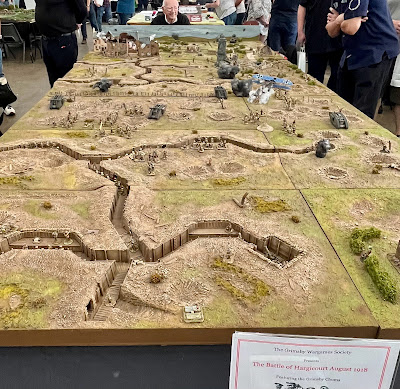
WW1 trench warfare is challenging to do well, but this was impressive.


Not much Balkan interest, I am sorry to say. However, this micro 28mm game of the Hungarian Revolution was interesting.


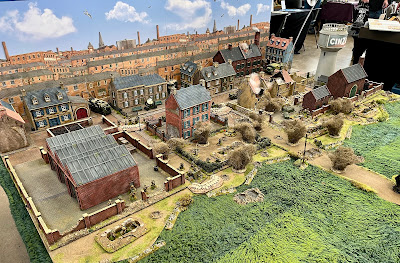
And somewhat spookily. My current bedtime reading is James Holland's WW2 fiction series. His hero, Jack Tanner, was at the defence of Calais in 1940 in last night's chapter, and there was an impressive game doing just that battle.


So, it was well worth the detour and thanks to the organisers for another great show. I had lots of interesting chats, and spending a day at a show doing whatever I fancy is nice.

I should find a golf range tomorrow morning to tune my rusty game, but I am staying just down the road from Bosworth. I haven't been for probably 40 years, and they have moved the battlefield in the interim!


Saturday 7 October 2023

South Yorkshire Aircraft Museum

 I am en route to the Other Partisan wargames show on Sunday. Looking for a suitable stop-off point, I realised I had never been to the South Yorkshire Aircraft Museum at Doncaster. This is another of those wonderful museums run by a dedicated band of enthusiasts. 

They don't have a lot of space, so the typical outside plane exhibits are limited. Still, a decent collection, including:

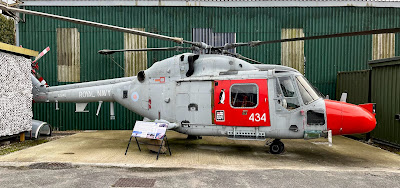
Lynx helicopter.

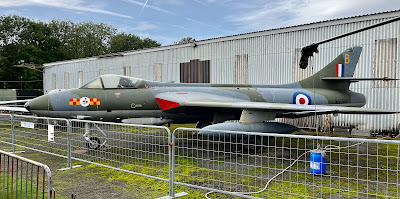
Hawker Hunter. This was an ex-Danish Air Force one.

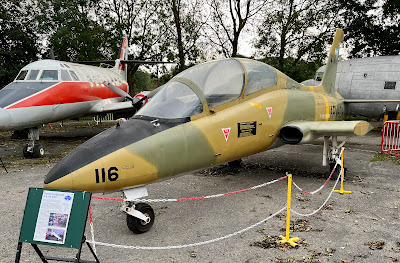
Aermacchi MB 339. Captured at Port Stanley airfield.

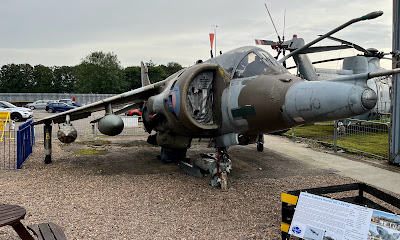
RAF Harrier that served in the Falklands campaign

The Falklands War is ever present in this museum with a dedicated area and plenty of exhibits as well as aircraft.

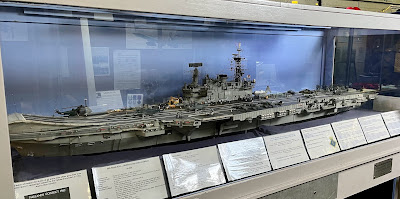
Including this exceptional 1/96th scale model of HMS Hermes.

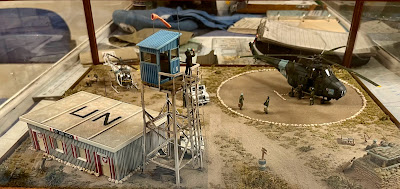
There is a helicopter preservation group based here, so there are plenty of them and fixed exhibits as well. Including an interesting Cyprus display, even if an error or two has crept in.

Cyprus UN helicopter base diorama


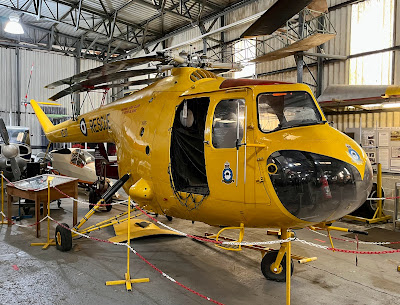
Bristol Sycamore. The first RAF helicopter.

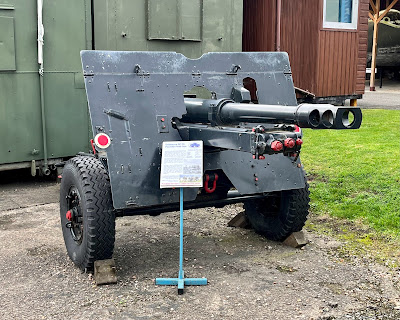
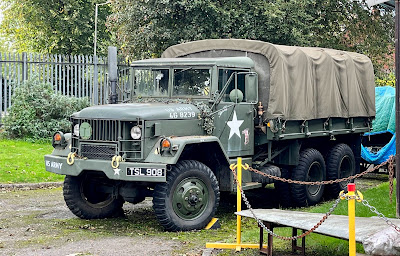
There are a few ground weapon displays as well.


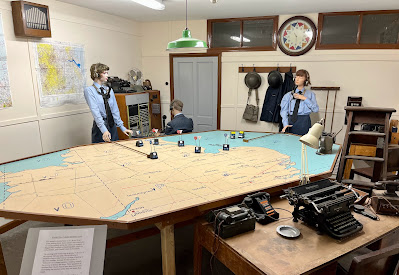
And a base operations room.


Finally, just about every Canberra variant you can think of.


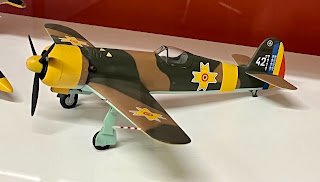
Even a bit of the Balkans with this Romanian WW2 IAR fighter!


I spent a couple of hours there. Plenty more to see, and if you are in the area, please support them.