Welcome to my blog!

News from a wargamer with a special interest in the military history of the Balkans. It mainly covers my current reading and wargaming projects. For more detail you can visit the web sites I edit - Balkan Military History and Glasgow & District Wargaming Society. Or follow me on Twitter @Balkan_Dave
or on Mastodon @balkandave@mastodon.scot, or Threads @davewatson1683

Friday, 30 May 2025

Gallipoli Sniper

 As if I haven't got enough books about Gallipoli, Dave Lanchester's stall at Carronade enticed me to buy John Hamilton's book about Billy Sing, the Anzac Angel of Death.


Billy Sing served in the Australian 5th Light Horse, a singularly inappropriate unit to send to Gallipoli! Needless to say, they left their horses back in Egypt. The primary sources about Billy Sing are limited, so this book does give a lot of context about the Gallipoli campaign, and sniping in particular. Over 33,500 British Empire troops died on this strip of land in modern Turkey next to the Dardanelles, along with 15,000 French and 87,000 Ottoman troops. More staggering is that the 324,000 Australians who served in WW1 were all volunteers, and 61,829 died, and 157,156 were wounded. All from a total population of less than five million. 

Billy Sing was not a typical Australian volunteer. He was half Chinese at a time when Chinese immigrants faced discriminatory legislation and were deemed unfit for anything other than non-combatant roles. The White Australia Policy was not quite Apartheid, but wasn't far off. Billy was a stockman who could ride and was a skilled marksman, having competed in numerous competitions. It appears that a sympathetic doctor, who had watched him play cricket, turned a blind eye to his ancestry and passed him to join the light horse. Others were not so fortunate and received a certificate with the designation, 'not substantially of European origin'.

When the 5th Light Horse arrived at Gallipoli, Ottoman snipers were picking off the inexperienced troops, including many senior officers. The ranges were close, a few hundred yards, well within the range of standard rifles. The descriptions of the fighting are pretty brutal, along with the appalling conditions the soldiers lived in. The author is a former journalist, and he describes just one Ottoman attack in which 10,000 men were casualties, with the line, 'the sweet nauseating smell of decaying flesh spread like a cloying fog over Gallipoli.'

Billy Sing was one of a team of initially 70 marksmen selected to counter the Ottoman snipers, 'hunting the hunters'. They used the standard Lee-Enfield rifle, but adapted it with homemade periscopes, which were later adopted by the Anzac workshops. The Ottomans sent trench raids to capture some, but the copies made in the Constantinople workshops frequently broke down. They also adapted the sights, strictly against regulations, but most officers recognised it worked. Snipers operated in teams of two with a spotter and managed to gain an ascendancy in this grim struggle. The patience Billy developed while hunting in the bush as a child came in handy in this grim task. They often operated behind camouflaged steel screens, while the equivalent Ottoman ones were made of brick.

The Ottoman equivalent of Billy was nicknamed Abdul the Terrible; aside from an interwar series of sensationalist books by Jack Idress, the evidence appears somewhat limited. Billy was Mentioned in Despatches (later awarded the DCM), having accounted for 201 casualties, although the final tally was probably closer to 300. He survived Gallipoli and a later spell on the Western Front, not without wounds. He married in Edinburgh and later returned (without his wife) to relative obscurity in Australia. He died alone in 1943. 

There is a lot of padding in this book, although it is still a good read, about a remarkable soldier. Happily, now properly remembered in the Australian War Museum.

I have walked over the Anzac and other positions on Gallipoli, a pilgrimage still made by many Australians to this day. You are left with the question: why didn't they just embark and land somewhere else?


Thursday, 22 May 2025

Mail Royal

The latest in my Nigel Tranter rereading project takes in the next generation of the Gray family during the reign of James VI & I, after the period when he gained the English throne.


Patrick Master of Gray's son, Andrew, is the Seventh Lord Gray. He has a land steward, David Grey, who is an illegitimate nephew. Tranter uses him as the hook for the story. 

Lord Gray is losing his lucrative appointment as Sheriff of Angus and wants to find the infamous casket letters (last seen in his father's possession) of Mary Queen of Scots to give him some leverage over the king. He sends David to Fast Castle to find them. David strikes up a romance with the daughter of the Home laird, who now owns the castle, and finds the casket. However, it doesn't include the most important letter, which is supposed to include a confession from Mary that the king's real father was her Italian secretary, David Rizzio.

You can visit Fast Castle today, although little remains of the walls that housed the infamous Logan of Restalrig. It is on a remarkable outcrop on the East Coast. I have only been once, and it's pretty challenging to get to, even today. Fast Castle was originally known as Fause (lit. False) Castle because of the lights hung from it, which misled shipping for wreckers to plunder them.


The king doesn't know that the key letter is missing, and David is sent to London with the delicate task of blackmailing him, without seeming to do so. Despite this, the king takes a shine to David, who sorts out a trade issue and is sent to France as part of the embassy to secure the marriage of the French Princess Henrietta Maria to Prince Charles. We get a lengthy insight into the machinations of the court of King Louis 13th. David gets into a few more of the king's projects, including a return to James' interest in witchcraft.

This is a well-told tale of the court of James I and the international situation at the time. There is not a lot of action, but then James was not a big fan of warfare.


Monday, 19 May 2025

The Antonine Wall

 My library pick this month was David Breeze's study of the Antonine Wall.


The Antonine Wall was built in what is now Scotland. It stretches across central Scotland from the Firth of Forth (near Edinburgh) in the east to the Firth of Clyde (near Glasgow) in the west, about 39 miles (63 km) long. It was constructed under the orders of Roman Emperor Antoninus Pius around AD 142, marking the northernmost boundary of the Roman Empire in Britain at its height. We don't know a lot about Antoninus due to limited contemporary sources. 

Like the better-known Hadrian's Wall to the south, it was built as a defensive fortification to mark the edge of Roman-controlled territory, control movement and trade, and repel attacks from northern tribes, especially the Caledonians. Unlike the stone-built Hadrian’s Wall to the south, the Antonine Wall was made primarily of turf laid on a stone base, with a deep ditch in front. Forts and watchtowers were spaced along its length. The wall was only occupied by the Romans for about 20 years. We assume that due to ongoing resistance and logistical challenges, the Romans retreated to Hadrian’s Wall around AD 162, although the full reasons are not documented.

Numerous forts, distance slabs (inscribed stone markers), and artefacts have been found along the wall since excavations started in 1895. However, there is nothing like the structure of Hadrian's Wall to see. There is a long-distance walk, and I have done bits of it, but again, it is not as well organised. 

There were three legions in Britain during this period: the 2nd, 20th, and 6th. These legions would have done the heavy work on the wall along with auxiliary units (including Gauls), which would have been the main garrison troops. 6-7000 troops would garrison the wall at any one time. The line was picked because it is the shortest distance across Scotland. Breeze argues that this doesn't necessarily mean it was the limit of Roman control; it was just a convenient line. There were undoubtedly outpost forts further north.

You must use a bit of imagination when visiting the forts at Bonnybridge, Twechar, Castlecary, Westerwood and Croy. Easrtworks are all that remain, although the remains of bath houses can be seen at Bearsden and Bar Hill. The book lists all the sites and is small enough to carry on the walk. 

One of my 28mm Imperial Roman legionary units.

Saturday, 17 May 2025

The Serbian Army 1876-1878

This is a new edition of Dusan Babac's book on the Serbian Army during the wars for independence. It's unclear why a second edition was necessary, as the preface and content look the same, except for a lovely new cover and better quality paper. So, if you have the 2015 edition, you won't need this one.


Serbia became an autonomous part of the Ottoman Empire after two revolts in 1815. It was de facto independent from the 1830s, and the last Ottoman troops left in the 1860s. After which, Serbia adopted a new constitution. Formal international recognition came with the Congress of Berlin in 1878.  This means the book's premise is a little misleading, as these wars were really about taking advantage of the uprising in Bosnia to expand the Serbian state, with the support of Montenegro. The nationalist tone of the first chapter might be a bit grating to readers outside Serbia, but this is the Balkans!

Putting the nationalist politics aside, this is a book about the Serbian army during these wars. The first war went badly. Serbia was poorly prepared militarily, and the Ottomans inflicted several defeats on the Serbs, most notably at Aleksinac. They were saved by Russian and Great Power intervention. The second war was part of the wider Russo-Turkish War of 1877, in which the Russians and Romanians played the central role.

The book describes the main battles of both wars, but its real value comes from the chapters on weaponry, uniforms, and standards. There is a profusion of period photos and colour plates. In the style of the time, they are mostly posed portraits, but the magazine artwork helps bring the action to life. I particularly enjoyed rereading the chapter on volunteers in the first war, as I gave a talk on this in Belgrade many years ago. Over 500 Russian officers volunteered to fight, and they were joined by Bulgarians, Hungarians and others from further afield. Brigadier-General MacIver was the most famous British volunteer, a remarkable soldier of fortune who fought in many conflicts. Babec says under 18 flags, although his 1888 biographer, W. D. L'Estrange, says 14. Dorothy Anderson wrote an excellent book, The Balkan Volunteers, in 1968. Surprisingly, it isn't in the bibliography, as copies can be found at attractive prices. I also have Philip Salusbury's memoir, which is less valuable. He was a yeomanry officer who made his way to Serbia at the outbreak of war and was given a small cavalry unit to train. However, his description of the actions he was present at spent more time describing the members of the Royal family he met and the food he ate than the action!

This book has everything a wargamer needs. Outpost Games was considering a small range of 28 mm figures for the Serbian army. However, the owner has sadly passed away, and I'm not sure how far he got. Their Bulgarian legion figures are superb. Conversions from the Balkan Wars ranges would not be too challenging, and French or even ACW ranges have figures that would work, particularly in smaller scales. The Ottomans can come straight from the 1877 ranges.


Outpost Bulgarian Legion


Wednesday, 14 May 2025

Arran - Scotland in Miniature

 I live a stone's throw away from the ferry terminal for Arran, but haven't been over for years. It is here temporarily (probably) while the Scottish Government and Peel Ports sort out an upgrade of the port facilities at Ardrossan. Yes, they built a new ferry that was too big for the ferry terminal, and it still hasn't been resolved!

However, the new ferry is an excellent ship, and Arran is a glorious place to visit on a sunny day. It is called 'Scotland in miniature' because it has all the elements that make up Scotland on one island. This includes several historical sites that reflect the island's rich history.

The ferry docks at the main town, Brodick. Our first stop was the Arran Heritage Museum, which I hadn't visited before. This small museum reflects many aspects of Arran life, from the geology and archaeology to the present day. The cafe also has delicious cake! Of particular interest is a display about wartime Arran. I have previously reviewed Colin Turbett's excellent book about wartime Arran and its role in defending the Clyde estuary. 

HMS Fortitude at Adrossan was the main naval base.


Memorial to the 21 USAF airmen who died in a Liberator crash on the island. The map above plots all the crashes.

Commandos trained on the island.

Next stop was Brodick Castle, probably the main attraction on the island. The medieval castle has been largely replaced by a Victorian house in the Scottish baronial style. Napoleon III lived here during his exile and there is a fine collection of Napoleonic medals.


The other castle is at Lochranza on the northern tip of the island. This was a MacSween castle built in the 1200s, and later developed as a royal castle. It's in a stunning location in a bay that would have housed the clan's fighting ships. There was a third castle in the south at Kildonan, but there is little left to see.


We drove down the west side of the island, which has little to see other than a fine view of Kintyre. The last historical stop (there were pubs, cafes and an art gallery!) was Kingscross point, the site of a Viking fort that would have defended their base in Lamlash Bay. King Haakon of Norway's fleet was based here before the Battle of Largs in 1265. The Bay was also used by the Royal Navy in both world wars. There are no remains but the view is excellent.

If you are planning a visit, I would recommend Horace Fairhurst's Exploring Arran's Past, for the history of the island. We are indeed blessed to have such treasures on our doorstep.


Sunday, 11 May 2025

Romania's Russia Scare

 Before my recent trip to Romania, I had brushed up on my Romanian history in anticipation of the museums and battlefields I planned to visit. One aspect of Romania's history I wasn't familiar with was its late 19th-century Russia scare. If this sounds familiar to British readers, it should. We had a similar scare with Russia and the French during the same period, and started building fortifications in response. The Palmerston Forts on the south coast are the best example, including the artillery museum at Fort Nelson.

Romania had been part of the Triple Alliance since 1883, which put it at risk of Russian invasion. The border area, with modern-day Ukraine, was probably indefensible, so in 1887, they started to build a line of forts along the Siret River, known as the FocÅŸani-Namoloasa-Galati (FNG) fortified region. Essentially, a shorter defence line between the Carpathian Mountains and the Danube River. They also built a series of forts around Bucharest to defend the capital. There isn't a great deal of the line to see today, other than the very fine WW1 memorial at MărășeÈ™ti. 


However, the National Military Museum has a series of Osprey-style booklets, including one on the FNG and another on the Bucharest forts. Only three of the series were on sale, at the bargain price of £10 for all three. I would have bought the whole series at that price.

While the main text is in Romanian, there is a summary in English, and the many illustrations, as well as the colour plates, have English captions. 

The fortifications cost the newly independent state a fortune and were controversial at the time. The designer was German Major Schumann, and the FNG included one fort and 15 groups of armoured batteries. There were more batteries at Galati defending the Danube port. An unusual feature was portable 37mm quick-firing guns, supplemented by 53mm guns and 120mm howitzers. 

53mm Grusson Cannon

There were 18 forts built around Bucharest, with another 18 batteries. This resulted in an 8km gap between positions. The forts had 210mm and 150mm guns in cupolas and disappearing turrets. There were smaller guns and machine guns as well. A railway was built to supply the ring of forts, with a garrison of 33,000 troops. Some of the forts exist today and are still used by the military.

Ironically, the FNG defences had to be reversed during WW1, when Romania left the Triple Alliance and faced an invasion from Austro-Hungary to the south. 


Friday, 9 May 2025

Mussolini's Defeat at Hill 731

 I am on a Greek-Italian War roll. After finishing the new study of the Italian Army in the Balkans, I have been reading John Carr's study of an epic Greek defence of Hill 731 during the Italian Spring offensive of March 1941.


In the Spring of 1941, the Italian leadership needed a victory before the impending German intervention. The plan, devised by General Ugo Cavallero, envisioned a large-scale attack on a narrow, 32 km front in the centre of the Greek positions. The Italian attack aimed to break through the Greek lines, recapture Klisura, and advance towards Leskovik and Ioannina. Key to the Italian effort was a hill known as 731, which stood at the centre of the planned attack. Hill 731 is situated approximately 20 kilometres north of Këlcyrë (Klisura), near the base of Mount Trebeshinë in Southern Albania.

Hill 731 was defended by the 2nd Battalion of the Greek 5th Infantry Regiment, which was ordered to hold its positions at all costs. The Italian attack, observed by Mussolini in person, was launched on 9 March with a heavy artillery barrage and air bombardment, with over 100,000 shells dropped on a 6 km front. Despite repeated assaults by three different Italian divisions, the defenders of Hill 731 held the position. 

Although there is enough context, this is not a broad overview of the offensive. Instead, the book focuses on the small unit fighting on Hill 731. The Italian tactics were not subtle. It was early WW1-style artillery bombardment followed by relentless frontal assaults. If the 'lions led by donkeys' line works anywhere, it is here. The Italians were shocked at how ineffective their artillery was and how good the Greek mountain artillery was in response. The Italians fired 100,000 shells in the opening barrage compared to fewer than 6,000 Greek shells, yet they were more effective. Some Italian attacks were broken up before they got anywhere near the Greek trenches. 

For the Greeks, their Hotchkiss machine guns were important, but so were counterattacks with bayonets and grenades. The defence did not simply sit in their trenches blasting away. The Greek bayonet was twice the length of the standard Italian issue, and they used the Polish WZ.24 hand grenade, which carried a bigger charge.

Italian radio security was appalling, with the Greeks intercepting messages and responding accordingly. Supply was a problem for both sides with the snow and ice, coupled with mud up to the waist on occasions. The Italians tried night attacks, but didn't change their frontal attack tactics. The result was the same as daytime. Casualties are unclear, but the Italians suffered around 5,000, including over 1,000 dead. Greek losses were around 500. Four Italian divisions were rendered useless. 

This excellent study of close combat in WW2 covers an interesting campaign. Sadly for the Greeks, Hitler's invasion outflanked the Albanian positions, and they had to give up Hill 731. 

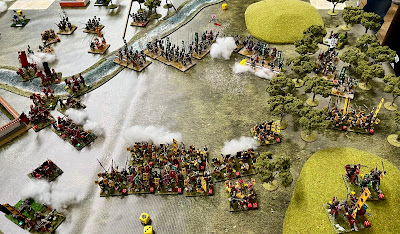
I have the armies for this campaign in 28mm and 15mm. The Greeks are below. This battle is certainly playable on the tabletop without too many challenges.


Sunday, 4 May 2025

Carronade 2025

 The first big Scottish wargames show of the year is Carronade. It is held in a high school in Falkirk, which is an excellent venue, although parking and public transport aren't great. This year, there was a noticeably better turnout - more games, traders and visitors. As usual, it tailed off in the afternoon, but until then, we only played a couple of rounds of our game. It was great to see wargame friends from across Scotland and talk about the game and wargaming generally.

There were no gaps in the trader areas, and they did steady business. I picked up some paints, basing materials and a couple of books. Thankfully, no figures tempted me as my lead mountain is high enough.

We were running a game based on the Battle of Khotin in 1769, the first significant battle of the Russo-Ottoman War 1768-74. It was obscure enough to get visitors guessing what it was and reading the handout. My Old Glory 'Vlad Castle' got another run out, and is not that far off stylistically from the actual fortress. 


Running a game doesn't give much time to see the rest of the show, but the quality of the games was very high, and these caught my eye.

Possibly my favourite, Industrial WW2 with U-Boats.

A big game of Blenheim.

Alford. An interesting battle, well put together.

Poletsk - 1812 Russian campaign

I have no idea what this is or the rules, but it's interesting terrain.

There were two Samurai games, both visually good.


A fantasy version of Billhooks on a fine table.

Obviously, The Alamo. Swapped notes on using Rebels and Patriots.

The Battle of Tewkesbury.

Nice little Napoleonic naval landing game. Works well as a participation game.

I thought this was the Tradeston club's Thirty Years War game, but it is obviously later and upscaled in 28mm.


As always, many thanks to the Falkirk club. Putting on a show of this size takes a lot of work, and Kenny and the team did a great job.

Thursday, 1 May 2025

Roman Soldier v Dacian Warrior

 This is a new Osprey Combat series book by Murray Dahm on the Dacian Wars AD 85-106. The Dacian Wars are one of my favourite ancient campaigns, and I have just returned from Romania, the Dacians' modern-day home. 


I am generally not a fan of this Osprey series. This is the third book from Osprey that covers the Dacians, and there are similar MAA titles on the Romans of the period. The primary selling point for this series might be wargamers who want enough information in one title to organise the armies and understand the campaigns. That said, Murray Dahm is an excellent ancient historian, and this is a well-researched book full of the latest evidence.

After a short introduction to the region and the opposing armies, Dahm gets straight into the organisation of both armies. It's not the same level of detail as in the MAA series, but it's enough to get the wargamer started. Some nice colour plates help, along with plenty of illustrations. The written sources are, as ever, limited, but we do have Trajan's column, which by Roman standards is a reasonably balanced depiction of the troops and the challenges the Romans faced. The column is still in Rome, but the plaster casts in the National History Museum, Bucharest, are a much better opportunity to study them. Here are a couple from my recent visit.


The Imperial Romans are pretty straightforward, but our sources on the Dacians don't always correspond to the depictions on Trajan's column. In any case, Dacian society seems to have consisted of various tribes under individual rulers who owed allegiance to an overall king. So, there may have been several variations, including the Dacian allies, of which the Sarmatians are a favourite. The archaeology is challenging as the Dacian forts were in the Carpathian Mountains, dense, hilly terrain, even today. On my first visit, the hotel insisted I take an armed escort as the forests I was walking through still had wolves and bears. One controversy concerns how many Dacian warriors used the distinctive falx. The subject of a fine colour plate in the book. The otherwise excellent Warlord plastics box doesn't have nearly enough.

The rest of the book covers the three Roman campaigns. Most descriptions focus on Trajan's campaigns and omit the earlier campaign by Domitian in AD 86. He was defeated at the First Battle of Tapae, and although he recovered to win the second, he couldn't subdue the Dacians. A plus for this book is that Dahm covers the earlier campaigns. 

In Trajan's First Dacian War (101–102 AD), he led a massive Roman force into Dacia, seeking to subdue King Decebalus. After several battles, including another critical clash at Tapae, Decebalus was forced to accept peace terms, becoming a client king of Rome. In the Second Dacian War (105–106 AD), Decebalus's continued resistance to Roman control prompted Trajan to launch a second campaign. This time, the Romans captured the Dacian capital, Sarmizegetusa, and Decebalus took his own life rather than surrender. Dacia was then annexed as a Roman province, bringing great wealth, particularly in gold, into the empire.

The final chapters give a good analysis of the effectiveness of both armies and the aftermath. The usual picture of Roman conquests is one of inevitable victory: the combination of auxiliary forces that provided the necessary skill in archery, light infantry and cavalry expertise, combined with the heavy-infantry prowess of the legions. Analysis of the campaigns against Dacia by Domitian and Trajan reveals that such a picture is false. Roman armies could be defeated, and imperial victories sometimes needed to be hard-fought and were by no means predetermined. Oltean surmises that Trajan’s Dacian expeditions were the "costliest war Romans ever fought, the war involving the highest number of troops and covering the largest area."

This is an excellent starting point if you are new to the Dacian Wars. However, if you have the other Ospreys, there might not be enough new material to justify the purchase.

I have the Dacians and the Romans in 28mm. However, more recently, I have played several games using Strength and Honour in 2mm, which gives a different perspective on the Tapae battles.