Welcome to my blog!

News from a wargamer with a special interest in the military history of the Balkans. It mainly covers my current reading and wargaming projects. For more detail you can visit the web sites I edit - Balkan Military History and Glasgow & District Wargaming Society. Or follow me on Twitter @Balkan_Dave
or on Mastodon @balkandave@mastodon.scot, or Threads @davewatson1683
Showing posts with label Ancients. Show all posts

Thursday, 13 August 2026

Kadesh 1286 BC

 This new Osprey by Anthony Spalinger is a bit outside my normal scope, but I got sucked in after visiting the wonderful British Museum exhibition about the Assyrians, and built an army in 15mm. This book covers the Egyptian pharaoh Ramesses II's invasion of Syria, contested by the Hittite king Muwatalli II near the city of Kadesh in modern Syria. Dates for the battle are contested.


Ramesses II marched into Syria with a large Egyptian army divided into several divisions. He received false information suggesting that the Hittite army was far away. In reality, Muwatalli had hidden his forces nearby. The Hittites launched a surprise attack on the Egyptian Ra division, badly disrupting the Egyptians. Ramesses rallied his remaining troops and counterattacked, preventing the Egyptian army from being destroyed. The battle ended without a clear decisive victory. Both sides claimed success, and the Egyptians portrayed Ramesses as a heroic victor in inscriptions and temple reliefs.

This book is in the Campaign series, which starts with a brief background and then the commanders. Ramesses II was an experienced commander, having fought off the Sea Peoples. Muwatalli appears to have had less experience but was trained for war at an early age. This is probably the shortest commander chapter I have seen in this series, as we don't know much about other commanders. The author takes us through the historical sources, pictorial and written. 

Next, we have the opposing forces. The Egyptians probably had around 20,000 to 25,000 men in four divisions, although we don't know the breakdown between troop types, which would have included chariots, archers and infantry. The Hittites were a coalition of forces, and we have lots of names, but their roles are unclear. The possible manoeuvres are described, in an effort to untangle the sources. Chariots had three crew members and were a mobile platform for firing rather than battle chariots. As you would expect, the book includes fine maps and colour plates, as well as pictures of the remaining pictorial evidence. 

The author describes the various stages of the battle, which went back and forth between both sides. The conclusion is that the Hittites were pushed off the battlefield but were not dislodged, remaining in control of Kadesh. The second day's fighting is unclear, other than that the Hittites came again, there was some fighting, probably at a lower level, and peace of sorts was agreed. Nothing had changed strategically, and the Hittites, while unable to defeat the Egyptians, also retained control of Kadesh. The conflict continued into the future, but Egyptian imperialism into Syria had failed.

If all of this sounds complicated and unclear - well, it is. The author has done his best with the available sources and explained his conclusions. If chariots are your thing, then this is essential reading.

I haven't got either army, but I do have a rather nice 15mm Assyrian army, with decent-sized chariots.


Monday, 29 June 2026

Stronghold Scotland

 My local library has been downsized, and I have been struggling to find my monthly library pick. However, I did spot Geoffrey Williams' book on prehistoric and Roman fortifications in Scotland. Scottish medieval castles are famous, but there are hundreds of earlier fortifications that are dotted around the country.


I suspect the author's chatty, almost quirky writing style will irritate some folks, but I found it very readable. It is also a very solid hardcover that will withstand the heavy handling it is likely to get when used as a guide.

There are two parts to this book. A history and then a gazetteer. The first part is a history of the period and the fortifications that developed during that time. It is shocking to think that the early immigrants probably came from England 😅. Then the Picts, of which we know relatively little, even the name of which was bestowed by the Romans. We are also not sure when the Celts arrived, but they are certainly not indigenous to these isles. By the Iron Age, the population of Scotland was probably around 200,000, and as social structures developed, so did the strength of their fortifications. The Romans came but failed to conquer, though they left behind some fortifications north of Hadrian's Wall.

He then describes the types of strongholds, each with its distinctive style. From simple blockhouses to the early brochs, some of the finest examples are on Orkney. When I was working up there, I usually found an excuse to go and look at them. The best preserved is at Mousa on Shetland.  


Then the water-based crannogs, one of which has been reconstructed on Loch Tay, and it is well worth a visit. The largest fortifications are the hillforts. These are mostly earthworks today because the wooden palisades are long gone, although many had stone walls. Sadly, many of these have been stolen for other building projects. The Roman forts exist as both marching forts and the various walls built across Scotland.

The gazetteer is a fabulous resource, offering alternative days out from the usual historic sites. Around 120 strongholds are covered with references to the others. They are often in scenic spots, making for great walks. Scotland's right to roam makes these more accessible than in other parts of the UK. There is an excellent online resource for hillforts. The Scottish Archaeological Research Framework (ScARF) is also an excellent resource.

This is worth getting for the historical background, but it is also a really useful guidebook.

I haven't got any Picts, too much woad to paint. So, let's have a Roman camp.


Friday, 13 February 2026

Cynoscephalae 197 BC

This Osprey Campaign book by Mark Van der Enden covers the classic legion v phalanx battle of the ancient world.


The Battle of Cynoscephalae (197 BCE) was fought in Thessaly between the Roman Republic, led by Titus Quinctius Flamininus, and the Macedonian army of King Philip V during the Second Macedonian War. The battle is best known for demonstrating the alleged superiority of the Roman legion over the Macedonian phalanx. Fighting began on rough, hilly terrain that disrupted the tight formation of Philip’s left phalanx, making it less effective. While part of the Macedonian line initially repelled the Romans, a flexible Roman unit exploited gaps in the phalanx's uneven formation and attacked from the flank and rear. This manoeuvre caused the Macedonian army to collapse, leading to a decisive Roman victory. The defeat weakened Macedonian power and marked a major step in Rome’s expansion and dominance in the eastern Mediterranean.

The author begins by explaining how Rome expanded its rule into the Balkans, primarily as a consequence of its campaigns against the Illyrians. The Macedonians had also allied with Carthage during the Punic Wars, and although that didn't amount to much, it gave Rome an excuse to invade. This is followed by a chapter on the commanders and their sub-commanders, although there are few sources on some of those on the Macedonian side.

This is a book about the campaign and battle, but both armies are examined. The Roman republican army at Cynoscephalae has been estimated to have ranged from 26,400 to 32,000 men. This was essentially the same army that fought in the Punic Wars, which is handy for wargamers. They also had Greek allies and elephants. The Macedonian army consisted of four major components: the pike phalanx, peltasts, cavalry, mercenaries, and auxiliaries, totalling around 25,000 men. Again, an Alexander the Great army would work fine for wargame purposes.

The core of the book is the campaign and battle. There were skirmishes in the Aegean and in Illyria before the main event in Thessaly. There is a whole range of interesting actions, not just the final clash. As you would expect from this series, there are excellent maps and colour plates. Unusually for this period, the Roman cavalry had the best of the early actions. A key element of the Roman campaign was to detach Greek allies from Macedon.

Does the Roman victory prove the legion was superior to the phalanx? Not necessarily. Philip’s right wing was caught in the rear, and his left wing was unable to deploy effectively or in time to resist the Roman advance, but the phalanx did operate successfully on what is considered to be rough ground. It also succeeded in maintaining its cohesion, advancing down the slope and pushing its Roman adversaries to the brink of collapse. Philip’s defeat resulted from his decision to launch a full-scale engagement before half of his army was ready and deployed for battle. Defeat in this instance has, therefore, more to do with Philip’s generalship and the inability of his inexperienced left wing to deploy quickly enough rather than intrinsic deficiencies of the phalanx. The flexibility of the legion did play a role in victory, as did Phillip's lack of a reserve. 

This is a really useful book that opens up a series of little-known battles, as well as the classic phalanx v. legion battle. Some of my 28mm Republican Romans. Strength and Honour would work well for this battle, and after my Punic War project, I have the figures to do this.


Wednesday, 11 February 2026

Seleucid Armies 312–63 BC

 This is the new Osprey MAA by William Horsted, covering a popular wargame army: the Seleucids.


Seleucus I Nicator was the founder of the Seleucid dynasty. He was an officer in Alexander the Great's army, commanding the hypaspistai, an elite infantry unit. Seleucus wasn't one of the original successors, but he became one when he took control of Babylon in 312 BC. At its height, the empire stretched from Asia Minor (modern Turkey) through Syria and Mesopotamia to Persia and parts of India. 

The author begins with an overview of the Seleucid Empire at war, marked by continuous warfare, beginning with the Wars of the Diadochi, in which Seleucus I fought rival successors of Alexander to secure his realm. Throughout the 3rd and 2nd centuries BCE, the Seleucids engaged in repeated Syrian Wars against the Ptolemaic Kingdom of Egypt over control of Coele-Syria. In the east, they lost territories to the rising Parthian Empire and faced the secession of Bactria. In Asia Minor and Greece, they clashed with local powers and were ultimately defeated by Rome at the Battle of Magnesia (190 BCE), a defeat that severely weakened them. Internal dynastic struggles further destabilised the state, while the harsh policies of Antiochus IV sparked the Maccabean Revolt in Judea. These external defeats and internal conflicts gradually reduced Seleucid power until Rome annexed Syria in 63 BCE.

The core of this book is the armies. One reason this army is popular on the tabletop is the variety of troop types. The core of the army was the Macedonian phalanx, probably recruited from Greek settlers in return for land. They were dressed and equipped like Macedonians, which is helpful for wargamers. The argyraspides were the original infantry guard unit of the Seleucid army. The name was first used by Alexander the Great for his hypaspistai, which Seleucus commanded in India. When Seleucus I established his own army, he likely retained the name for his foot guard, which was equipped as phalangites. These were supported by peltasts. There may have been a unit of 5,000 men wearing ring-mail cuirasses and armed in a Roman manner. This appears to be the first step in the reformation of the Seleucid army from a Hellenistic force built around the phalanx to one modelled on the Roman legions. Other infantry contingents were provided by Galatians, Thracians and Greek mercenaries, with light infantry from Crete (slingers) and other regions.

The Seleucid kingdom encompassed areas renowned for producing both excellent horses and horsemen of all types, from the heaviest kataphraktoi to the lightest horse archers. Between these types, the bulk of the cavalry consisted of medium cavalry, such as from Nisa or regular units called the politikoi. He also created his own elite cavalry, similar to Alexander's companions, called the agema and hetairoi. Irregulars from Galatians, Thracians and Tarentum or other Greek colonies. Horse archers mainly came from the Dahae, a Scythian people.

Finally, we have the exotic units, including elephants from India and scythed chariots. The latter were a disaster at Magnesia and were never used again. I can sympathise as mine have never worked either. Elephants can be pretty hit and miss as well.

This book has everything you need to collect and paint a Seleucid army. Plenty of illustrations and colour plates of every troop type. 

The phalanx.


Thursday, 8 January 2026

The Jugurthine War 112-106 BC

 This new Campaign series book by Nic Fields covers Rome's long war in North Africa, against the Numidians. The war is named after King Jugurtha of Numidia.


Numidia had been a client kingdom of Rome since the Second Punic War. Jugurtha had served with Roman forces in Spain, where he learned how Roman politics could be manipulated through bribery. Soon after King Micipsa’s death in 118 BC, Jugurtha murdered his son Hiempsal and forced the other son, Adherbal, into exile. Rome intervened diplomatically, dividing Numidia between Jugurtha and Adherbal, but Jugurtha later attacked Adherbal again. Jugurtha captured Cirta, Adherbal’s capital and executed him. Several Italian merchants were killed during the siege, and Roman public opinion, inflamed by the deaths of Roman allies and blatant senatorial corruption, pushed the Senate to declare war.

The early Roman campaigns were deliberately inconclusive or outright sabotaged (at least according to Sallust), resulting in a humiliating treaty in 110 BC, which allowed Jugurtha to escape punishment. A special commission exposed corruption among Roman nobles. Jugurtha famously remarked that Rome was “a city for sale,” if only a buyer could be found.

Gaius Marius was elected consul and reformed recruitment by enrolling landless citizens, laying the groundwork for long-term changes in the Roman army. Marius conducted a more aggressive and disciplined campaign in Numidia, forcing Jugurtha to fight a guerrilla war. Lucius Sulla negotiated with Bocchus I, King of Mauretania and Jugurtha’s father-in-law, who handed him over to the Romans in 106 BC for execution.

This book follows the usual Campaign format. There is an introduction followed by a detailed breakdown of the commanders and the opposing armies. The Numidians included the aggressive light cavalry, made famous by Hannibal, as well as javelin-armed light infantry. However, by this period, there were also troops raised and paid for on the Roman model. While they couldn't face a Roman army in open battle, they could engage in asymmetric warfare against a largely infantry army. At least during the early campaigns, Roman armies fought in a manner similar to that of the Punic Wars.

The core of the book describes the campaigns, aided by excellent maps and colour plates. This includes the civil war and the Roman interventions. The falling out between Marius and Sulla would have long-term repercussions. The Senate did not annexe Numidia, giving half of its territory instead to Bocchus, as a reward for his treachery, and half to Gauda, the halfwitted half-brother of Jugurtha. Divide and rule is always the choice of empires.

If, like me, you have built up Punic War armies, then this is an alternative use for your Numidians and Romans. The Battle of Muthul, 109 BC, would make a good scenario for a larger battle using Strength and Honour, with the Romans deploying two legions. In 28mm, there are countless small-scale actions. 

Some of my 2mm Numidians for Strength and Honour. Warbases figures.

Some of my 28mm Numidians. Carthage was my first wargames army, so I suspect these are very old from a long-forgotten range. Too dark skinned as well.


Monday, 19 May 2025

The Antonine Wall

 My library pick this month was David Breeze's study of the Antonine Wall.


The Antonine Wall was built in what is now Scotland. It stretches across central Scotland from the Firth of Forth (near Edinburgh) in the east to the Firth of Clyde (near Glasgow) in the west, about 39 miles (63 km) long. It was constructed under the orders of Roman Emperor Antoninus Pius around AD 142, marking the northernmost boundary of the Roman Empire in Britain at its height. We don't know a lot about Antoninus due to limited contemporary sources. 

Like the better-known Hadrian's Wall to the south, it was built as a defensive fortification to mark the edge of Roman-controlled territory, control movement and trade, and repel attacks from northern tribes, especially the Caledonians. Unlike the stone-built Hadrian’s Wall to the south, the Antonine Wall was made primarily of turf laid on a stone base, with a deep ditch in front. Forts and watchtowers were spaced along its length. The wall was only occupied by the Romans for about 20 years. We assume that due to ongoing resistance and logistical challenges, the Romans retreated to Hadrian’s Wall around AD 162, although the full reasons are not documented.

Numerous forts, distance slabs (inscribed stone markers), and artefacts have been found along the wall since excavations started in 1895. However, there is nothing like the structure of Hadrian's Wall to see. There is a long-distance walk, and I have done bits of it, but again, it is not as well organised. 

There were three legions in Britain during this period: the 2nd, 20th, and 6th. These legions would have done the heavy work on the wall along with auxiliary units (including Gauls), which would have been the main garrison troops. 6-7000 troops would garrison the wall at any one time. The line was picked because it is the shortest distance across Scotland. Breeze argues that this doesn't necessarily mean it was the limit of Roman control; it was just a convenient line. There were undoubtedly outpost forts further north.

You must use a bit of imagination when visiting the forts at Bonnybridge, Twechar, Castlecary, Westerwood and Croy. Easrtworks are all that remain, although the remains of bath houses can be seen at Bearsden and Bar Hill. The book lists all the sites and is small enough to carry on the walk. 

One of my 28mm Imperial Roman legionary units.

Thursday, 1 May 2025

Roman Soldier v Dacian Warrior

 This is a new Osprey Combat series book by Murray Dahm on the Dacian Wars AD 85-106. The Dacian Wars are one of my favourite ancient campaigns, and I have just returned from Romania, the Dacians' modern-day home. 


I am generally not a fan of this Osprey series. This is the third book from Osprey that covers the Dacians, and there are similar MAA titles on the Romans of the period. The primary selling point for this series might be wargamers who want enough information in one title to organise the armies and understand the campaigns. That said, Murray Dahm is an excellent ancient historian, and this is a well-researched book full of the latest evidence.
After a short introduction to the region and the opposing armies, Dahm gets straight into the organisation of both armies. It's not the same level of detail as in the MAA series, but it's enough to get the wargamer started. Some nice colour plates help, along with plenty of illustrations. The written sources are, as ever, limited, but we do have Trajan's column, which by Roman standards is a reasonably balanced depiction of the troops and the challenges the Romans faced. The column is still in Rome, but the plaster casts in the National History Museum, Bucharest, are a much better opportunity to study them. Here are a couple from my recent visit.


The Imperial Romans are pretty straightforward, but our sources on the Dacians don't always correspond to the depictions on Trajan's column. In any case, Dacian society seems to have consisted of various tribes under individual rulers who owed allegiance to an overall king. So, there may have been several variations, including the Dacian allies, of which the Sarmatians are a favourite. The archaeology is challenging as the Dacian forts were in the Carpathian Mountains, dense, hilly terrain, even today. On my first visit, the hotel insisted I take an armed escort as the forests I was walking through still had wolves and bears. One controversy concerns how many Dacian warriors used the distinctive falx. The subject of a fine colour plate in the book. The otherwise excellent Warlord plastics box doesn't have nearly enough.

The rest of the book covers the three Roman campaigns. Most descriptions focus on Trajan's campaigns and omit the earlier campaign by Domitian in AD 86. He was defeated at the First Battle of Tapae, and although he recovered to win the second, he couldn't subdue the Dacians. A plus for this book is that Dahm covers the earlier campaigns. 

In Trajan's First Dacian War (101–102 AD), he led a massive Roman force into Dacia, seeking to subdue King Decebalus. After several battles, including another critical clash at Tapae, Decebalus was forced to accept peace terms, becoming a client king of Rome. In the Second Dacian War (105–106 AD), Decebalus's continued resistance to Roman control prompted Trajan to launch a second campaign. This time, the Romans captured the Dacian capital, Sarmizegetusa, and Decebalus took his own life rather than surrender. Dacia was then annexed as a Roman province, bringing great wealth, particularly in gold, into the empire.

The final chapters give a good analysis of the effectiveness of both armies and the aftermath. The usual picture of Roman conquests is one of inevitable victory: the combination of auxiliary forces that provided the necessary skill in archery, light infantry and cavalry expertise, combined with the heavy-infantry prowess of the legions. Analysis of the campaigns against Dacia by Domitian and Trajan reveals that such a picture is false. Roman armies could be defeated, and imperial victories sometimes needed to be hard-fought and were by no means predetermined. Oltean surmises that Trajan’s Dacian expeditions were the "costliest war Romans ever fought, the war involving the highest number of troops and covering the largest area."

This is an excellent starting point if you are new to the Dacian Wars. However, if you have the other Ospreys, there might not be enough new material to justify the purchase.

I have the Dacians and the Romans in 28mm. However, more recently, I have played several games using Strength and Honour in 2mm, which gives a different perspective on the Tapae battles.  


Saturday, 22 March 2025

Alexander's Legacy - To the Strongest

 No, this isn't another blog about my go-to set of ancient wargames rules. This is the opening book in a series by Robert Fabbri on the Wars of the Successors (Diadochi), my library pick for this month. The title is taken from a phrase reportedly uttered by Alexander the Great on his deathbed, signifying that his empire should go to the most capable, not to a designated heir. 


Most of us could probably name the best known of the Successors, Ptolemy, Seleucus and Antigonus One-Eye. However, these were not the only initial contenders, and it is this initial struggle that is covered by the book. The leading player in this book is Perdiccas (spelt Perdikkas in this book) – Alexander’s top general and regent (Fabbri calls him the half-chosen because he received Alexander's ring), initially ruling in the name of Philip III and Alexander IV. Philip III Arrhidaeus, Alexander’s half-brother, was mentally impaired and was made a figurehead king. Alexander IV was Alexander’s posthumous son with Roxana. He was too young to rule, leading to a regency.

Perdiccas' aim was to keep the empire together. However, most other generals had an eye (pun intended!) for creating their own kingdoms. In particular, Ptolemy took Egypt and founded the Ptolemaic Dynasty, which ruled until Cleopatra VII. He hijacked Alexander's coffin and defeated Perdiccas's attempt to recover it. Perdiccas was assassinated after the battle, probably by Seleucus, one of Perdiccas's commanders, who later took Babylon.

Antigonus controlled Asia Minor and also aimed to unify Alexander’s empire. He allied with Antipater, the aged but respected regent of Macedonia who initially controlled Europe. Other secondary characters include Eumenes, who was a Greek and, therefore, not a contender, but he was a wily operator (Fabbri calls him 'the sly'), along with Alexander's mother Olympias and his half-sister Ada.

This book ends with the assassination of Perdiccas, so the later battles are yet to come. Fabbri sticks fairly closely to the history, introducing just a few extra characters and, of course, the dialogue. Each chapter focuses on one of the characters while maintaining a chronological narrative. The chapters are short, which suits me perfectly as this is my bedtime reading. I enjoyed this treatment of a classic piece of ancient history and will probably read more in the series.

My Macedonian phalanx in 28mm

Saturday, 25 January 2025

The Athenian Army 507-322 BC

 There have been many general studies of the armies of this period, but now the Athenian Army has a stand-alone Osprey by Nick Sekunda. Fortunately, there are surviving texts about ancient Athens and lots of archaeological evidence. However, as the author highlights, that doesn't mean there are no differences in interpretation.


The book starts with Cleisthenes's reforms in 507 and a new 'democratic' system of government. However, it was a limited form of democracy as Athenian society was a slave-owning society and economy. Consequently, its citizens could be released to perform military service without the economy collapsing. This was tested early on by the Persian Wars, including the battles of Marathon and Platea. 

This book's strength is in the army itself. It starts with the practically universal liability for military service, with registration from 17 and the oath-taking. Service was limited to the boundaries of Attica until age 20, an obligation that remained until age 50, then only within the borders again until 60. The citizen of sufficient wealth would serve as a hoplite, providing their own equipment accompanied by a psilos, which usually meant an attendant (often a slave) rather than a lightly armed combatant. 

The evidence for Athenian cavalry is limited, but they appeared to be recruited from the wealthier citizens. They originally numbered no more than 300, although this was expanded to 1,000 during Pericles's reforms. They provided their own horses and equipment but were paid a fodder allowance and a grant to replace horses lost on campaigns. There was also a 200-strong unit of horse archers.

At the start of the Peloponnesian War, the Athenian army's strength was 13,000 citizen hoplites of military age with 16,000 ephēboi (old and young), limited to home service. There were 1,200 cavalry, including the 200 horse-archers and 1,600 foot-archers. The Athenian fleet was one of its strongest assets, with 300 seaworthy triremes. The triremes would have required over 50,000 oarsmen if fully manned, which meant the Athenians depended on foreigners to crew their navy. The fighting troops on board included hoplites, archers and peltasts.

The organisation and equipment did not change hugely during this period. However, the author shows how it evolved in response to losses, economic pressures and the different campaigns. For example, at the end of this period, wealthier citizens would donate equipment to allow poorer citizens to fight. The hoplite shield was particularly expensive. 

As you would expect in an Osprey, there are excellent colour plates and other illustrations for all the troop types. These are situated close to the relevant text in the Elite series, which I prefer, although it takes a bit of getting used to. 

Some of my 28mm Athenian hoplites.


Thursday, 12 December 2024

Conquest: Alexander and Hannibal

 Strength and Honour (S&H) is my favourite ruleset for big battles in the ancient world. One of my wargaming pals finds this ironic as he reminds me of the grief we gave him over a France 1940 game he organised in 3mm. In my defence, we spent most of the afternoon trying to identify the type of tank firing! Whereas the 2mm figures for S&H are mounted on large bases and labelled.

 The main rules mainly cover the Imperial Roman world. Mark has written a new supplement covering earlier conflicts, including Alexander, the Successors, and the Punic Wars. I dabbled at this with my Young Alexander in the Balkans campaign (published in Slingshot), but this allows me to extend the campaign to the Persians. I have always fancied a Persian army, and in 2mm, it is quickly completed. I also have a soft spot for the Carthaginians because they were my first wargame army, in 25mm using Warrior Miniatures. I will need some 2mm Romans in manipular legion formation, so another order is off to Martin at Warbases.


The supplement provides some new rules for the period extension and some tweaks based on feedback. There are 12 new army lists covering this earlier period and 20 scenarios. It all comes as a PDF download, which makes sense. I prefer a hard copy for rules, but a PDF is easy to use and a significant cost-saving, particularly for colour printing. I did the same with my new Cyprus 1974 guide for wargamers. I have printed off the new rules I will likely use, which are just a few pages.


Onto the tabletop for the midweek game last night. Alexander has crossed the Hellespont and faces a Royal Persian Army.


It went badly for the Persians from the outset, with both flanks driven in.


The centre held up better, with the mercenary hoplites doing a good job for the Persians. However, Homunculus Est! was called successfully with only a handful of setback cards in the Macedonian pile. I was a bit short of cavalry for this game, which may have helped the Persians, and some more archer units might have slowed up the Macedonian phalanx. We will have another go after Christmas.


When a giant cat arrived on the battlefield, Alexander was pleased to see it was a Moggie, not a Persian 😅.


Friday, 1 March 2024

Roman Legion Exhibition

 I am in London this week working in the Greenwich and Kew archives on the Ambuscade book. While here, I didn't want to miss the British Museum's special exhibition, Legion, which brings together exhibits on the Roman army worldwide. They tell the story through one recruit into the auxiliaries, although I could have done it without the commentary boards of rats dressed up as Romans. I assume this was to keep the kids interested, but it was pretty silly.

The first exhibit that caught my eye was a scary bust of Augustus.

The equipment exhibits were excellent, including the only surviving legionary shield. Lots of helmets and swords and cataphract armour.


The display captions were informative and well-organised, with various stone friezes illustrating different ranks and roles.


Our recruit reached the end of his 25-year term; only 50% did, and he got his bonus and citizenship. 


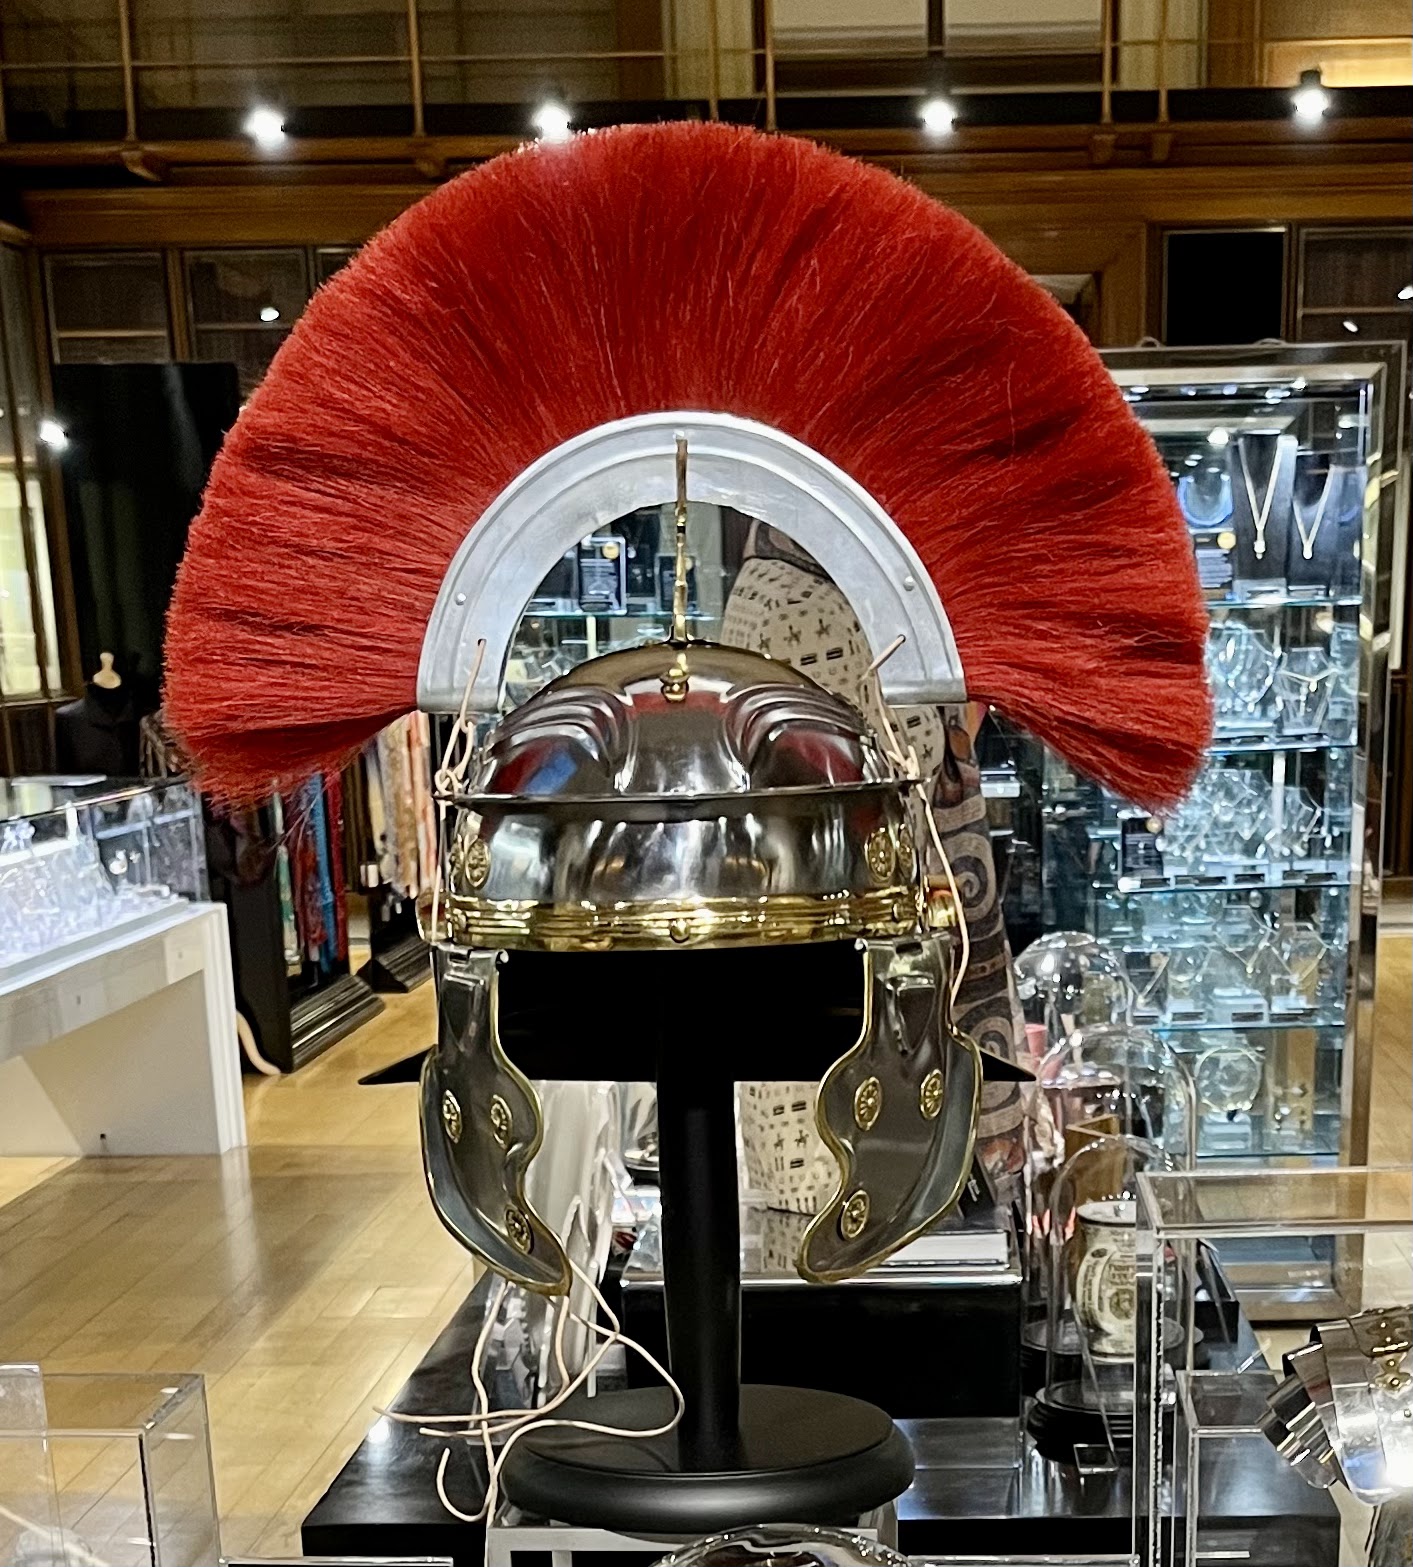
There is a lovely book to go with the exhibition, if too detailed and pricey. They always overdo the exhibition publication when an Osprey-size booklet would be more sensible. I passed on the book but was very tempted by the centurion's helmet. My daughter was more impressed by the ducks!


If you are in London, it is well worth a visit. And, of course, the British Museum has a wealth of treasures, even if some of them would be better placed elsewhere! 

Sunday, 22 October 2023

Septimius Severus in Scotland

This is Simon Elliot's book on the two campaigns Emperor Severus made in Scotland. His swansong before dying at York after the second campaign. Only one chapter in the book is devoted solely to the actual campaigns; the rest of the book sets the scene. In fairness, the sources and archaeology are scarce, and the campaigns must be seen in the broader context. There was, of course, not Scotland as such, but we are describing campaigns in the area covered by modern Scotland.


The sub-title referencing 'Hammer of the Scots' is justified based on the quote from Cassius Dio's campaign narrative. 'No: we are not going to leave a single one of them alive., down to the babies in their mothers' wombs - not even they must live. The whole people must be wiped out of existence, with none to shed a tear for them, leaving no trace.' Edward I thought similarly, and he also died making the effort!


For context, Severus ruled in the latter part of the Principate Empire just before the chaos of the crisis of the Third century. He came to power in AD 193; his Scottish campaigns were AD 209 and AD 210. He died in AD 211. Elliot gives us an overview of the Severan period, one of overall success, and Severus was one of the more effective rulers of the Empire. He implemented several military reforms, beginning the process of change from the border force to the later defence-in-depth model. The three key elements are described: the legions, auxiliaries and the fleets. All would participate in the Scottish campaigns. Fortifications were also important, both permanent and marching forts. The archaeology of these forts has helped trace the route Severus took in his invasion.


In the early third century, Roman Britain had a large Roman garrison of around 55,000, plus another 7,000 men in the Classis Britannica regional fleet. This is about 12% of the total manpower for only 4% of the Empire's land mass. Perhaps because of this, the tribes south of Hadrian's Wall were pretty settled, with growing urban and agricultural development. However, the northern tribes often raided over the border. In particular, the Maeatae just north of the border and the Caledonians above the Highland line. These were confederations of tribes, fighting in a more open style than other 'barbarian' tribes the Romans faced, and they retained the use of light chariots long after others had abandoned them. 


Severus was a warrior emperor, and the limited evidence points to him wanting one last great military triumph before he died. A plea for assistance from the governor was, therefore, probably welcomed. He brought the Empire to Britain, with the Imperial court set up in York. He also had challenging sons who needed to be taken away from the fleshpots of Rome for campaign experience. He brought detachments from several legions with him to supplement the three already in Britain, as well as the Praetorian Guard and Guard cavalry (Equites singulares Augusti). A total force of around 50,000 men plus the fleet.


Severus advanced into Scotland along Dere Street in the spring of AD 209. The local tribes in the borders sued for peace, given the size of the force. The crossing point across the Forth is disputed, but Elliot goes for the route of the current Forth Railway bridge, which is some engineering achievement for what would have been a pontoon bridge. After crossing the Tay, Severus split his force into two. One column marched with him along the coast, with the fleet alongside. His son Caracalla led the other inland along the Highland line—a hammer and anvil strategy which worked well. There were no major battles, but the tribes did cause significant casualties through harassing attacks and ambushes. The experience was grim for both sides, and the weather seems to have been worse than usual. As I write this, the area is subjected to Storm Babet, flooding large parts of the route. 


The Romans did not intend to occupy the region above the Tay, although a naval base may have been maintained. The following year, the Maeatae and Caledonians rebelled, and Severus sent his son north again with the genocide order. He appears to have carried that order out, as little is heard from either tribe for years after this campaign. The Scottish weather probably did for Severus, as he died the following year at York. His sons quickly made peace and returned to Rome to scrap over the Emperorship.


I have been playing the Strength and Honour rules recently in 2mm. I don't have chariots, but my Dacians were repurposed as Caledonians for a game in tricky terrain for the Romans.


The warband on the Caledonian left managed a tricky manoeuvre to turn through the woods into the flank of Praetorian Guard. They even rolled a six in the combat, but the Praetorian discipline held firm. 


It was downhill after that for the Caledonians as the Romans ground their way northwards. 


I never thought I would take to 2mm, but I am enjoying these rules.

Thursday, 31 August 2023

Strength and Honour

 These are the new rules by Mark Backhouse for fighting the epic big battles of the ancient world. I played these at Partizan in a refight of Cannae. The outcome of using Hannibal's tactics was historical, and it was the first time I felt this classic battle had been faithfully reproduced on the tabletop. The downsize (pun intended) is that the game is designed to be played with micro armies (typically 2mm). My experience of playing 3mm WW2 games has not previously encouraged me in this direction. However, here, the unit blocks are placed on a large base, which is easy to identify and label.

So, I bought the rules and a batch of figures from Antonine Miniatures (Warbases). My first matching armies were the Dacians and Romans. At this scale, the Dacians will do for almost any warband army of the period. I also bought some pike blocks intending to do some of Alexander's early battles as well.


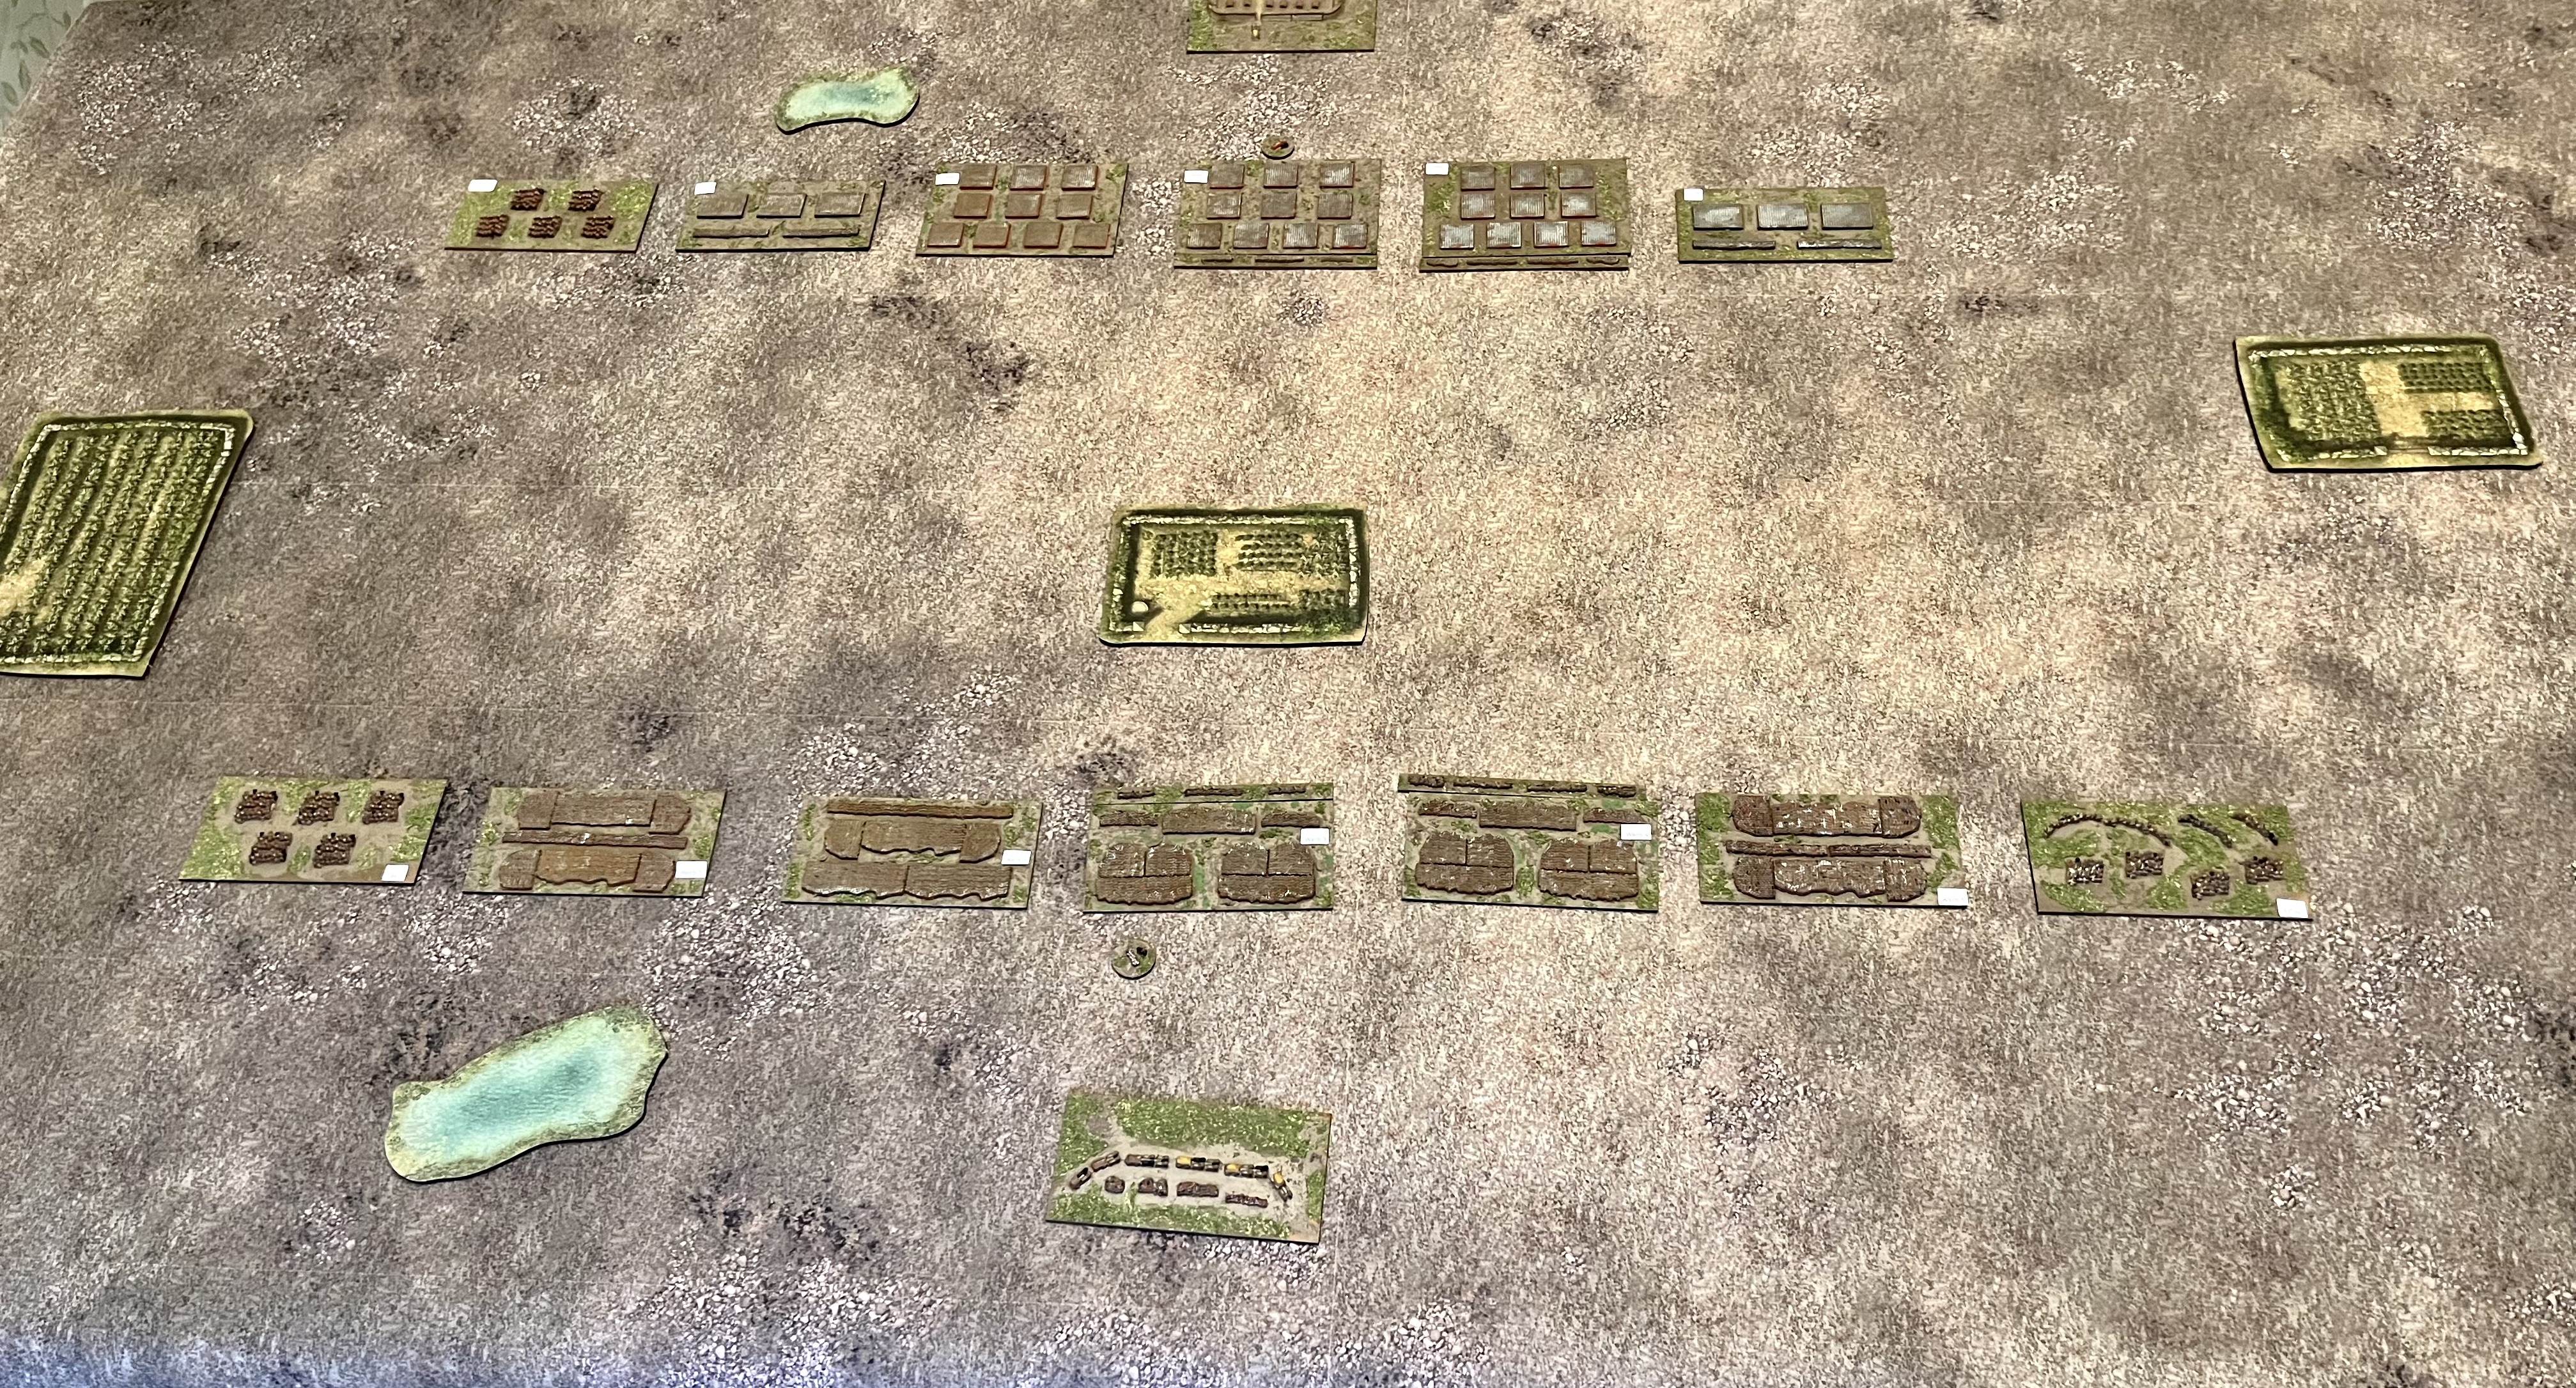
This was the first batch of painting. I glued the metal blocks onto the bases, which are standard and a little deeper for the Roman legions. The warbands looking suitably irregular and the Roman ten cohort legion supported by auxiliaries. After priming them in brown I painted the legions in red around the edges and the auxiliaries in blue. Then dry brushed the helmets with a few crests for officers. The Dacians got dabbed a range of colours. Then a fine sandy base mix, followed by a green foilage mix. 

The same approach for the second batch, which includes cavalry, two camps and skirmishers. I also bought some scenery pieces from Warbases.


On to the tabletop, meant reading the rules. Much helped by my memory of the participation game at Partizan. Everything you need is in the nicely laid out booklet, plus a downloaded QRF and command board from the Two Fat Lardies site. The game is played on a grid, typically 75mm, so I used my 150mm To the Strongest mat.


You dice for command points and allocate them to the command board. I'm embarrassed to say we largely forgot to use these, but they give various benefits, although you can only use a point once. It doesnt seem to overpower the game as sometimes happens in other rules. 

The key mechanism is activation, which includes movement, combat, charge, shooting and reform. A roll on a D6 means variable movement, which, as I discovered, makes it difficult to keep a neat battle line. This matters as isolated units can come up against supported enemies. Manoevre, which means anything other than straight ahead also has to be diced for and failure means the end of your turn. So, do it last. It also discourages unhistorical dashing about the tabletop, which is all too common in osome other rules.

Combat and shooting is straightforward, based on a unit combat factor with typical modifiers. If you lose then the combat result table can result in a pushback or worse. You are also likely to attract setback or disaster cards which are drawn from a pile and placed face down. These have numbers which added together can reach the break point for the army. We didn't reach that when we had to call it a night, but my Dacians were losing heavily. Never mind, wait till the Romans get into the mountains!


The book has army lists and scenarios as well as some basic campaign rules. Overall, we had a good game and will certainly return to these for when the big battle itch has to be scratched.