Welcome to my blog!

News from a wargamer with a special interest in the military history of the Balkans. It mainly covers my current reading and wargaming projects. For more detail you can visit the web sites I edit - Balkan Military History and Glasgow & District Wargaming Society. Or follow me on Twitter @Balkan_Dave
or on Mastodon @balkandave@mastodon.scot, or Threads @davewatson1683

Sunday, 8 October 2023

The other Partisan 2023

 From not having attended any of the Newark shows, I have now been to all of them this year. I hadn't intended to go again this year, but my brother organised a few days of golf with pals near Leicester, so it would have been rude not to go on the way.

Partisan has a reputation for high-quality games, and it didn't disappoint. All the usual traders were also there, and I picked up Mig Alley for Blood Red Skies, some cowboys, various WW2 types for the Cyprus project, paints and other stuff. 

There were a couple of games that even impressed my non-wargaming daughter. One was a giant game of Risk. The board game will never feel the same again.

The other was a Star Wars game. She tells me it is from Rogue One, which means nothing to me.

If there was a theme this year, it was castles. In all shapes and sizes, the 3D printers have been very busy.


Graus 1063


Sharp Practice 1860s

Others that caught my eye was a giant Cold War game in Germany. The planes were particularly good.

WW1 trench warfare is challenging to do well, but this was impressive.


Not much Balkan interest, I am sorry to say. However, this micro 28mm game of the Hungarian Revolution was interesting.


And somewhat spookily. My current bedtime reading is James Holland's WW2 fiction series. His hero, Jack Tanner, was at the defence of Calais in 1940 in last night's chapter, and there was an impressive game doing just that battle.


So, it was well worth the detour and thanks to the organisers for another great show. I had lots of interesting chats, and spending a day at a show doing whatever I fancy is nice.

I should find a golf range tomorrow morning to tune my rusty game, but I am staying just down the road from Bosworth. I haven't been for probably 40 years, and they have moved the battlefield in the interim!


Saturday, 7 October 2023

South Yorkshire Aircraft Museum

 I am en route to the Other Partisan wargames show on Sunday. Looking for a suitable stop-off point, I realised I had never been to the South Yorkshire Aircraft Museum at Doncaster. This is another of those wonderful museums run by a dedicated band of enthusiasts. 

They don't have a lot of space, so the typical outside plane exhibits are limited. Still, a decent collection, including:

Lynx helicopter.

Hawker Hunter. This was an ex-Danish Air Force one.

Aermacchi MB 339. Captured at Port Stanley airfield.

RAF Harrier that served in the Falklands campaign

The Falklands War is ever present in this museum with a dedicated area and plenty of exhibits as well as aircraft.

Including this exceptional 1/96th scale model of HMS Hermes.

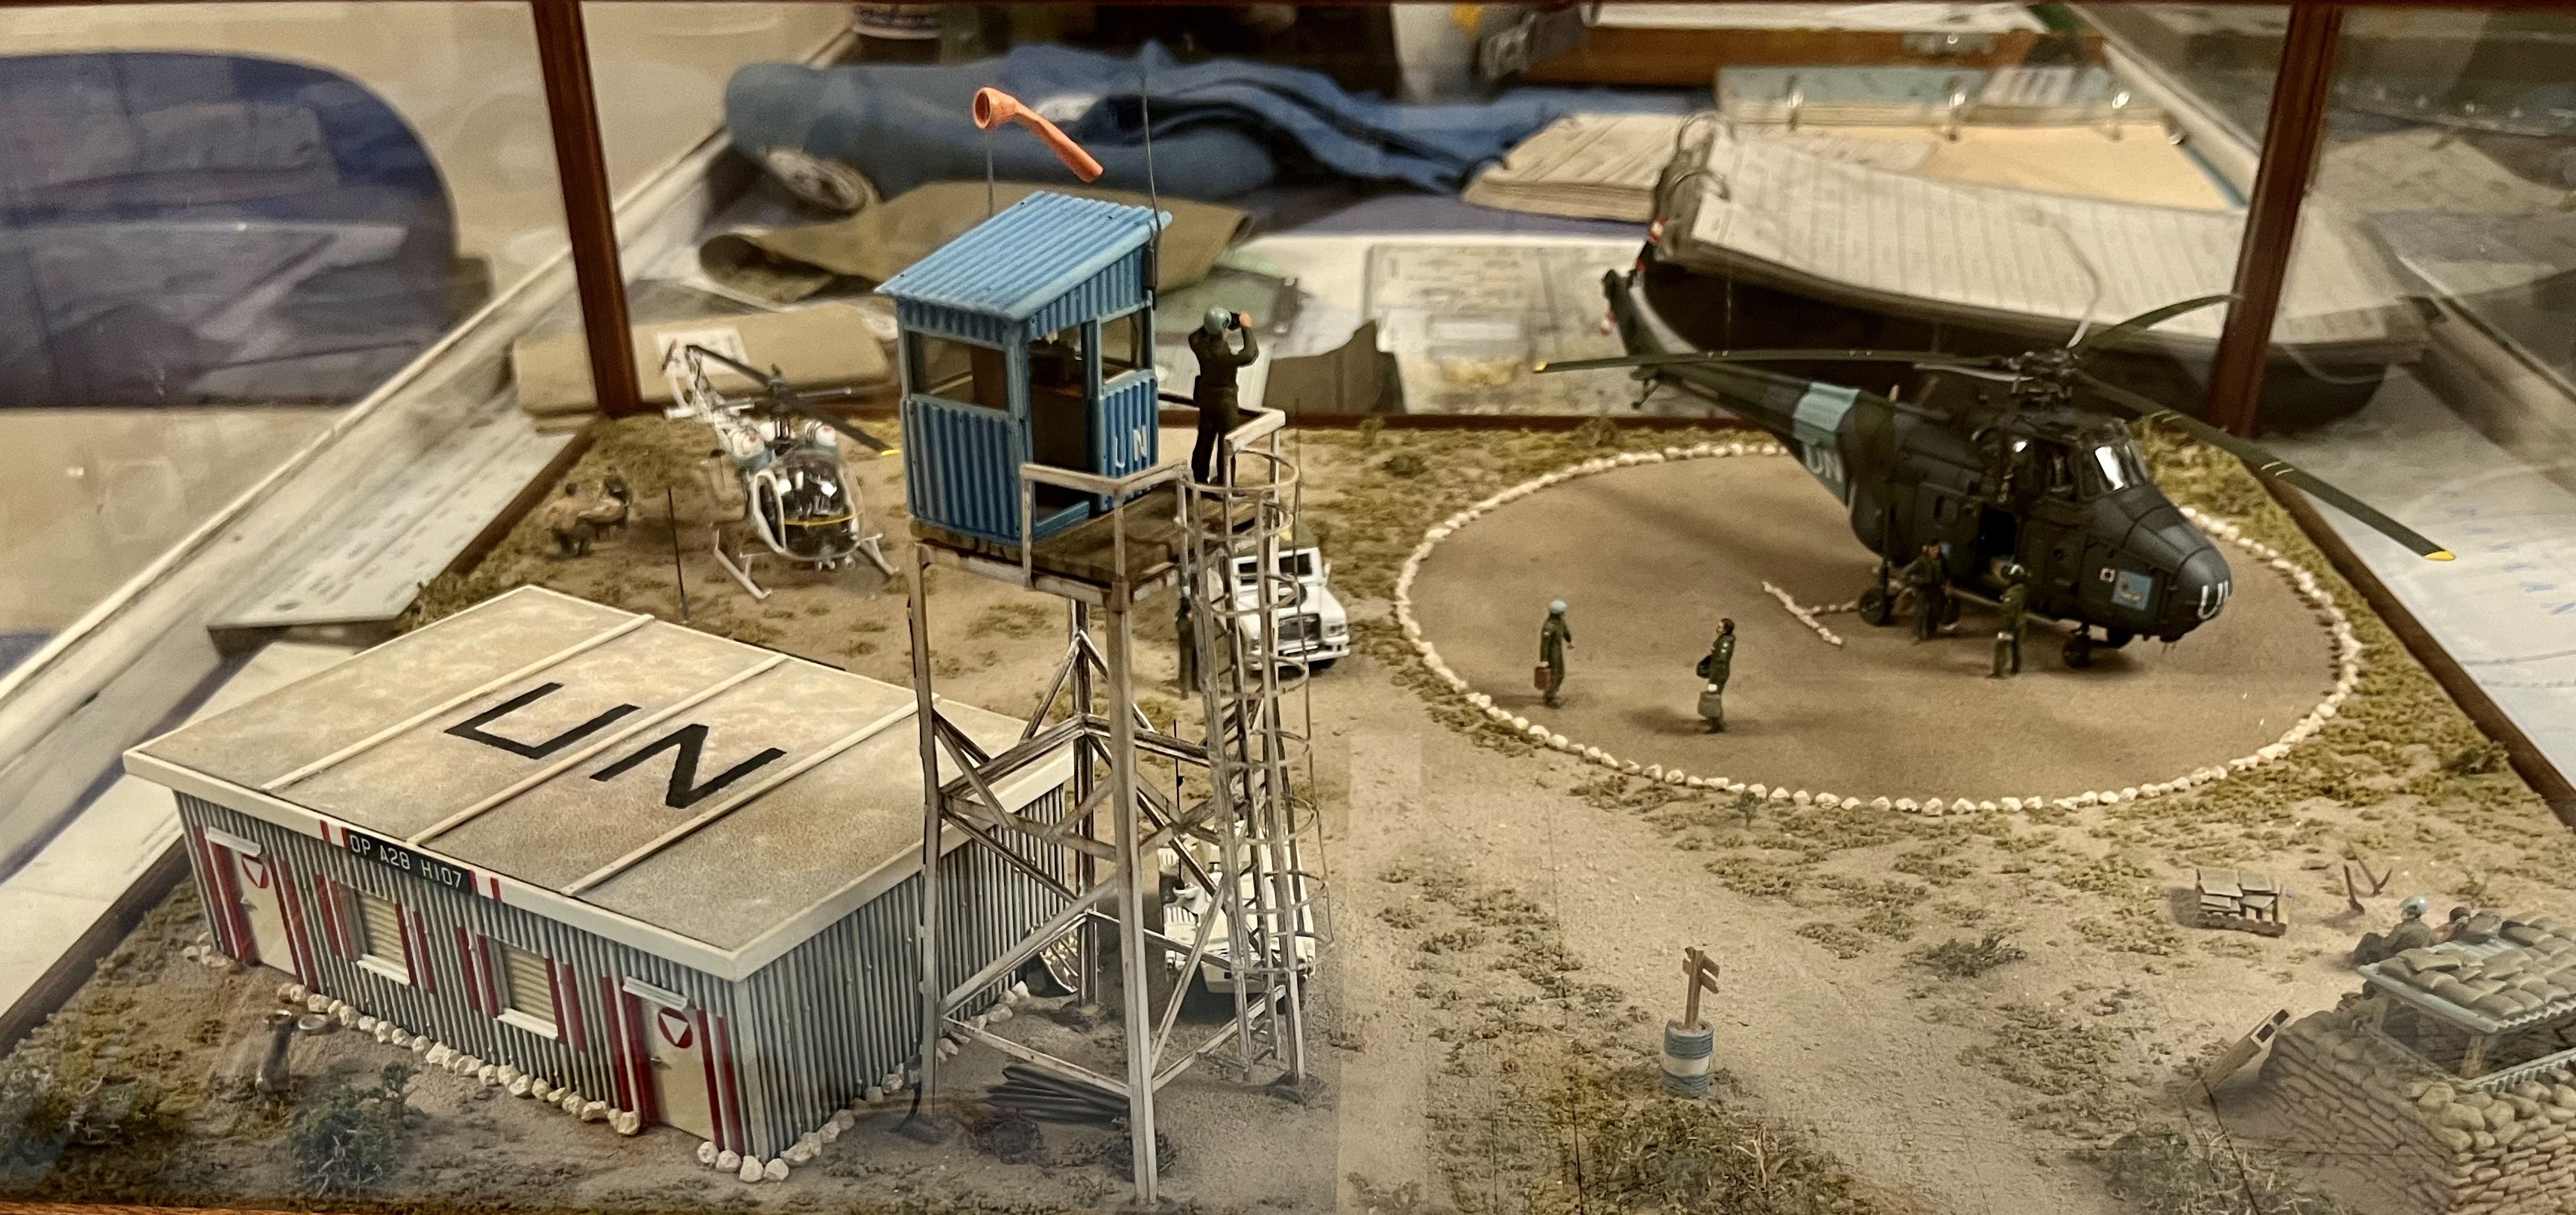
There is a helicopter preservation group based here, so there are plenty of them and fixed exhibits as well. Including an interesting Cyprus display, even if an error or two has crept in.

Cyprus UN helicopter base diorama


Bristol Sycamore. The first RAF helicopter.

There are a few ground weapon displays as well.


And a base operations room.


Finally, just about every Canberra variant you can think of.


Even a bit of the Balkans with this Romanian WW2 IAR fighter!


I spent a couple of hours there. Plenty more to see, and if you are in the area, please support them.


Tuesday, 3 October 2023

War of the Stray Dog

I do like an obscure conflict, although I won’t turn this one into a book! I was looking for a small-scale battle for a midweek game over Zoom with a friend from Greece. When researching something else, I had come across the Incident at Petrich and thought it might make an interesting game.

The Incident at Petrich in October 1925 was a border clash between Greek and Bulgarian forces near the town of Petrich, which is in modern-day Bulgaria. The incident had its roots in territorial disputes and ethnic tensions that had been simmering in the region for years. Greece and Bulgaria were among the countries attempting to redraw their borders, particularly in the region of Petrich. The dispute centred on the border demarcation established by the Treaty of Neuilly in 1919, which required Bulgaria to cede various territories after being defeated in WW1. The population in the disputed area was ethnically diverse, with Greek and Bulgarian people residing there. This diversity contributed to ethnic tensions and territorial claims.

The incident occurred on 18 or 19 October, 1925, when a border dispute escalated into a military confrontation. Greek and Bulgarian troops clashed near Petrich, resulting in casualties on both sides. 


Unsurprisingly, there are differing explanations of how it started. One version claims a Greek soldier ran over the border chasing his dog (hence, it is sometimes referred to as the War of the Stray Dog), and the soldier was shot by Bulgarian sentries. The second version claims that Bulgarian troops crossed the border and killed a Greek officer and sentry. We have no idea what happened to the dog before anyone asks!

The Bulgarian government apologised and said it was a misunderstanding. The Greek government issued an ultimatum demanding that those responsible be punished and wanted two million francs in compensation for the families. Greece sent troops to occupy Petrich to enforce these demands. There was some fighting, with chetas of the Internal Macedonian Revolutionary Organisation (IMRO) joining in. Petrich was the headquarters of the Macedonian-Bulgarian committee, and their cross-border raids were not uncommon. Over 50 people, primarily Bulgarian civilians, died.

The incident raised concerns of further escalation (possibly including Yugoslav or even Italian troops), and the League of Nations intervened before Greek troops crossed the border. However, some newspapers claimed they captured the town. The League mediated negotiations between Greece and Bulgaria to defuse the situation, and in 1927, Greece and Bulgaria signed the Petrich Agreement (also known as the Treaty of Petrich). This agreement included compensation on both sides, redefined the border in the Petrich area and established mechanisms for resolving future disputes peacefully.

The number of troops involved is unclear, although the initial Greek information was that they had been attacked by a regular Bulgarian battalion with machine guns. This sounds unlikely and is more likely to reflect the febrile state of the Greek war ministry at the time. The response was to order the Greek 3rd and 4th Corps to advance to the border. Again, it is unclear how many troops were actually sent. The Bulgarians got less excited and treated it as another border incident, ordering its forces into defensive positions with orders only to fire if attacked. The Bulgarian army was limited under the Treaty of Neuilly to 20,000 men, with a further 13,000 para-military forces and frontier guards. This meant they would be heavily outnumbered by the Greek army in any protracted conflict.

The terrain around Petrich is mountainous, with peaks of 1400-1600 metres. The Metaxas line fortifications, which gave the Germans so much trouble in 1941, marked on this map, hadn’t been built in 1925. So, my Bulgarians have taken up defensive positions in light cover, and a much stronger Greek force makes the attack. The Greeks may have had some mountain artillery, but this would have been an infantry battle.

We used my 15mm figures of the period. According to Knotel, the Greek uniforms had stayed the same. He is less clear about the Bulgarians, who apparently reverted to their early war uniforms from the predominately late-war German ones. Either way, not even I will be building a fresh army for this conflict!

Further reading, although this is focused on the diplomacy:

J. Barros, The Greek-Bulgarian Incident of 1925: The League of Nations and the Great Powers, (Proceedings of the American Philosophical Society, Vol. 108, No. 4, Aug. 27, 1964), pp. 354-385.


Sunday, 1 October 2023

The Khotyn Campaign of 1621

This is a new book by Michal Paradowski on the Khotyn campaign 1621 fought between Poland and the Ottoman Empire. This isn't your usual set-piece battle, but it's closer to a siege in some ways.

The author starts by outlining relations between the Polish Commonwealth and the Ottomans in the early Seventeenth century. The Polish border stretched down to Moldavia, a tenuous vassal of the Ottoman Empire. Moldavians fought on both sides in this campaign. To the east were the Tartars, Ottoman allies who regularly raided into Poland, challenged by the cossack regions, which were loosely part of Poland at this time. A treaty was signed in 1617 to stop these raids both ways, but little changed in practice.

The earlier 1620 campaign gets a chapter. This went badly for the Poles, who were forced to withdraw using their wagons (tabor). The use of war wagons in wargame rules has been the subject of much debate over many years. There is an excellent contemporary description of how they were organised (page 34), which should be compulsory reading. Fortunately for the Poles, the very capable Ottoman commander, Iskander Pasha, was later killed, and his replacements were not nearly as competent. 

Both military systems are covered. The Polish-Lithuanian forces included the classic indigenous units of the Polish army, including winged hussars and cossacks, as well as mercenary units in the western style, Reiters and infantry. Cossacks were mostly foot during this period; their horse were akin to dragoons, and their boats raided as far as Constantinople. Polish recruiters travelled Europe, including Britain, and a small contingent of Irish, Scots and English fought in the campaign. The Polish envoy remarked, 'Irish are best, as they are tough and good Catholics; Scots are also tough but they are really serious heretics.' I was surprised about the high proportion of hussars, although we must be cautious about the difference between paper strength and reality. In total, about 25,000 troops were available to the Polish commander. 

The Ottoman numbers are even less reliable. One Polish chronicler claimed 500,000 men accompanied Sultan Osman II on this campaign. The author plumps for around 60,000, but he carefully explores the sources so you can make up your own mind. They included all the classic types, primarily provincial sipahi, Kapikulu cavalry, Janissaries and Tartars. There was also a significant Moldavian and Wallachian contingent.

The Poles assembled their forces for the campaign and advanced into Moldavia. They crossed the Dniester River and established their camp at Khotyn. The position was defensible, with a castle on one flank. The Poles started to dig in with field fortifications when they were attacked. The Ottomans concentrated on the weaker flank held by the cossacks and built their own bridge over the river to threaten the Polish supply lines. German officers with the Poles were very impressed with the Ottoman bridge. Ottoman military engineering is worth further study. 

The rest of the book is a daily campaign diary; as the Ottomans attacked, the Poles sortied out in a battle that raged for over a month. In the end, a treaty was negotiated that allowed the Polish forces to withdraw back to Poland. It may not have been a great victory, but it did halt Ottoman expansion into Poland. Losses are contested, but there were probably around 20,000 on each side.

This is an excellent description of the campaign and warfare generally on this front. It is well illustrated with colour plates of the main troop types. Diaries give a personal view of the fighting alongside the strategic factors.

I dusted down my 28mm Polish and Ottoman forces for a couple of games of Pikeman's Lament last weekend. The Poles came out best in both games, mainly due to the charging power of the winged hussars. Although I was playing the Ottomans, the hussars are a lovely wargame unit.


Thursday, 28 September 2023

Lion Let Loose

 This is the latest in my Nigel Tranter bedtime re-read. It covers the reign of James I of Scotland, not to be confused with James I of England, who was also James VI of Scotland. OK, you can be confused!

Not one of Scotland's better-known kings, James I was born in 1394 and was King of Scots from 1406 until his assassination in 1437. 

His father, Robert III, was ailing, and the real power in the country, the Duke of Albany, had James' brother and heir killed. He was hidden on the Bass Rock in the Firth of Forth for his safety and then sent to France. However, his ship was captured by English pirates, and he was held in captivity in England by Henry IV and then his more famous son, Henry V. His captivity lasted 18 years.

This was the tail end of the Hundred Years War, in which the Scots allied with the French. This was primarily to keep the English monarchs busy in France rather than invading Scotland. Significant Scots forces were sent to France and had an important victory against the Duke of Clarence at the Battle of Baugé in 1421. James accompanied Henry V in some of his later campaigns in France, which put the monarch in a difficult position. He also provided an English wife, Joan Beaufort, a cousin of the future Henry VI.

After Henry's death, James was released for a hefty ransom. Not that he was welcomed back to Scotland by the Albany faction. Tranter, not for the first time, takes a sympathetic view of James I's actions on his return. Tranter portrays his savage destruction of the Albany faction and his Inverness Parliament, which at least partially tamed the Highlands, as a reluctant response. Modern historians are less positive. In fairness, medieval Scotland was a tough country to rule, with internal treachery, the English over the border and the Highlands semi-detached. 

James was assassinated in 1437 by the relatives of the Albany faction. However, they failed to capture and kill his son and were later caught and executed. So, the Stewarts continued on the throne.

Perhaps not one of the most gripping of Tranter's novels. The long period of captivity, more like house arrest, is challenging to turn into good historical fiction. However, it picks up in the latter parts of the book.

Typical Scots infantry sent to France during the Hundred Years War.


Monday, 25 September 2023

Air Campaign: Korea 1950-53

 This is a new Osprey book by Michael Napier covering the strategic bombing campaign in the Korean War. Timely, as I am planning to add the air warfare dimension to my Korean War project, using Blood Red Skies and the new Wing Commander supplement. It's on my Partisan show list.


Air power was crucial in shaping the Korean War battlefield and applying strategic pressure to North Korea and China. This book describes the strategic employment of air power by the United Nations Command (UNC). While this book covers strategic bombing, the limited theatre of operations meant that strategic and tactical operations could be blurred. 

Several features of North Korea made bombing challenging. The flying weather is often poor in the summer, so October to March was ideal. The railway system was a key target, but it was designed by the Japanese builders to be more robust. North Korean engineers were also good at quickly repairing damage, as this was the primary method of moving supplies to the front. Bombing bridges is, in any case, a challenging target, made especially difficult with the crosswinds, even in winter. 

The US Far East Air Force led the bombing campaign with their B-29s, operating mainly from Japan. They were initially unopposed other than a handful of Yak-9s. However, introducing Soviet Mig-15s forced the bombers to fly higher and switch to night bombing with less accuracy. The Soviets had experienced pilots dressed in North Korean uniforms, and their regiments were rotated through the theatre. Chinese pilots, in contrast, were inexperienced and quickly withdrawn. US Fighter escorts were added using the F-84 Thunderjets, and when these proved ineffective, the F-86 Sabre. The F-84 was switched to ground attack in formations as large as 60 aircraft.

Tactically, there were similar disagreements to the Normandy campaign of WW2. The air force objected to being used in close support missions, and there were political restrictions on bombing China or the Soviet Union. Both sides were trying to avoid escalating the war. This meant much of the fighting occurred near the North Korean airfields, in an area known as 'Mig Alley'. The air force eventually ran out of industrial targets and switched to military training facilities. There were also attacks on the dams that drove hydro-power stations, deploying naval aircraft from carriers.

Overall, the bombing campaign had mixed results. As North Korea could call on China and the Soviet Union, the destruction of its industry didn't have the same impact as the bombing campaign against Germany in WW2. Thanks to its breadth and complexity, North Korea could also repair its supply networks.

The author highlights five lessons to be learnt from the strategic bombing of North Korea:

1. A World War II-style bombing campaign against a partially industrialised economy is unlikely to prove decisive.

2. Interdiction against a wide and complex resupply system routed through difficult terrain requires massive force numbers to be effective.

3. Neither strategic bombing nor interdiction can be fully effective if much of the enemy industrial base or source of resupply exists in a neighbouring country where it cannot be attacked.

4. It is essential to deny the enemy the opportunity to operate its aircraft freely within its own borders.

5. The ingenuity and ability of the enemy to repair damaged infrastructure must never be underestimated.

It might be argued that all five lessons had to be relearned during the Vietnam War in the subsequent decade.

This book has all the elements you would expect from the Osprey series. Concise text, plenty of period illustrations, good maps and colour plates. It is a really useful addition to the Korean War library.

Saturday, 16 September 2023

British Destroyers 1892-1918

 This book is by Jim Crossley in the Osprey New Vanguard series, looks at the development of Royal Navy destroyers in the period up to the First World War. This is a period of naval warfare I know little about and is an introduction to my HMS Ambuscade project.


HMS Ambuscade, in this period, was an Acasta-class destroyer. This appears to be a step up from the previous frigate status, although destroyers were only introduced into the world's navies in the 1880s. However, everything is relative because the HMS Ambuscade we are planning to bring back to the Clyde is a Type 21 frigate and is over 100 feet longer than the WW1 Ambuscade. The size of a modern frigate was brought home to me when I visited Portsmouth in the summer. HMS Iron Duke was in port, and I was astonished to discover this large warship was a frigate.

Destroyers in this period were developed in reaction to the torpedo menace. Here, a bit of Balkan history slips in because the Imperial Russian Navy were one of the first to launch torpedoes at the Ottoman Navy in 1878, sinking a small gunboat. The Royal Navy called their early vessels Torpedo-Boat Destroyers until 1919. The early classes were small ships able to sneak into harbours and launch torpedoes at short range. The development of the 18-inch and then 21-inch torpedoes meant the destroyer could be used with the battlefleets at sea. In theory, attacking at up to 10,000 yards, although in practice, there was little chance of hitting anything at that range.

As the type developed, they got bigger, with the Tribal class at up to 290ft long, setting the standard for future generations of destroyers. Still a lot smaller than modern frigates. The Acasta class was renamed K-Class in 1912 before HMS Ambuscade was launched in January 1913. These ships were 267ft long armed with three 4in guns, one 2pdr gun and two 21in torpedoes. They had a speed of 31 knots. The Royal Navy gave their destroyers a powerful gun armament, which paid off in actions against German destroyers who relied heavily on torpedoes. 

Tactically, the challenge for a destroyer serving with the fleet was to get close enough to the larger enemy ships without being blown out of the water. There were two options. Steer towards the last shell or turn violently when you see the enemy gun flash. German battlecruisers were also well protected against torpedoes, even if you could hit one in battle conditions. The British fired 96 at Jutland and scored six hits. One of those came from HMS Ambuscade. I had thought boarding actions were consigned to the Napoleonic wars, but the author describes a Dover Patrol action when HMS Swift rammed a German ship, and a boarding action commenced.

In conclusion, destroyers made an important contribution to the development of the Royal Navy, but it did not end the era of the big-gun warship as the Germans had hoped. This book has all the technical specifications, lovely colour plates, and plenty of illustrations. All you need for an introduction to the period.

I managed to get this postcard in the Rotary Photo series recently. On the left is George V, and on the right is Admiral Jellicoe.


Friday, 15 September 2023

The Flowers of Chivalry

 The Bruce is dead, and a child king is on the throne. It was one of the most dangerous times, internally and externally, for any medieval kingdom. This is the setting for Flowers of Chivalry, the latest in my bedtime Nigel Tranter re-reading project.

In this book, Tranter returns to a favourite technique of telling the story through a lesser-known figure close to the main action, often from his Lothian home. In this case, Sir Alexander Ramsay of Dalwolsey a local noble who was one of the more effective Scots knights of the period. Having a child king is less dangerous when there is a strong Regent. However, the book starts with the death of Thomas Randolph, Earl of Moray, one of the last living close comrades of Robert the Bruce.

David II succeeded to the throne at the age of five. After Moray's death, Scotland was ruled by a series of less-than-effective regents. Edward III took advantage of this by invading and putting Edward Baliol on the throne. He put his governor in charge when he failed to counter the inevitable insurgency. Following the English victory at the Battle of Halidon Hill in 1333, David was evacuated to France, where he remained in exile until it was safe for him to return to Scotland in 1341.

The book covers the period up to his return in 1341 when he took back the throne. Although the wars with England continued, they merged with the Hundred Years War. Scotland was allied to France, and at least the fighting on the continent distracted Edward III long enough to give Scotland the occasional breathing space.

This is a lesser-known period of Scottish history, told in the typical Tranter style. Ramsay arguably did the most with Sir William Douglas to save David's throne and keep Scotland independent. There were a few set-piece battles, but again, this was a period of small wars well suited to refighting on the tabletop with rules like Lion Rampant.

Some of my 28mm Scottish infantry of the period


Thursday, 14 September 2023

HMS Ambuscade

I will shortly start a new writing project about Royal Navy ships called HMS Ambuscade. I am a member of the Advisory Group for the Clyde Naval Heritage charity, planning to bring the latest vessel of that name, a Type 21 frigate, back to the Clyde where it was built. This HMS Ambuscade served in the Falklands War and was later sold to Pakistan. The Pakistan Navy has kindly agreed to donate the ship; we just have to get it home!

So, I am writing a history of the ship with all profits donated to the charity. The first HMS Ambuscade was a 40-gun fifth-rate frigate of the Royal Navy. She was formerly the French Embuscade, launched in 1745 at Le Havre and captured by HMS Defiance in April 1746. Sold off in 1762. The next HMS Ambuscade was a 32-gun fifth-rate  (Amazon Class) frigate of the Royal Navy, built at Deptford in 1773. It fought in the American Revolution and captured an American and a French brig and a French privateer. In the Revolutionary and Napoleonic Wars, she captured a French privateer, a chasse maree and a merchant ship before being captured herself in 1798. Serving in the French Navy as Embuscade. She was recaptured by HMS Victory in 1803 and served in the Mediterranean. She was broken up in 1810.

There were two captured frigates briefly called Ambuscade during the Napoleonic Wars, and it almost became the name of the Royal Navy's first steam-powered frigate. During the First and Second World Wars, Ambuscade was given to destroyer classes, Acasta and W-Class. One fighting at Jutland and the other serving on Arctic convoys. More on this in later posts.

I have included naval warfare in all my books but wouldn't claim to be a maritime historian. Anyone playing me at Black Seas will know of my irritation with sailing ships, which just won't go where I want them to go! So, any advice is welcome. And I will apologise now if my reading and archival research has a nautical flavour for the next few months.  

Napoleonic frigate warfare was an essential part of the story in my book, The Frontier Sea, but I had yet to read Mark Lardas' Osprey book, British Frigate v French frigate 1793-1814. To command a sailing frigate was a glorious thing. Fast and well-armed, they acted as the eyes of the battle fleet and as commerce raiders. A function that made many frigate captains rich. It was eye-opening when I poured over the Malta court records to see how much cash was involved in prize money. 


French naval architects led the way in ship design, and the British caught up initially by copying them. Frigates got progressively larger as the war progressed, regarding sails and armament. While the British carronade, made in Falkirk, gave the British an advantage at short range, the French copied that with their designs. British frigates were by 1800 some of the finest sailing ships in the world, and coupled with experienced officers and crew, were rarely beaten. The reasons for this advantage are explained in the book, along with excellent graphics. 

Mark finishes with several examples of frigate combat. This helpfully, from my point of view,  includes Ambuscade v Baionnaise in December 1798. Sadly, for my story, this was one of the few French victories achieved by boarding. Baionnaise had extra soldiers on board returning from the West Indies. It was the only ship-to-ship action won by an inferior French warship during the Napoleonic wars. 

Apart from that unfortunate outcome, this is an excellent starting point for understanding frigate warfare during the Napoleonic Wars.

This is a painting of the action. One of many lovely paintings of naval warfare during the conflict.


Tuesday, 5 September 2023

The Battle for History

 I was listening to Gary Sheffield's podcast on his former colleague at Sandhurst, John Keegan. Most famous for his book The Face of Battle. The following day I was browsing through our local Oxfam bookshop and spotted a book of his I hadn't read, The Battle for History: Re-Fighting World War Two.


This is a slim volume, published in 1995, essentially a historiography of the Second World War. The problem with historiography is that it quickly becomes dated, so he covers the classics. He starts by describing some of the significant controversies, not least the causes of the war. Much of this takes me back to my A-level history course on this subject. Keegan is somewhat more critical of A.J.P. Taylor than my teachers were. 


He is kinder to Churchill than most histories today, particularly over Greece, less over his Mediterranean strategy, but he was part of the wartime generation. There is a schoolboy error referencing the Ionian Islands rather than the Dodecanese, which I hope was addressed in subsequent editions. However, I'm not convinced there is any evidence that Hitler was planning on invading Turkey in 1941. In fact, he went out of his way to negotiate a non-aggression treaty. Keegan concludes that Turkey may be regarded as the most successful neutral of WW2. I'm not sure the population more generally felt they were successful given the economic hardship, but if success is measured solely by casualties, then he has a point. 


He is not uncritical of David Irving, but kinder than most historians would be today because of his holocaust denial. I'm afraid I cannot view him as 'a historian of formidable powers', given how he has perverted those apparent skills.


At least we are spared some recent revisionism regarding the war in Yugoslavia. Milan Djilas' book Wartime gets special praise 'as one of the most brilliant literary achievements of the Second World War.' It is on the Eastern Front that his analysis looks the most dated. He was writing before access to Soviet and other Eastern European archives. He also underplays the role of the Wehrmacht in atrocities in the Eastern Front and the Balkans.


His chapter on the brains and sinews of war is also a bit dated. However, even in the 1990s, the view that Germany outmatched the Allies' equipment 'in quality and arguably in size' is debatable. Most would argue it was strategy and tactics that gave Germany the edge.


It's an interesting wee tome if a bit dated. You can pick it up today for very little, which is probably just as well. As Gary Sheffield pointed out, his later works have been criticised, although that should not diminish the groundbreaking work of The Face of Battle.


Thursday, 31 August 2023

Strength and Honour

 These are the new rules by Mark Backhouse for fighting the epic big battles of the ancient world. I played these at Partizan in a refight of Cannae. The outcome of using Hannibal's tactics was historical, and it was the first time I felt this classic battle had been faithfully reproduced on the tabletop. The downsize (pun intended) is that the game is designed to be played with micro armies (typically 2mm). My experience of playing 3mm WW2 games has not previously encouraged me in this direction. However, here, the unit blocks are placed on a large base, which is easy to identify and label.

So, I bought the rules and a batch of figures from Antonine Miniatures (Warbases). My first matching armies were the Dacians and Romans. At this scale, the Dacians will do for almost any warband army of the period. I also bought some pike blocks intending to do some of Alexander's early battles as well.


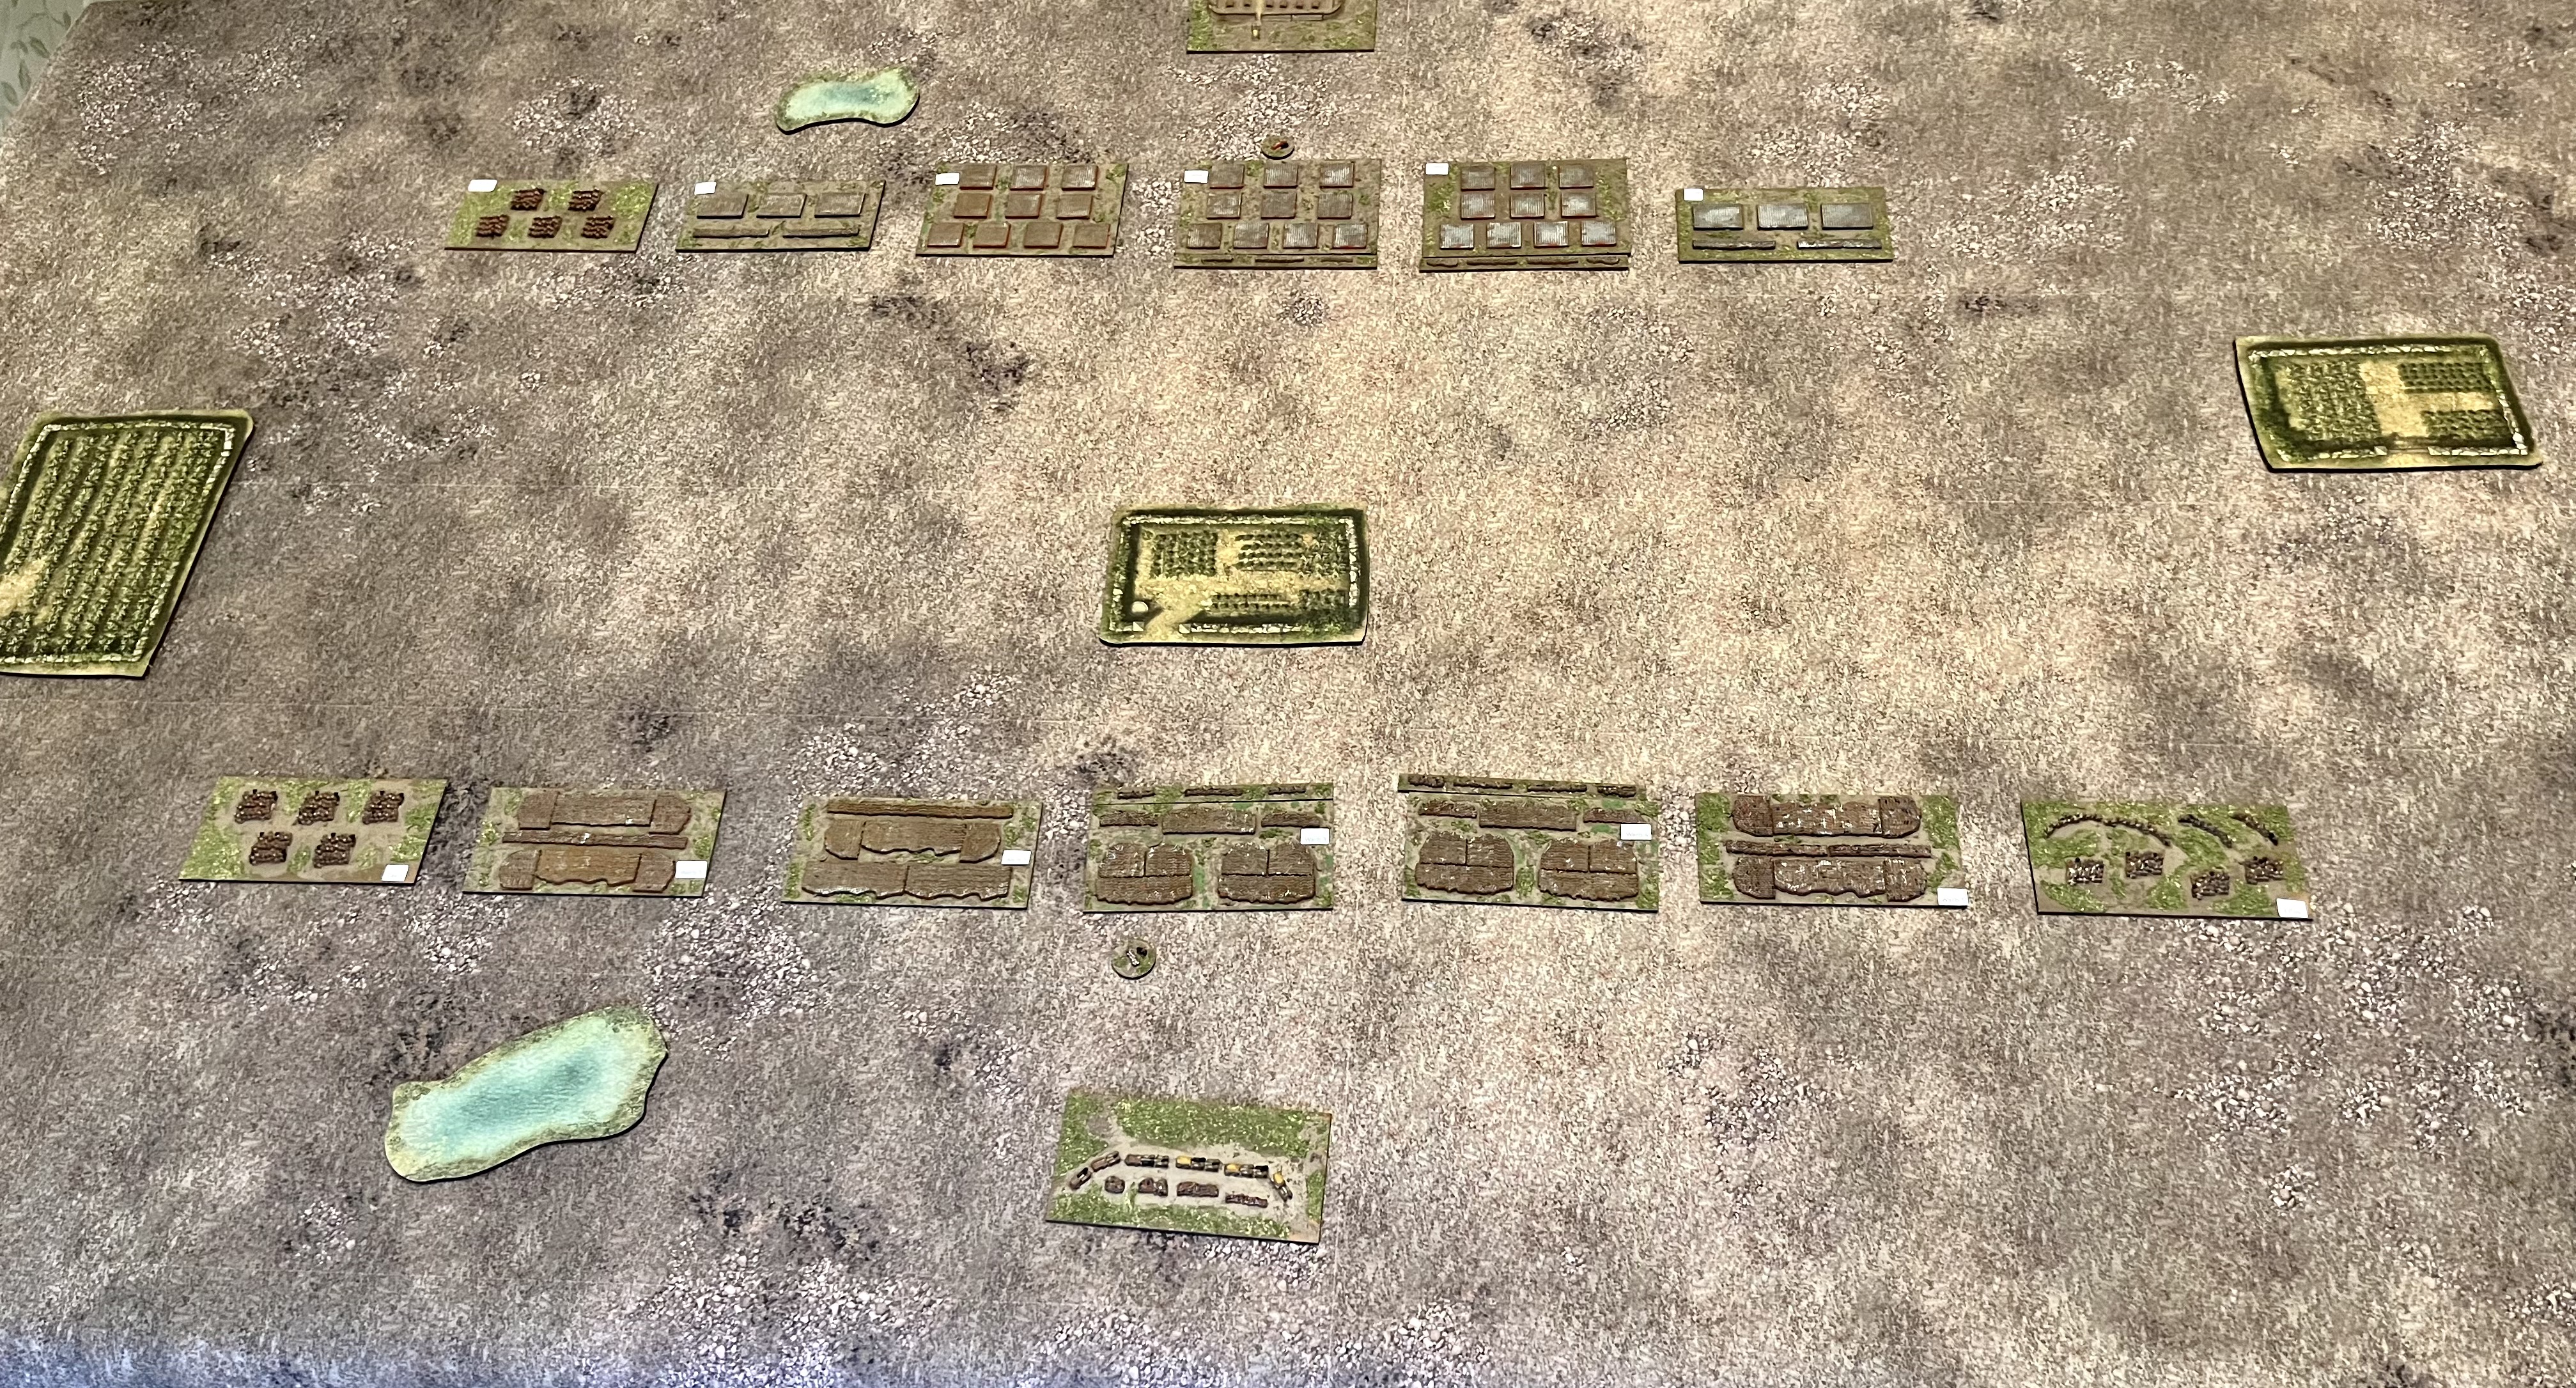
This was the first batch of painting. I glued the metal blocks onto the bases, which are standard and a little deeper for the Roman legions. The warbands looking suitably irregular and the Roman ten cohort legion supported by auxiliaries. After priming them in brown I painted the legions in red around the edges and the auxiliaries in blue. Then dry brushed the helmets with a few crests for officers. The Dacians got dabbed a range of colours. Then a fine sandy base mix, followed by a green foilage mix. 

The same approach for the second batch, which includes cavalry, two camps and skirmishers. I also bought some scenery pieces from Warbases.


On to the tabletop, meant reading the rules. Much helped by my memory of the participation game at Partizan. Everything you need is in the nicely laid out booklet, plus a downloaded QRF and command board from the Two Fat Lardies site. The game is played on a grid, typically 75mm, so I used my 150mm To the Strongest mat.


You dice for command points and allocate them to the command board. I'm embarrassed to say we largely forgot to use these, but they give various benefits, although you can only use a point once. It doesnt seem to overpower the game as sometimes happens in other rules. 

The key mechanism is activation, which includes movement, combat, charge, shooting and reform. A roll on a D6 means variable movement, which, as I discovered, makes it difficult to keep a neat battle line. This matters as isolated units can come up against supported enemies. Manoevre, which means anything other than straight ahead also has to be diced for and failure means the end of your turn. So, do it last. It also discourages unhistorical dashing about the tabletop, which is all too common in osome other rules.

Combat and shooting is straightforward, based on a unit combat factor with typical modifiers. If you lose then the combat result table can result in a pushback or worse. You are also likely to attract setback or disaster cards which are drawn from a pile and placed face down. These have numbers which added together can reach the break point for the army. We didn't reach that when we had to call it a night, but my Dacians were losing heavily. Never mind, wait till the Romans get into the mountains!


The book has army lists and scenarios as well as some basic campaign rules. Overall, we had a good game and will certainly return to these for when the big battle itch has to be scratched.

Tuesday, 29 August 2023

Turkey and the Second World War - A Wargamers Guide

In the first draft of my book, Chasing the Soft Underbelly: Turkey and the Second World War (Helion 2023), I wrote an appendix on wargaming the actual and potential campaigns in the book. However, space precluded its inclusion in the book; in any case, I felt it didn’t do the subject justice. For that reason, I have written a booklet to supplement the detailed history in the book.


This booklet offers a new army and campaigns for Second World War gamers looking for something different. We all love the Western Desert, the Steppes of Russia or the Normandy bocage, but there is another world out there to embrace!

It explains why and how Turkey was involved in the Second World War. How the armed forces were organised, and what you need to model them on the tabletop. The vehicles, tanks, artillery and aircraft come straight out of the lists for the main combatants. Infantry requires a little effort, but this can be done relatively cheaply, particularly in smaller scales. The Turks could have fought most belligerents, so opponents will already be in the collections of many gamers. Germans can invade Turkey during Operation Gertrud, and Russians can do the same from the north at Batumi. These are both actual plans, prepared but not delivered. However, I also indulge in a bit of alternative history, which is the wargamers licence.

The organisation and doctrine of the Turkish armed forces are outlined, along with army lists for some of the most popular WW2 rules. There are eleven scenarios to get you started, with maps and illustrations from my collection. Turkey’s strategic position offers battles in European Thrace, the Caucasus mountains, or the sands of the Middle East. Something for everyone. That includes naval and air warfare scenarios.

Each of the eleven scenarios gives the historical background, the orders of battle, objectives and a tabletop map. I conclude each scenario with an analysis of what might have happened.

This is from the Operation Hercules scenario - the invasion of Rhodes.

When writing history books, there are legitimate constraints when you stretch away from actual events. So, I enjoyed the freedom writing this booklet gives. It is a good value (just a fiver) PDF download because I accept this is a niche interest, and in full colour, it would be prohibitively expensive to do a print version. 

This is the contents page, and you can get a copy here.


Friday, 25 August 2023

Wing Commander

 Wing Commander is a compendium or supplement to Warlord's Blood Red Skies game of air warfare. This is my go-to set of air warfare rules at present, with a nice balance of playability.

The game designer Andy Chambers has brought together some of his favourite material created by players. A chunk of this material comes from the guys who produce the Lead Pursuit podcast, which I occasionally listen to. Episode 109 covers Wing Commander. They also appear to run a series of games at conventions in the USA.


The booklet starts with a chapter on tactical tips for beginners, which I found very useful. This is followed by a solo enemy flowchart that I will have a go at as the game is not played at my club. There is a short, simple campaign for carrier battles based on the Pacific in 1942. It's not my gig, but it could be adapted.


The book arrived just as I wrote an air warfare scenario for my forthcoming wargamers guide to Turkey and the Second World War. I used the bomber escort scenario in the main rules, but the amendments here are a definite improvement. In particular, 'The bombers move last' rule helps keep bombers in historical formations. 


There are several scenarios for the Korean War, one of my current projects, so that I will give this a go. As short-range air-to-air missiles began to be introduced in this period, there are some rules and a scenario. Stretching the rules a bit further is a chapter on the 1965 Indo-Pakistan War, a conflict I have done the ground war for and fancy trying the air war. Warlord doesn't do models yet for this, but there are 1/200 manufacturers who do: Hawker Hunter, Folland Gnat and Mig-21s, amongst other aircraft types.


The largest chapter is a campaign system. I probably won't do this, but it looks well-designed and allows the player to tailor the level of depth they want to get into. The aircraft availability chart for WW2 is a standout piece of research. There are also stats for every aircraft that fought in the period covered by the rules, which allows the deployment of models not in the Warlord range. 


Finally, a helpful FAQ chapter and errata pages for the main rules. Sadly, it is a requirement for many Warlord products. 


You will want a copy of this if you are a Blood Red Skies player. They are nicely laid out with plenty of eye-candy inspiration as well.


Some of my models and the main game aids.


Thursday, 24 August 2023

High Tide in the Korean War

 This book by Leo Barron tells the story of the US 23rd Infantry Regiment at the Battle of Chipyong-ni in the Korean War. I have been dabbling in the Korean War and spotted this in my local library. Although the Turkish contingent was not directly involved in this battle, it is an excellent study of a unit level action in this conflict.


Allowing for the author's hype, it is a remarkable story of how a single US regiment, with an attached French battalion, fought off several Chinese divisions near the Han River in February 1951. This was just after Matthew Ridgeway took over command of the US Eighth Army with his more aggressive strategy.

The 23rd Infantry regiment was undermanned and underequipped like most of the US Army at the start of the Korean War. Post-WW2 cuts affected all the armed services, and this regiment was no exception, calling on volunteers from other units to make up the numbers. The US Army had decided that anti-tank guns had failed in WW2 and were replaced with Sherman tanks. I hadn't appreciated this fact, and frankly surprised, but any excuse to get armour on the table. The Chinese Air Force was not a significant threat to ground troops, so the quad AAs on the M16s were used in the ground support role. They also had a battery of 155mm howitzers, a combat engineer company and a Ranger company. The flexibility of the US Army structure was evident in this operation.

The regiment was sent on a probing operation to find the Chinese army, exposing it to mountainous terrain with only one road to their target. They dug in on a couple of hills, and the Chinese sent waves of troops against them. They were aiming for a critical road junction behind the position. 

Much of the book covers very similar actions, which can get a bit repetitive once you have read a couple. The Chinese attacked at night, and the emplaced American and French troops gunned them down, causing horrendous casualties. Brave does not begin to describe these mostly frontal attacks. When US aircraft could fly ground attack missions, they also caused heavy casualties with napalm, breaking the back of several assaults.

You can pick out some operational details that will interest wargamers. For example, Chinese mortars were very accurate. As one rifleman said, 'Those bastards could drop a 60mm mortar on a dime and get change.' My mortars rarely hit anything on the tabletop! Close air support was deadly, and after reading some of the descriptions, I won't be complaining about their effectiveness again. Grenades were also favoured over rifles, partially because, at night, rifle fire was easy to spot. The Thompson sub-machine was unpopular because it was too easy to spot. The Chinese also used satchel charges on the end of poles, which were dropped into foxholes.

It may be a cliche, but the 23rd was relieved by the cavalry. In this case, the 5th Cavalry fought its way up the road and over the surrounding hills. In Korea, the best commanders learned that you always took the high ground. Although the cavalry, organisationally, was an infantry regiment with armoured support. However, the infantry rode on the tanks in all but the forward echelons. After this battle, the initiative shifted back to the UN forces, although the war quickly ground to a halt before an armistice was eventually agreed.

If you want to understand how units deployed and fought in the Korean War, this book is for you. Lots of detail, and you can skip over the repetitive bits. Many thanks, as usual, to my local library. Long may they continue!

One of my recent Korean War games


Tuesday, 22 August 2023

The Bruce Trilogy

 I have been a bit slow recently with my chronological Nigel Tranter re-reading project. In part, although this book covers some of the most stirring events in Scottish history, it is also three books and over 1,000 pages. 


The first book, The Steps to a Vacant Throne, deals with the period before Robert became King of Scots. Note, not King of Scotland, an important Scottish monarchial difference. Tranter takes a sympathetic approach to Robert's actions in this period, which, while conceding that he supported Edward I against the Scots, also has him as a supporter of Wallace. He even has him rescuing Wallace at the Battle of Falkirk. This history is contested, and some chroniclers have him fighting on Edward's side in this battle. On balance, he was probably not present on either side. Modern nationalism played no part in these struggles, as the landed elite in both countries (outwith the Highlands) largely came from the same Norman stock.

The second book, The Path of the Hero King, covers his accession to the throne after murdering his rival, Comyn in Dumfries church. He was caught napping in the Battle of Methven and was forced to flee to the Isles. Tranter doesn't avoid his romantic interlude with Christina of the Isles while his wife and family were imprisoned by Edward. She is a character in her own right, and I highly recommend a visit to her Castle Tioram in Moidart.


Robert rebuilt his strength with the notable support of the Lord of the Isles and began a comeback on the mainland. He fought a series of small battles against the occupying forces culminating in the Battle of Loudoun Hill (not far from me). Edward was in the process of another massive invasion when he died. Edward II was not the warrior his father was but was eventually provoked into another invasion, culminating in the Battle of Bannockburn.

Even for most Scots that was the end of the story. However, Tranter rightly covers the post-Bannockburn period in detail in the third book, The Price of the King's Peace. Edward II refused to agree to a peace treaty, despite his problems at home with his own nobles. The Scots raided deep into England, effectively annexing swathes of the border regions to Scotland. There was also a less than effective campaign in Ireland led by Robert's impetuous brother Edward Bruce. Peace was finally agreed after Edward II's death.

For the wargamer, there is an understandable focus on the large battles, particularly Bannockburn. My own club, GDWS, did this battle on the large scale as a display game at Carronade in 2014. However, this battle was the exception. Tranter brilliantly captures the skirmishes, small battles and raiding that dominated warfare during this period. Lion Rampant is an ideal set of rules for this warfare, and I dusted down some of my Bannockburn armies for a game last weekend. Naval warfare was also important, along with amphibious landings. 


Islesmen get stuck into English bowmen.

This trilogy rates as one of Tranter's best. The history may not be perfect, but it's a cracking read.