Welcome to my blog!

News from a wargamer with a special interest in the military history of the Balkans. It mainly covers my current reading and wargaming projects. For more detail you can visit the web sites I edit - Balkan Military History and Glasgow & District Wargaming Society. Or follow me on Twitter @Balkan_Dave
or on Mastodon @balkandave@mastodon.scot, or Threads @davewatson1683

Monday 30 August 2021

The Secret War

 The Secret War is Max Hasting's look at spies, codes and guerillas, 1939-1945. Unfortunately, I missed this in my scan of books on intelligence operations and only spotted it in my local library. While discounting Hasting's political bias, he still writes cracking good history.

He takes a look at intelligence operations in a global context with plenty of comparative analysis. He has the journalist's eye for a story, which are inserted effectively into the historical narrative. He argues that what matters is how secret knowledge changed outcomes and is pretty sceptical about the outcomes for the amount of effort expended. There are several examples of how carefully collected intelligence could have been sourced from newspapers and academic journals.

He sometimes goes a bit too far with this and allows his political views to colour the analysis. I have studied the Allied deception operations in the Mediterranean in some depth, including the primary documents. He rightly points to the success of Operation Zeppelin in keeping Axis divisions in the Balkans rather than waiting in Normandy. However, it is going too far to suggest that Tito's partisan operations didn't make a significant contribution. In fairness, he does give credit to some of the Soviet deception operations that are less well known to Western readers. His scepticism of guerilla operations also extends to France and other parts of occupied Europe. They were more important for morale than military outcomes.

As a consequence of recent films and other publicity, we now tend to focus on Ultra and perhaps less on the codebreakers who worked on other signals intelligence. The Allies placed a lot of effort on this compared to the Axis use of human intelligence. I liked the story of Abwehr agents using the fixture list of an ICI plant's football team to identify chemical plants the Luftwaffe were not aware of. That is not to say that the Germans didn't have their signals intelligence successes, including British naval codes and were particularly good at signals interception. It was yet again the division of effort among many agencies and how the data was used that mattered.

Hasting's is particularly scathing about the Foreign Office's contribution. The naivete of Ambassadors and their guests and servants is astonishing. The Cicero case in Ankara is a good example of this. I was watching the Turkish TV film take on this story last week. Sadly, this is historical mince, like previous film efforts, but still an entertaining view. What I didn't know was that this wasn't the first time the British embassy had been penetrated, with the ambassador being forced to sack his previous valet. Spies in neutral states also often took cash from several sides.

There are some good stories about fantastic SOE schemes. To give a topical example, in 1942, SOE proposed agents should be dispatched to rally Afghan tribes on a prospective German line of advance to India. Internal squabbles and empire-building damaged the effectiveness of some agencies. I was aware of this as an issue within the German structures, but Hastings also documents the clash between the FBI and OSS.

This is not a quick read (nearly 600 pages) as Hasting's covers a lot of ground. However, it is eminently readable compared to many other studies of this subject I have ploughed through.
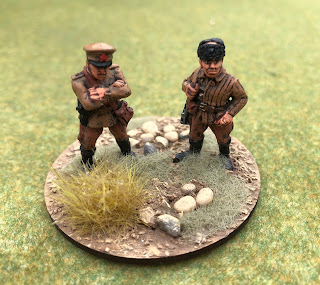
A partisan commissar, just to upset the author!


Friday 27 August 2021

Trimontium - The Romans in Scotland

 It was my turn this week to choose the venue for our weekly day out. I choose Melrose in the Scottish Borders as it has plenty for my wife to see and has a new museum on the Roman fort just outside the town, Trimontium.

The Roman invasion of Scotland or Caledonia started in 79AD. After five years, they had defeated the tribes but never succeeded in turning the country into a proper Roman province. Trimontium (the place of the three hills) was in a key position on a natural mound above the River Tweed, and later the Romans built a road that linked the fort to Hadrians Wall and their main base at York. The garrison comprised around 500 cavalry, a fast reaction force able to respond to any threat in the area. The Trimontium Trust publishes a pamphlet that explains the history and how the fort was built. The local tribes included the Votadini and the Selgovae, and they occupied the nearby Eildon Hills and what is today Melrose. The Romans abandoned the site in the early 3rd century.

The small exhibition is based in the town centre and includes state of the art visual aids to explain the Roman presence and how such a fort operated. It includes some of the finds from excavations at the site, primarily the work of James Curle between 1905 and 1910. He published a book on his finds, which can be read online.


There is not much to see at the site of the fort. Air photography has identified around nine temporary camps as well as the permanent camp.


Melrose is a typical pleasant border town, an area often overlooked by tourists heading for the capital or the Highlands. It also has an abbey, which is worth a look.


Also nearby is Abbotsford House. I included this in our itinerary for the gardens to keep my wife happy. This was the home of the great Scottish author Sir Walter Scott (Ivanhoe, Rob Roy et al.) I expected the excellent library, useful if only to tell my wife how much larger my own library could be!


Although my wife is not convinced, I didn't realise that he had an amazing collection of weapons in his armoury. This includes a musket owned by Rob Roy and a wide range of swords and firearms worldwide. Scott died in 1832, so these are early and very rare pieces.

The Indian gauntlet swords are particularly interesting.

Rob Roy's musket is the second from the bottom.

It's a bit of a drag from my side of the country to get to Melrose on abysmal borders roads, but worth the effort.


Wednesday 25 August 2021

The Luftwaffe in the Mediterranean

 Two for one in reviews this week. I felt my understanding of Luftwaffe air operations in the eastern Mediterranean was a bit of a gap in my research. So, a couple of Osprey's on my 'to read' shelf helped plug the gap.

The first is John Weal's, Junkers Ju 87, Stukageschwader of North Africa and the Mediterranean (Osprey Combat Aircraft 8). 

Ever since my Airfix kit days as a lad, I have liked the Stuka. It enjoyed a fearsome reputation early in the war, but the myth was shattered in the early stages of the Battle of Britain when its slow speed made it vulnerable to modern fighters. Even ground troops in the desert learned that however frightening, the chances of being hit during an attack were slim. 

The units despatched to the Mediterranean had a new lease of life in the anti-shipping role. The aircraft carrier Illustrious was an early casualty of their pinpoint accuracy, followed by the cruisers, Southampton and Gloucester. The Italian Air Force also deployed the Stuka, called the Picchiatelli. Squadrons were deployed in Albania and Greece as well as in the anti-shipping role.

After Operation Crusader, Allied air strength was on a par with the Axis, which meant the writing was on the wall for Stuka. Air superiority made all the difference, and even ground troops realised they could bring them down with rifle and machine-gun fire. "It gave men courage to stand and fire back at the Stukas, and when they did so they found they could bring them down. I once saw 25 Stukas stage a ten-minute raid and wound one man in the leg. We calculated that leg-wound had cost Hitler all of £50,000."

The Stuka had a brief renaissance during the Dodecannese campaign because the Allies had limited air cover. But, even then, they lost 16 aircraft to a single P-38 sortie.

In this book, you get a narrative of each campaign, profusely illustrated and a fine collection of colour plates.

Luftwaffe fighter units in the Mediterranean were almost always equipped with the Messerschmitt BF109 in its various marks. This aircraft doesn't have quite the same cachet for me, and it was apparently tricky to fly as well. Nonetheless, the design was remarkably resilient, and with upgrades served throughout the war in this region.

Christopher Shores' Luftwaffe Fighter Units, Mediterranean 1941-44 is a smaller book but covers all the campaigns with many period photographs and enough colour plates for the wargamer. One story in the book that I had forgotten was the shooting down of a Bristol Bombay transport aircraft in August 1942. The passengers included General William Gott, who had been appointed as successor to Auchinleck as commander of the Eighth Army. His death led to the appointment of Montgomery in his place, and the rest, as they say, is history.

I tend to find air warfare history a bit monotonous, but these are well written and did the job for me.

These 1/100 die-cast models save the kit building for my WW2 games in 15mm.


And as a postscript, I got some WW2 painting done this week. Most of my Bolt Action opponents have late-war armies, whereas mine are mostly early war. So, I remembered I had a few Warlord sprues that came with Wargames Illustrated. Some grim-looking Grenadiers will do for a start. 


Tuesday 24 August 2021

A Napoleonic invasion of Ottoman Turkey

A couple of threads got me thinking about the prospects of a successful invasion of the Ottoman Empire during the Napoleonic period.

Jonathan Spencer's fictional trilogy set during the run-up to Napoleon's Egyptian expedition reminded me that Britain did not know the final destination of the fleet assembled in the ports of southern France. The options included a sweep north to invade Britain, Naples, Sicily, Istanbul, or Constantinople as the western powers still described the city.

I was also doing some research in the National Archives. I came across a massive drawing by George Pink, completed in 1799, of the castle at Kelletbahar, which appears to be the English spelling of Kilitbahir, one of the castles defending the Dardanelles. 


William Wittman, in his book ‘Travels in Turkey, Asia-Minor, Syria, and Across the Desert Into Egypt During the Years 1799, 1800, and 1801, in Company with the Turkish Army, and the British Military Mission’(London, 1803), spells it this way. The plan is interesting in that it is a plan of the castle and projects a new fortress on the heights above the castle. He was a Royal Artillery doctor serving with a military mission to the Army of the Grand Vizier. This mission was part of the British support to the Ottoman Empire that ended with the successful Egyptian campaign of 1801. I hadn't realised that the British advisers, including Colonel Holloway, had been with the Ottoman army for a couple of years before that campaign.


His book understandably focuses on medical aspects. In the irritating habit of British officers of the period, there was more commentary on food and who they met than military matters! On the subject of fortifications, he gives us the less than helpful comment; “They have an ancient proverb which says, that ‘it beholds the infidel to build, and to mussulmen to take them’. He suggests that this may once have been true, but not in the current state of the Turkish empire. However, he is much more complimentary about the Turkish Navy. He did sail with the army down the Dardanelles and was becalmed for three days in the Sea of Marmara opposite Gallipoli. They anchored at ‘Chennecally’, which I assume is modern Çanakkale, as he references the castle and surrounding area. He also mentions a survey of the four castles defending the Dardanelles undertaken by Colonel Holloway. Sadly, the author spent more time removing ancient remains near Troy, in the style of Lord Elgin, who was also in Istanbul at the time! 

From these notes, I think it is reasonable to assume that the plans in the National Archives are part of the proposals drawn up by the British to strengthen the defences of the Dardanelles. Wittman says that the Grand Vizier approved them. However, as my photograph shows, I don't recall seeing any evidence of the new fortress when I visited the site, although there are trees at the top, so I might have missed it.


While the British were assisting with the defences of Istanbul, others were suggesting ways it could be captured, although more likely by the Russians. The Prussian Major-General Baron von Valentini wrote a book ‘Military Reflections on Turkey in 1820’. I have an English translation in 1828 published by the much-missed Pallas Armata booklets in 1995. He sets out in some detail how an army of 200,000 could capture Istanbul and take much of Asia Minor. The primary force would be 50,000 strong with a detached column on the coast of 30,000. The remaining troops are for garrisons and reserves.

He proposed a direct line of march to Istanbul, containing the fortresses on the Danube and Adrianople (Edirne), supported by a naval attack from the Black sea, which would land at Scutari. He argues that the castles defending the Bosphorus could be reduced by naval fire. Wittman refers to the Turkish gunners practising with heated shot, which suggests they may have been better prepared than the Baron thought! He was not impressed by the defences of Istanbul itself, which he believed could be reduced by cutting off the water supply. His plan proposes an advance to the Sakarya River and then establishes a military border on the Austrian model. The Turkish War of Independence, some two centuries later, springs to mind when reading this plan!

So, a few interesting what-ifs in addition to the actual history. Of course, Napoleon didn't take on Istanbul and probably didn't have the naval resources to risk it. Ironically, the Russians might have followed the Baron's advice in their war against the Ottomans starting in 1808. However, Napoleon's invasion of Russian in 1812 forced them to seek a quick peace.

I have put a few more photographs on my website version of this if you want to examine the plans etc in more detail.
 

Sunday 22 August 2021

Napoleon's Run

 This is the first of a series of historical fiction books by Jonathan Spencer set in the revolutionary wars before and during Napoleon's Egypt expedition. 

Comparisons have been made with Bernard Cornwell's Sharpe series, and there is a similarity. However, our hero, Marine Lt. William John Hazzard, comes from a typical middle-class officer background, albeit not an establishment figure. He is an officer in the Bombay Marines, which reminds me of a decent series of books by Porter Hill in that setting. Long since donated to Oxfam.

The story begins during the British invasion of the Cape, which includes what Hazzard regards as a betrayal by the Admiralty. He is wounded and goes home to recover from his wounds. There is a bit of love interest that the Admiralty use to get him back into action. He recruits an unconventional unit of marines to join the fleet near Gibraltar. The French are preparing a fleet, and the Admiralty needs to find out where it is going. Hazzard and his men trek around the western Mediterranean, looking for the fleet. This includes a sojourn in Naples involving the Hamilton's and then Malta just as Napoleon and his fleet arrive. 

The author keeps fairly close to the history while inserting his leading characters. The story cracks on at a good pace with plenty of action, in a style that is reminiscent of the Sharpe books. I enjoyed this and will read the next in the series. They are currently available at an excellent price for the Kindle.

The story fits well with my recent reading around the Egypt expedition, including Stuart Reid's new book of the slightly later British intervention. Unfortunately, the revolutionary wars are often overlooked in favour of the later Napoleonic campaigns, which is a pity. I am also enjoying the Napoleonic Quarterly podcast, which takes the listener through the period three months at a time. The two experts have different views of the French Revolution and Napoleon, making for some interesting discussions!

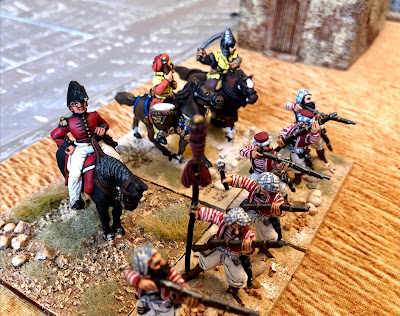
For the tabletop, I took an obscure action from Reid's book, the Battle of Belbeis. The Ottoman army was advancing on Cairo some distance from the British column. General Belliard in Cairo saw an opportunity to destroy the Turks before the British could support them. The Ottomans had around 4,500 cavalry and 5,000 Albanian infantry commanded by Tahir Pasha and Mehmet Ali Pasha. Belliard left Cairo with 4,600 infantry and 900 cavalry. After some skirmishing, he formed his troops into two large squares, a tactic the Austrians and the Russians developed when fighting the Ottomans. The usual response of the Turks was to charge the squares, but the British advisor Colonel Holloway persuaded them to use their cavalry to pin back the French skirmishers and shoot at them from a safe distance. As more Ottoman troops arrived, Belliard, running short of water and ammunition, decided to withdraw back to Cairo.

I only had room on my desert mat for one large square using my 28mm figures, but it did make for a different game. Lasalle2 rules don't allow squares to move, limiting the French tactic, although it is unclear if they changed formation to move anyway. Reid suggests that they may have done. This is tricky to replicate on the tabletop, but I will persevere. 


Colonel Holloway passing on his advice!


Friday 20 August 2021

Indo-Pakistan War of 1971

 The Indian military intervention in what was East Pakistan (now Bangladesh) is the subject of a new book by Ravi Rikhye in the Helion Asia@War series. Last year, I began a project on gaming these conflicts, starting with the 1965 war and then adding the extra units needed for the 1971 conflict. This is Volume 1, looking at the war in the east. The second volume, due out later this year, will deal with the war in the west.

Pakistan, after the partition, had the thankless task of being a country divided into two parts, separated by 1600km on land and 5,500 nautical miles by sea. The problem was exacerbated by the concentration of power in West Pakistan, which dominated the armed forces and the civil service despite the population of East Pakistan being three times larger. The east was treated as a colony resulting in an increasingly hostile population and the development of an independence movement.

Once India decided to intervene, the Pakistan Army had few strategic options available to defend the country. The limited forces were insufficient to defend a 4,000km border with India and crucially had no reserves once the thin crust was broken. A better strategy would have been to retreat to a defensible line, but this was impossible for political reasons. The Indian Army outnumbered them five to one, with better armour and almost total control of the skies. They also had the support of insurgents who provided vital intelligence.

The Indian operational plan was to advance into the country on three fronts to secure enough territory to create the political conditions for independence. Two of those fronts made steady progress, although they faced determined resistance around some strong points. The northern front made better progress than anticipated, breaking through the limited Pakistani defences, capturing the capital Dacca, which ended the war. As a result, 93,000 Pakistani troops surrendered, making this the largest surrender since WW2.

The author starts with the background and political context, which is vital to understanding the war, particularly for readers unfamiliar with the sub-continent. The garrison of East Pakistan is broken down together with an explanation of Pakistan's strategic planning, such that it was. Only 30 battalions covered 4,000km of the front, supported by just 50 Chafee light tanks and five regiments of 25pounders. India had been supporting Bengali insurgents for some time, and their units are described in detail. The Indian land, sea and air forces had not only been modernised with Soviet support since 1965, but they were able to deter any intervention from China. Political support from the Soviets was also useful in slowing any external interventions until it was too late.

Finally, the three key elements of the campaign are described in detail. Or at least in such detail as is available given the absence of official histories. The book is lavishly illustrated with period photographs, colour plates and clear maps. This is an excellent study of the war, and I look forward to the next volume.

For the wargamer, the disparity of forces might make this conflict pretty unappealing. However, the Indians didn't have it all their own way. Pakistani strong points resisted Indian attacks in several places, and these make balanced games. They made little difference to the outcome because the Indians could bypass these strong points. Even the rivers proved to be less of an obstacle, thanks to helicopters and support from the local population.

The Chafee light tanks were no match for the T55s deployed by the Indian Army.

The Indian PT76 tanks (second row) speed and amphibious qualities were more useful in East Pakistan than on other fronts.


Friday 13 August 2021

Lancashire Fusiliers

 On my way to watch some cricket at Old Trafford, I stopped off in Clitheroe to see the castle and then the Lancashire Fusiliers Museum in Bury.

The castle is a fairly modest tower built around 1186 by Robert de Lacy, but it dominates the market town and gives a great view of the surrounding area. The museum doesn't have much about the castle; the focus is on the social history of the area. The castle keep got bashed during the Civil War.


The next stop was the Lancashire Fusiliers Regimental Museum in Bury. Surprisingly, I don't think I have been here before. The regiment traces its roots back to 1688 and fought at the Boyne, Dettingen and Culloden. As the 20th Foot in the Napoleonic Wars, it was in Egypt and most of the Peninsular battles. The post-Crimean War Cardwell reforms saw the regiment move from the West Country to Bury.

One of its most famous officers was James Wolfe of Quebec fame.


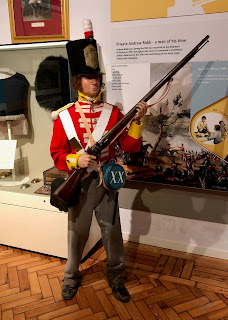
A small section on the Napoleonic Wars.


The regiment fought in the Boer War, including Spion Kop. I remember the grave trench dedicated to their losses when I visited the battlefield.


At Spion Kop the dead were buried in the inadequate trenches they scraped during the battle.

Another famous action was Gallipoli. There is an outstanding oil painting. A print of it was my purchase from the shop.


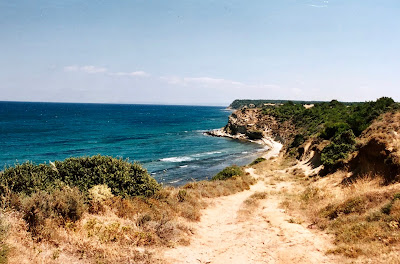
I have been to the beach where they landed at Gallipoli. It looks a good deal narrower than the painting though!

The WW2 section had a standard collection of weapons and equipment. Although I dont recall seeing a Japanese light mortar before.

In 1968 the regiment was merged with all the other fusilier regiments into the Royal Regiment of Fusiliers. The final section includes their modern roles.

Well worth a visit. Very helpful staff as well.

On the morning before the game I walked to the nearby Imperial War Museum North. I am a bit of a traditionalist when it comes to museums, and I prefer more exhibits and less audio-visual. However, I accept it is trying to attract a wider audioence than old fogies like me! My previous blog on this is here.

They do have a good selection of WW1 Balkan front exhibits.

And a board game I thankfully missed!


Tuesday 10 August 2021

Sino-Soviet Border War of 1969

 I do like an obscure conflict, and they don't come much more obscure than the Sino-Soviet border war of 1969. This is the subject of a new study by Dmitry Ryabushkin, translated by Harold Orenstein. This is the first of two volumes.


To call this a war is probably overstating the level of conflict; it was at best a border skirmish. However, it certainly had the potential to turn into a full-blown war, which with two nuclear-armed protagonists, could have been catastrophic.

There are differing views on the causes of the conflict and the events. The author sets out the historical background to the border between China and Russia along the Ussuri River, which has in theory been set down in several treaties between the two countries. Most international borders run down the middle of a river border. However, this gets more complex when there is an island, in this case, Damansky Island ( Russian) or Zhenbao (Chinese). The island is closer to the Russian side of the river and is a mere 1700 metres long by 500 metres wide. It has no real economic or military value.

It is likely that the Chinese inserted several units totalling around 300 men onto the island and laid them up in ambush. Soviet border guards spotted an insertion and went to challenge the Chinese. When they did, the ambush was sprung, and the Soviets lost around 32 men killed. Chinese casualties are less clear, but between 20 and 30 dead. All the versions are set out in detail. 

The political context included the invasion of Czechoslovakia, which caused significant tensions within the Warsaw Pact. Mao saw the Brezhnev Doctrine as the precursor of a Soviet invasion of China. This sounds fanciful, but both sides had large numbers of troops and equipment on the border. There were also internal Chinese factors as this was the period of the Cultural Revolution.  

Other incidents followed, which I assume will be covered in the second volume. Diplomacy then kicked in, and an outright war was averted.

There is a level of detail in this book that the general reader might regard as overkill. However, there are some very nice colour plates of the equipment and infantry uniforms. This was winter on the border, and there are a lot of similarities between the two sides. The real interest is in the 'what-ifs' of a major war. Strategy and Tactics published a boardgame The East is Red: the Sino-Soviet War, which covers these possibilities. I am sure I used to have a copy, but I can't find it. It is certainly gameable on the tabletop either as a large scale micro-armour game or as a skirmish in the larger scales. I have a nice BTR60 in 20mm, which would work, but I am probably not ready to indulge myself with the infantry.


Saturday 7 August 2021

Egypt 1801

 This new book on the British intervention in the Egyptian campaign by Stuart Reid is revisiting an old friend for me. In 2008, I ran three display games for GDWS at wargame shows that year on the theme of Napoleon in Egypt in 28mm. It involved a lot of work but was great fun and was well-received. Charles Grant even kindly signed my copy of his then recently published two-volume campaign study at one of the shows. In 2010 we did a follow up with the 1801 Battle of Alexandria.

Although many are quite old, there is no shortage of books on the campaign, and even Charles Grant and Paul Strathern (Napoleon in Egypt) are now 15 years old. Most books give the post-Napoleon stage and the British intervention less attention, or in some cases, it's just an afterthought. So, this book, by an author who has written extensively about the British army of the period, is very welcome. Hopefully, it will bring an interesting campaign to a new generation.

The British commander of the expedition was General Abercromby. Reid is perhaps less sympathetic than the 2019 biography by Carole Divall. He was killed quite early in the campaign and replaced by his second in command, John Hely Hutchinson, who was arguably just as ill-equipped for the job. Described as 'a slovenly, unsociable man with a filthy temper'. Reid argues that the real stars of the campaign were the brigade commanders, which included Sir John Moore.

This book pays more attention than most to the Ottoman Turkish forces that supported the British. These included the usual irregular rabble but also the disciplined regular infantry, the Nizan I-Cedid. The Turks also provided additional gunboats and other small craft that were essential to the campaign. The cavalry was particularly useful given most of the two British cavalry regiments arrived without horses. The Turks also defeated the French under Reynier at Belbeis by restraining their usual mad charge at the French squares. British advisors showed them a better tactic of sniping at the squares and using their artillery more effectively.

The French army was one of the most colourful of the Revolutionary and Napoleonic wars, which made them a joy to collect. No rank after rank of blue-coated infantry here. My personal favourite is the Regiment des Dromadaires.

There are several tactical points of interest that Reid highlights. For example, at the Battle of Alexandria, the British line did not always form a square when faced with cavalry. Stewart's Brigade fought off several charges by French cavalry, causing 25% casualties. Later in the campaign, the French outside Alexandria formed up in line, being attacked by British infantry in battalion columns covered by a heavy skirmish line. The British also had a range of colourful foreign regiments, including the Corsican Rangers, Hompesch' Hussars, Chasseurs Britanniques and the Regiment de Watteville.

Whatever Abercromby's shortfalls may have been, he can be credited for preparing his army in a way that addressed some of the earlier disasters. Reid argues that this proved to be a transitional moment in the history of the British Army, 'as a shambolically inefficient army began to flower into what would very soon be described (by the Duke of Wellington no less) as "probably the most complete machine for its numbers now existing in Europe"'.

The book includes a complete narrative of the campaign covering all the major actions. There are also extensive appendices covering the opposing forces and some colour plates. The wargamer will probably also want to buy Charles Grant's books for the colour plates and uniform details, but this is a better narrative history. 

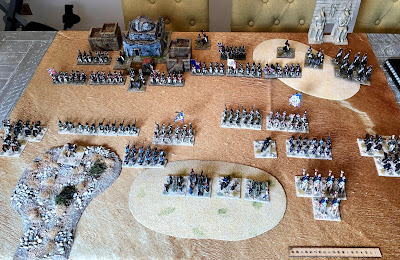
So, onto the tabletop. My current ruleset of choice for tactical games is Lasalle2. Here we have two brigades a side with the French attacking the British line in the traditional manner.

My plan was to pin the British right and concentrate my main attack on the left with artillery and cavalry support. Not to mention the Regiment des Dromadaires!

The Dragoons had swept away the British light dragoons and caught the British in line - ouch! 

This battle plan was just as well as our daughter's cat is staying with us a couple of days, and he decided to park himself between the two lines. 

The French routed the British 2nd Brigade and swung around the flank, forcing the British to withdraw.

I enjoyed getting these figures back on the table. Time to dust down the Ottomans next!