Welcome to my blog!

News from a wargamer with a special interest in the military history of the Balkans. It mainly covers my current reading and wargaming projects. For more detail you can visit the web sites I edit - Balkan Military History and Glasgow & District Wargaming Society. Or follow me on Twitter @Balkan_Dave
or on Mastodon @balkandave@mastodon.scot, or Threads @davewatson1683

Sunday, 15 July 2018

Edward's 'Ring of stone' in North Wales

A trip to North Wales was an opportunity to revisit some of the finest castles in the UK.

In the 13th century, North Wales was controlled by the Welsh Prince, Llwelyn ap Gruffudd. Edward and his Marcher lords sought to bring the independent Welsh territories under their control. In two campaigns, in 1277 and 1282/1283, Edward reduced the territory of the Principality of Wales and then completely conquered it. Most of the conquered territory was retained as a royal fief, and these lands subsequently became the territorial endowment of the heir to the English throne with the title Prince of Wales.

Edward sought to secure his new lands with a 'ring of stone' - large castles, all of which can be seen and visited today. James of St George was Edward's master-builder, and he used the most advanced defensive features of the day, to build the castles of Beaumaris, Conwy, Caernarfon and Harlech.

I didn't have time to visit Beaumaris, which is over the Menai Straits in Anglesey. Although it's imposing outline can be seen as you drive down the opposite shore to Conwy. I spent more than one childhood holiday in this area and Conwy castle never fails to impress. The railway bridge which runs by it was also constructed in 'castle' style.


Caernarfon Castle is worth spending the most time at. Construction started in 1283 and like the other castles is a World Heritage Site.


The current Prince of Wales was invested inside the castle, the grounds of which are substantial. The information boards and audio visual introduction is very good.


Not only is this castle impressive in its own right, but it includes the regimental museum of the Royal Welch Fusiliers. 


Not forgetting the regimental goat, who is on the muster, not a mascot.


Finally, we reached Harlech Castle. This isn't as grand as the others, but it is my favourite, perched on a rock above the sea. The song 'Men of Harlech' (think of the film Zulu) was written about the siege of the castle during the Wars of the Roses.


Like all these castles, it could be supplied from the sea, a huge problem for the besiegers who didn't have a strong navy during the rebellions against the rule of Edward and his successors. Today, the sea is some distance away, with a fine golf course in between. Sadly, not enough time to play it.


So, four castles, well preserved and presented. Highly recommended.

And for contrast, here is a typical Welsh castle of the period. This is near Llanberis at the foot of Snowdon.




Saturday, 14 July 2018

Battlegroup South

A wargame show in a museum is a very special event and Battlegroup South, held in the Bovington Tank Museum this weekend, is no exception.

A holiday in the area was an opportunity to pay my first visit to this show. I used to work in Dorset, so I am very familiar with the museum, but I haven't been back for over 25 years.

There were some 25 games and 30 traders spread around the museum. There was more room than I expected, but it is a different experience to a normal show when the stalls are next to each other. This photo gives an idea of how the games fit around the exhibits.


Difficult to tell how well supported the event was as wargamers mixed with the usual Saturday museum visitors. However, there was plenty of discussion around the stalls and hopefully the games might draw a few more into the hobby. I certainly left with more than a few packages!

There was an understandable 20th century emphasis with the traders and games. Here are a few that caught my eye.


I'll do a separate post on the museum itself. Hugely impressive.

Friday, 6 July 2018

Flodden - the battlefield

I have now played a few games with Scott's fabulous 10mm armies for this battle. However, I hadn't managed to actually visit the battlefield.


The opportunity presented itself en-route to a conference in Newcastle yesterday.

The battlefield is marked by a memorial on the hill above Branxton village, roughly in the centre of what was the English line. 


From there you can look down to what was the marshy bottom of the hill that the Scots had to march through.


The well marked battlefield trail takes you to the bottom where you get the Scots perspective. I had thought the hill was steeper than it is. Mind you, I wasn't marching up it in armour wielding a pike!


There are information boards all alone the trail. This is at the bottom of the hill where King James was probably killed.


Finally this is the view from the Scots starting point on the opposite hill.


I then travelled to Etal Castle that was captured by the Scots before the battle. There is a small exhibition about the battle and the remains of the modest castle.


I also went to Ford Castle, but this is now more a country house than a castle, used as a residential activity centre by the council. The village is very pleasant with plenty of eating opportunities.

Overall, very pleased to have finally visited the battle. As always it highlights the value of walking a battlefield, not just reading about it.

Tuesday, 3 July 2018

The Guards Museum

The Household Division of the British army consists of two cavalry regiments and five regiments of Foot Guards. In order of precedence; Grenadier, Coldstream, Scots, Irish and Welsh Guards. The Foot Guards have a small museum in the Wellington Barracks, next to St James Park in London.


I had a spare hour after a meeting in Whitehall this week and took the opportunity to visit a museum that I had previously missed. It is a small museum but packed with interesting exhibits, covering the long history of the Foot Guards. 

Most people are familiar with the guardsman who parade at Buckingham Palace, but many will not know that these are also fighting regiments to this day. 

The museum takes a chronological tour from the Grenadier and Coldstream Guards regiments establishment during the Civil Wars and the Restoration. This was followed by the Scots Guards and later by the Irish and Welsh Guards.

The displays are traditional, supplemented by some quite stunning life sized vignettes. There are plenty of uniforms and equipment from each campaign.


There is also a model soldier shop next to the museum and you can also visit the Guards Chapel. The original was largely destroyed by a V1 flying bomb in 1944. Today, it has a fine display of standards used by the Guards over the years.


Overall, well worth a visit if you are in that part of London.

Peter the Great Humbled

The Great Northern War is now better known following some great books and wargame figure ranges. However, the war with the Ottoman Turks that followed is less well known. For that reason Nicholas Dorrell's new book, 'Peter the Great Humbled' is very welcome.

The hint is in the title. The Russo-Ottoman War of 1711 did not go well for the Russians. In fact, had it not been for very generous terms, Peter the Great could have come to a sticky end and the history of Russia might have been very different.


The author sets out the origins of the war, which was in part a consequence of Peter's victory over the Swedes at Poltava in 1709. It was also a means of strengthening Russian support amongst the Cossacks and continuing Russian expansion to the south. We then get pen pictures of the opposing commanders and a quite detailed discussion of the opposing armies. The evidence is strong for the Russians, somewhat less so for the Ottomans and their Tartar allies. The Moldavian's came out for the Russians, but the Wallachian's played a more subtle game, playing wait and see.

There were secondary fronts in the Crimea, Ukraine and in the Kuban. The Tartar defences were strong and provided a good base for Tartar raids. The Russian aim was to pin as many Tartars down in their home area in the Crimea, to reduce the numbers joining the main Ottoman field army.

The main front was in the Balkans, primarily Moldavia. The Russians fielded about 80,000 men and the Ottomans somewhat larger army was probably around 120,000. The author discusses the sources and attempts to reach a balanced conclusion. Overall, the two armies were probably closely matched.

The decisive actions took place on the Pruth River, south of the Moldavian capital at Jassy. Firstly, at the crossing at Faltcha were the Russians failed to halt an Ottoman crossing. The Russian main body then withdrew to a defensive position at Stanilesti. Pinned against the river the Ottomans could have just starved the Russians into surrender. However, they were concerned about a separate Russian column and their own position. The Grand Vizier offered very reasonable terms, which Peter gratefully accepted. Some loss of territory, including the loss of the fortress at Azov.

The format of this book is similar to the popular Osprey style. Plenty of illustrations, decent maps and colour plates, supplemented by photos of re-enactor groups. The style of the colour plates has been criticised, but they look fine to me.

We refought this battle on the tabletop as a display game at the Albanich show in Dumfries in 2010. I wish this book had been published then, it would have made my own outline of the campaign much easier. Overall it is excellent and I look forward to others in the series. A bit of competition for Osprey is no bad thing.


Monday, 25 June 2018

1204 - The Unholy Crusade

The Fourth Crusade never actually reached the Holy Land. The Venetians managed to divert the crusading army, first to the Adriatic town of Zara and then to Constantinople. While it is often described as a criminal venture; John Godfrey in, '1204 - The Unholy Crusade', argues that it didn't look that way at the time.

The author takes us from the calling of the Crusade and the response, largely from France and Germany, which gradually assembled in Venice. The plan was to sail to the Holy Land, initially Palestine, but latterly Egypt, rather than travel overland through the Balkans. However, the leaders overestimated the numbers of crusaders and entered into a contract with the Venetians for a fleet they had little hope of paying for.


The Venetian Doge, the extraordinary Dandolo (85 years old and blind), saw an opportunity to advance Venetian interests by persuading the crusaders to capture Zara from the Hungarians. This resulted in the excommunication of the Venetians because the Hungarians were a Christian state. He then persuaded them to sail for Constantinople, the capital of the Byzantine Empire.

The author devotes a couple of chapters to the role of Byzantium and their relations with Islam. It is an important part of the story and one of the reasons the capture of the city did not appear unreasonable to western eyes in 1204. Italian traders had been arrested and massacred in recent history, creating an enmity that went beyond anything that might have motivated the Dodge himself.

The siege itself took place in two stages and the walls were breached from the sea, using Venetian ships. The city was sacked and its wealth found its way across Western Europe, particularly Venice. You can see some of the statues and other sculptures in Venice today. One of the Latin leaders described the booty the like of which 'had never been obtained in any city since the world began'.

The new Empire held not only Constantinople, but also formed kingdoms in modern day Greece. Diplomatic blunders, particularly relations with the Bulgarians, enabled the Byzantines to recover and they eventually recaptured the city in 1261. However, they never recovered their wealth and strength, leading to the rise of the Ottomans. It is therefore possible to trace the Ottoman occupation of the Balkans, and very nearly, Central Europe, to the destruction caused by the Fourth Crusade.

The Latin states survived much longer and I recommend 'The Franks in the Aegean' by Peter Lock for this fascinating story. I visited some of their magnificent castles in the Peloponnese, earlier this year. Larissa below was my favourite.

Larissa Castle near Argos
This book was published in 1980, but copies can be found on the second hand market. I picked my copy up for a very reasonable £7.50. Written for general reader it tells a fascinating story, very well.

Monday, 11 June 2018

This Untoward Event

I picked up a copy of C.M Woodhouse's 'The Battle of Navarino' in a second hand bookshop, prior to my recent trip to the Peloponnese.

Published in 1965, it provides a comprehensive account of the naval action that largely secured the independence of Greece from the Ottoman Empire. It was fought on 20 October 1827 between the combined Egyptian and Ottoman fleets, and the allied British, French and Russian fleets commanded by Admiral Codrington. Navarino is a bay and port on the south-west coast of the Peloponnese.


The battle was described in the King's speech to parliament on 29 January 1828 as 'this untoward event', which Prime Minister Wellington explained as meaning 'unexpected or unfortunate', to considerable criticism at the time. This is because Britain was traditionally an ally of the Ottoman Empire as a bulwark against Russian expansion. However, the cause of Greek Independence was popular in Britain and many of the Greek commanders were British, as well as significant numbers of volunteers, known as Philhellenes. The King was reported to have 'winked' as he read out the speech.

The combined fleets had instructions to enforce an armistice, at sea at least, which would force the Sultan into peace talks. They had effectively blockaded the Ottoman fleet until it broke out in an attempt to reinforce Patras. After being intercepted by the British fleet, they withdrew again to Navarino.

After this the allies decided that the only way to enforce the armistice was by a show of force. This involved sailing into the bay and anchoring within range of the Ottoman fleet. There is some dispute as to who initiated the fighting, but it is agreed that a Turkish ship fired first. This led to a full engagement in which the Ottoman fleet had a numerical advantage, but their ships were not as experienced or as competently handled as the allies. Their fleet was destroyed as a fighting force.

Turkish and Egyptian losses included three ships of the line, 17 frigates, some 40 other ships and around 4,000 dead. Allied fleets lost 182 dead. As no state of war existed, no prizes were taken.

The book is well illustrated, mostly with the many oil paintings commissioned after the battle. The book is largely based on the Codrington papers in the National Maritime Museum, supplemented by French and Russian secondary sources and Egyptian records. As is often the case, the Ottoman sources are scant. There are few copies still around on the second hand book market.

I have been clearing out some old wargame magazines in an effort to create some space on my shelves. Coincidentally, I came across a very good article on the battle by Jonathan Carruthers, for Wargames Illustrated, I think back in 1988. He suggests a more balanced game by allowing the Ottomans to contest the allied fleet at the entrance to the bay. I suspect the outcome would have been the same, but casualties would have been higher, given the shore batteries and the narrow entrance.

No ships, but here are a few of my 15mm Greek War of Independence figures in 15mm.


Sunday, 3 June 2018

Target Corinth Canal 1940-44

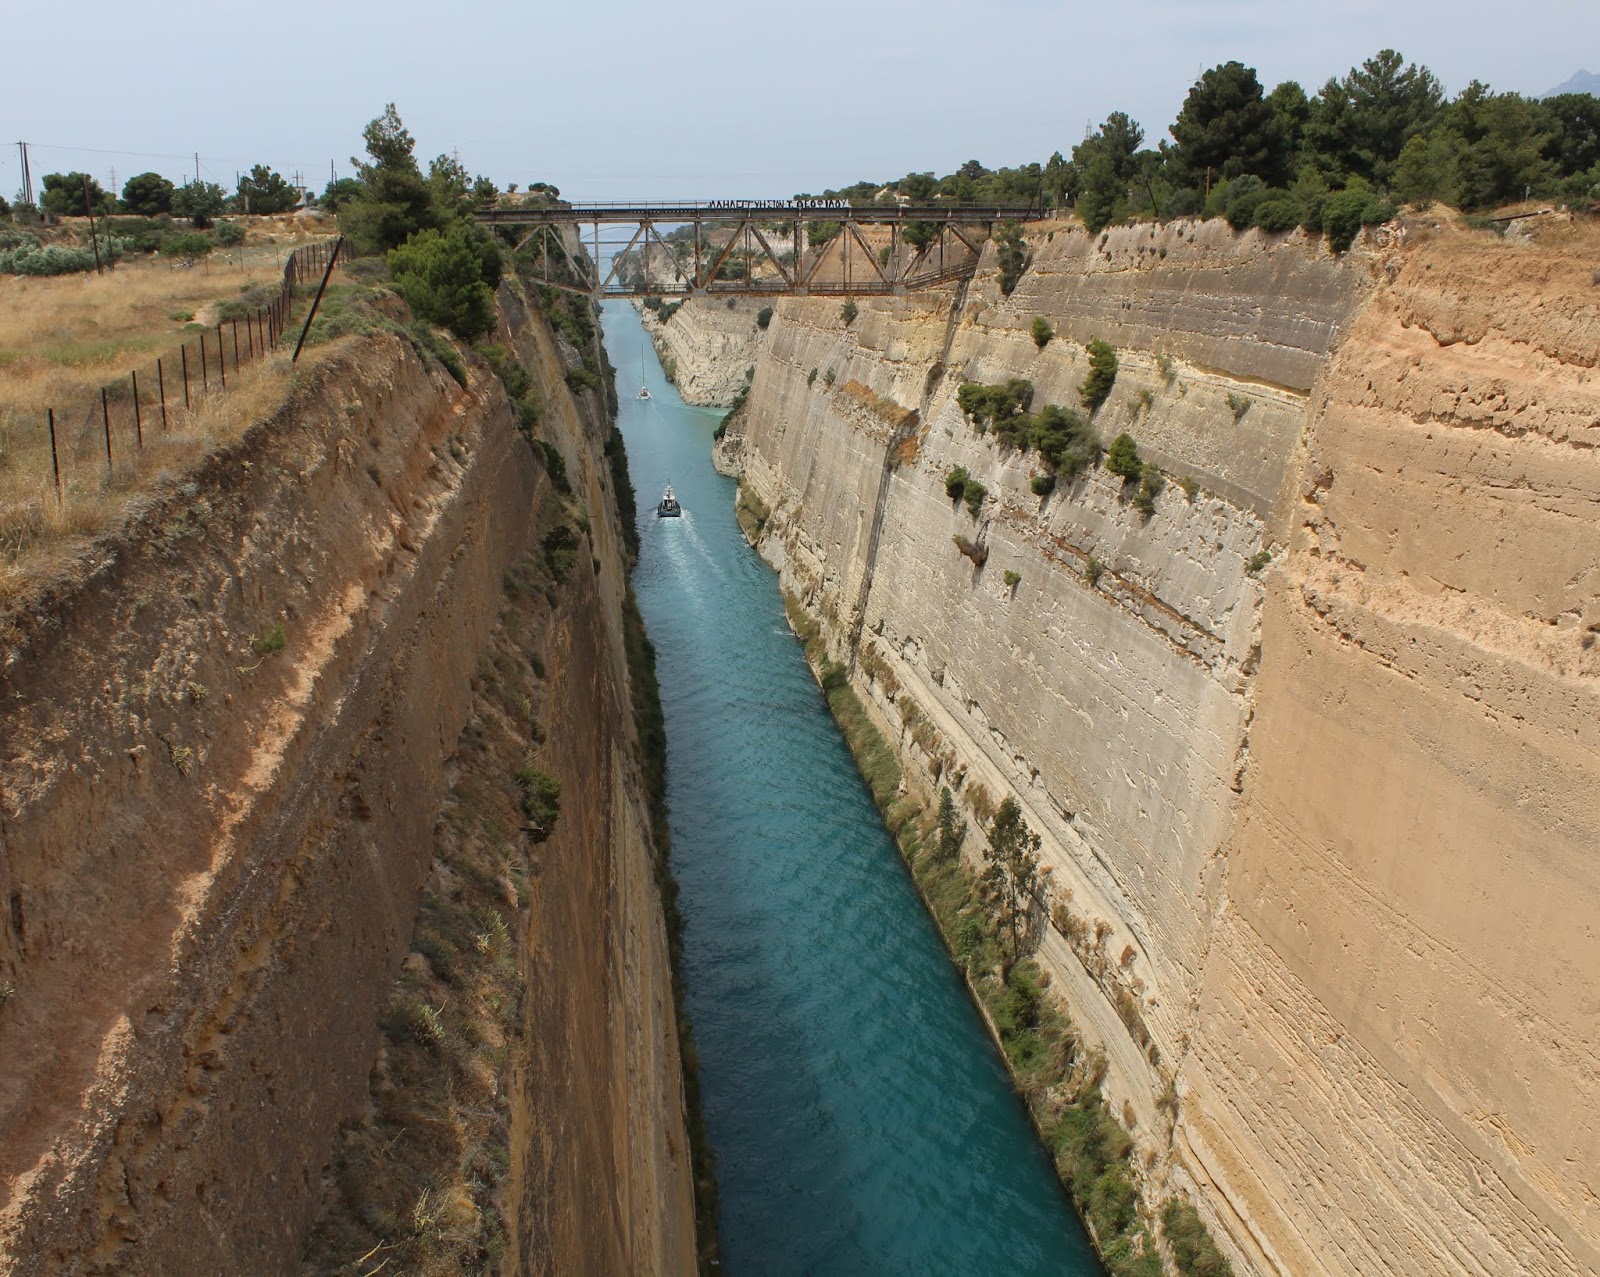
During my recent visit to The Peloponnese I stopped off at the Corinth Canal. I was obviously familiar with the German airborne assault on the canal in 1941, but wanted to know more. The answers are in this excellent book by Platon Alexiades.


The Corinth Canal separates the Peloponnese from the rest of mainland Greece. It is nearly four miles long, seventy feet wide and 260 feet above sea level at its highest point. Even today, it is an obligatory stopping off point for tourists. Even my family thought it was worth seeing, something that couldn't be said for some of the ancient sites they trekked around!

It was completed in 1893 and was a grand statement of modernisation for a country that that had only secured its independence some 60 years earlier. In 1940, some 8,600 ships a year used the canal.


The strategic point of the canal is that it saves around 185 nautical miles, avoiding the sea journey around the Peloponnese, which became dangerous for Italian shipping heading to their bases in the Dodecanese islands. These islands had been gained as a consequence of the Italo-Turkish War of 1911-12.

The book sets the scene with a brief description of the Italian invasion of Greece and the naval actions around the coast. SOE had a particular interest in Greece and from its base in Cairo organised many operations, even before the German invasion and occupation. The Admiralty wanted the canal blocked, but the RAF could not bomb it in daylight, primarily because it was outside the range of fighter cover.

Even when the British intervention force was retreating over the canal, attempts to block or mine the canal failed. It was the 2nd Fallschirmjager Regiment that dropped both sides on canal in Operation Hannibal, who seized the canal, although the New Zealanders defending it did managed to blow the bridge.

The rest of the book covers the various plans and attempts to block in canal by SOE. Most importantly, Operation Locksmith, led by Mike Cumberlege, which failed primarily because of defective weaponry. He died with the rest of his four man team in a German concentration camp.

Canals of this size are very difficult to block in this sort of operation. Finding a mine large enough for the job, yet small enough to transport, was a major challenge. Ironically, it was the Germans who completed the task as they withdrew, by dumping some 200 railway wagons in the canal, sinking block ships at either end, and filling up large parts of the canal with rubble.

This is a fascinating story, very well told. Recommended.

Allied intervention force in 15mm