Welcome to my blog!

News from a wargamer with a special interest in the military history of the Balkans. It mainly covers my current reading and wargaming projects. For more detail you can visit the web sites I edit - Balkan Military History and Glasgow & District Wargaming Society. Or follow me on Twitter @Balkan_Dave
or on Mastodon @balkandave@mastodon.scot, or Threads @davewatson1683

Monday, 26 December 2016

Open Combat revisited

My Xmas game was an opportunity to revisit Open Combat since getting the nice new glossy hardback and dice as part of the kickstarter. For those not familiar with these rules, They allow you to point up all sorts of historical and fantasy skirmish forces, creating balanced games between genres if you want.

The game also allowed me to get my newly painted monsters from the Conan board/figure game on the table. I like the board game, but I suspect I will get more use from the figures using Open Combat and Dragon Rampant.

Here we have a couple of demons.


and then a rather tasty giant snake.


Then, onto the game itself. My merry band of adventurers included a first outing for my Frostgrave wizard and his apprentice. Together with Bugman and his dwarf rangers. Some of my very first fantasy figures from the old Citadel range.


We had a cunning plan for grabbing the jewels from the demon fort. Bugman would distract the Demon knights and the big hairy demon, while the wizard and apprentice sneaked into the fort.


It started well, with dwarf crossbows weakening the demons. The Open Combat dice are useful, but not essential, as the rules are very simple and the QRF covers most of it.


But they soon got a bit too close for comfort. Crossbows down and get stuck in with the axe - the slope was useful too.


Meanwhile, the sneaky attack on the fort got disrupted when the giant snake slithered out of the wood. Those fangs are to be avoided! Glad I paid for the nimble and evade skills for our magic pair.


The Demon king hopped out of the fort to join in.


After that it was a slogging match. Sadly, both wizards died a fate worst than death, but Bugman and the boys saved the day. Held the hill and killed enough to reach the demon break point. But it was a close run thing!

Not sure they will accept these demon jewels as payment for a well earned pint in Bugman's Brewery, but the dwarfs will no doubt be persuasive....


Wednesday, 21 December 2016

Chosen Men

'Chosen Men' is a new set of skirmish rules for the Napoleonic Wars, written by Mark Latham and published by Osprey. Mark used to work with Warhammer Historical and produced Legends of the Old West and Trafalgar. More recently he wrote the Osprey fantasy rules, Broken Legions.

These are genuine skirmish rules with one model equalling one man. A typical unit is led by an officer and consists of 4 to 9 figures. A typical standard 350 point game on a three foot square table would have three units a side. (see roster below). The game is designed for 25mm figures, although I can’t see any difficulty in playing with other scales. Think Sharpe skirmish episodes, for the sort of game these rules are aimed at. Timely for me as my beloved being away on a course recently allowed me to work through the Sharpe boxed sets on Virgin!

The game starts with both sides rolling for initiative and war strategies. This gives a one off action that is played immediately or can be saved. In my test game the rifle unit was delayed a turn and the French light infantry had to undertake a command test when they strayed near the table edge. The idea is to represent the battle going on around this skirmish.

The action phase allows players to activate a unit alternatively, so you can pick your most vital unit first. Actions are move, charge, fire etc and each one costs a TAC point. Better units have more points, but as you can only use one action per move and can’t move and fire, I didn’t find this very restrictive. Movement is 6” for foot and 10” for horse, although a double move is an additional D6. The default formation is skirmish, but you can form into line and column if you want, with commensurate factor gains. You can also order a hold action which allows a delayed action later the phase. This allows you to react or fire in response to enemy movement. Firing is a straightforward accuracy roll to hit followed by damage rolls based on the units resilience . 

The next phase is melee, with weapon and unit melee factors and an ‘old style’ table to calculate the score to hit. Again, hits are converted into damage based on the units resilience. Most figures have one wound, but officers and cavalry have 2 or more. Then you apply combat resolution factors to find the loser who takes a command test.

Finally, there is the recovery phase, which involves rallying and moving fleeing units and checking victory conditions.

There are optional commander traits and strategies that you can purchase for army list points. I didn’t use them, but they clearly add some colour to a game, without being too overwhelming. There are also special rules like ‘crack shot’ and ‘devastating charge’, which again give additional factors in appropriate circumstances. The army lists are restricted to the Peninsular and Waterloo campaigns, but it wouldn’t be difficult to adapt them for other nations. You also get six scenarios.

The production quality is typical of the Osprey games series. A logical process and plenty of photo’s. However, there is no quick reference sheet, which means a lot of page turning. With all the special rules, your copy of the rules is going to be well thumbed. It really needs a decent process chart, otherwise you miss important rules.

These rules plug a gap in the Osprey series, for the period up to ‘The Men Who Would Be Kings’ colonial rules. However, the mechanisms are very different. It’s probably competing with Sharp Practice 2. If you don’t like card driven games, or the Lardies more random approach to unit activation, these rules might be for you.


My test game was a simple Peninsular action with light troops and cavalry. The standard game will probably be done and dusted in 90 minutes or so once you have a handle on the rules. If this a new period, then you only need a small number of figures. Significantly fewer than Sharp Practice. 


Finally, some eye candy from the test game.


Sunday, 11 December 2016

Glory, Hallelujah!

'Glory, Hallelujah!' is the title of the Back Powder supplement for the American Civil War. I bought it some time ago, but I have just got around to using it.

So what do you get for your £20, or usually cheaper? You get just about everything you need to game the ACW. A description of the armies, equipment and tactics - as well as masses of eye candy for uniform reference. There are optional rules to supplement Black Powder and plenty of army lists and scenarios. Even special rules for forts and river operations.

The production quality is nothing short of sumptuous. Even if you don't use Black Powder rules, this book is well worth the price.

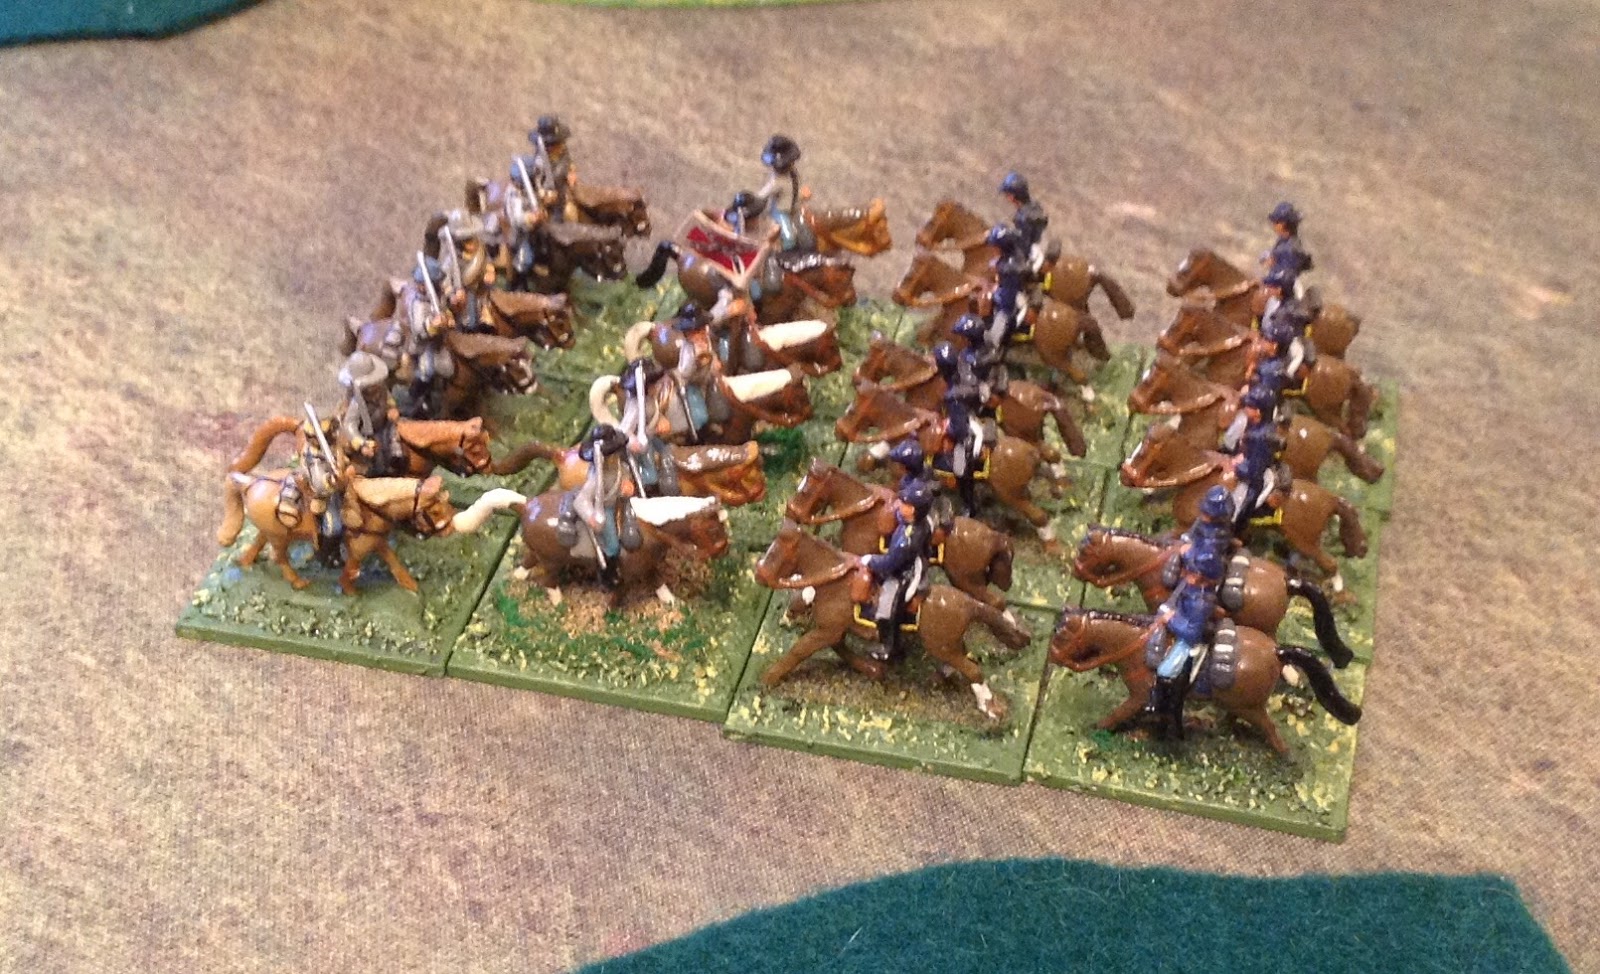
So onto the battlefield. I used my collection of 15mm figures for this game. I collected them gradually over many years and they are based for Fire and Fury, a rule set I never really liked. The special rules played well and gave a real feel for the period.

The objective was to capture the town. The Rebels got there first and held off two counter attacks.


I toured the Eastern battlefields of the ACW a number of years ago, en-route to Historicon. They are some of the best preserved battlefields I have visited and a credit to the staff involved. Here is my picture of the site of Pickett's charge at Gettysburg.


Thursday, 8 December 2016

Panzer III

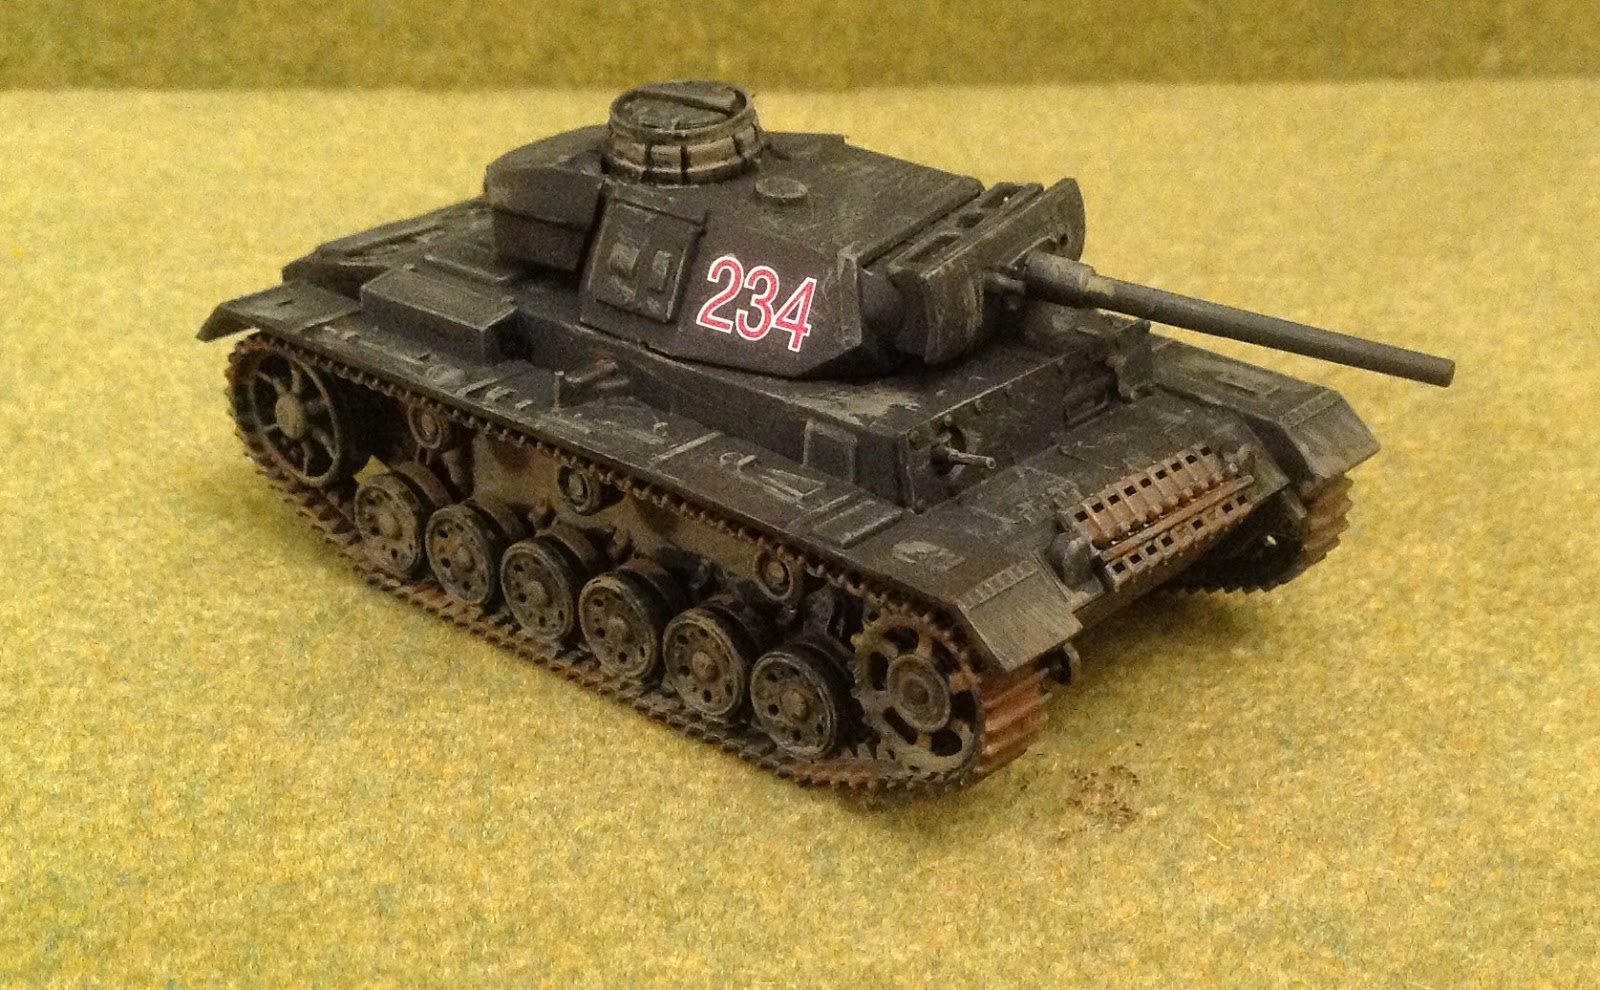
I have been making some further efforts at reducing my lead pile, or in this case plastic pile. The victim was a Rubicon 28mm kit of the German Panzer III. I say victim, as kits are not my favourite projects, I am at best all thumbs.

The Panzer III was intended as the primary battle tank of the German forces. However, when it initially met the Russian KV-1 and T-34 tanks it proved to be inferior in both armour and gun power. To meet the growing need to counter these tanks, the Panzer III was up-gunned with a longer, more powerful 50-millimetre (1.97 in) gun and received more armour but still was at disadvantage compared with the Soviet tank designs.


Despite my reservations about kits, this was very straightforward, with all the essential bits like tracks being one casting. Very clear instructions and all parts numbered - no need to try and guess how it goes together from a photo! A vast improvement on the Warlord/Italeri model that was nothing short of a nightmare and simply not robust enough for a tabletop model. Rubicon also give you a generous decal sheet.

I purchased mine from Scott's Models in Glasgow. Support your local model shop, or they are unlikely to be around when you need that pot of paint.


Sunday, 4 December 2016

Malaya and Singapore 1941-42

The Japanese invasion of Malaya and the fall of Singapore in 1941-42 was a military disaster of unprecedented proportions for the British Empire. Mark Stille covers the reasons for this very well in the Osprey Campaign No.300 'Malaya and Singapore 1941-42'.


From Churchill downwards this was not Britain's finest hour. The strategic assumptions were wrong and Churchill even failed to deliver on his own poor plan. On the ground, the British Empire commanders failed to take advantage of their material superiority in important categories through poor planning. The consequences were a staggering 138,708 casualties, 130,000 of which were prisoners of war. In contrast the Japanese 25th Army used intelligent planning and relentless initiative to keep the all important initiative. Tanks played an important role, but it was the Japanese infantry who really delivered the victory.

This campaign was one of my recent wargame projects, so I have read a number of detailed campaign histories and memoirs. Mark Stille has written a very good concise history of the campaign with lots of quality photographs and the excellent illustrations by Peter Dennis. What Osprey do better than other publishers is excellent maps, both of the campaign and the key battles. If you are thinking of doing this campaign on the tabletop, this book is an ideal starting point.

This represents a typical action during the campaign, using Bolt Action rules and 28mm figures.


Wednesday, 30 November 2016

The Flame Bearer

A new Bernard Cornwell book is always a must read, and The Flame Bearer, the latest in the Last Kingdom series is no exception.


Our 'hero' Uhtred is now based in Northumbria, where his son-in-law Sigtryggyr rules. Northumbria is under pressure from the Saxon kingdoms of Wessex and Mercia, who aim to create England, and the Scots from the North.

Uhtred is besieging his family home of Bebbanburg, held by his cousin. He has to abandon the siege to support Sigtryggyr and successfully foils an attempt by a Wessex nobleman to break the truce. This buys a year or two for Northumbria, but more importantly, time for Uhtred to capture Bebbanburg.

Being Cornwell, this is no simple siege. We have the Scots, Norse raiders, a mad Bishop and the West Saxons all playing a role. They all come together in an epic final battle at the Bebbanburg fortress.


No expletives are too extravagant to describe any Cornwell book. He is the master of historical writing and this title is up to his very high standards.


Saturday, 26 November 2016

Killiecrankie 1689

A short autumn break in Perthshire was an opportunity to visit a battle site I haven't been to for a number of years, Killiecrankie.

The Glorious Revolution of 1688 wasn't accepted by many in Britain, including most of the Highland clans, who remained loyal to the Stuarts. Most Lowland Scots supported William and Mary and followed the English Parliament in supporting him as King. This predates the Treaty of Union, so Scotland had its own monarchy and institutions. 

The Jacobites rallied around John Graham, Viscount 'Bonny' Dundee, who joined Lochiel, Chief of Clan Cameron, who was raising the clans. Dundee was pursued by General Mackay, who commanded a government force of around 3,500. Dundee gathered those clans who had arrived at the muster, some 2,400 men, and blocked Mackay's advance at the Pass of Killiecrankie, just north of Pitlochry.

The two forces exchanged fire and then Dundee ordered a charge. When the lines met, the government troops were "swept away by the furious onset of the Camerons". The advance and charge was masked, leaving the redcoats with insufficient time to fix their plug bayonets. Mackay's force fled, suffering some 2000 casualties. 

However, around one-third of the Jacobite force was killed, including Dundee. The Jacobite advance continued until it was stopped by government forces at the Battle of Dunkeld. After which the rebellion dissolved. 

The position of troops on the battlefield today is difficult to identify. There are two modern roads and railway that now go through the pass. However, there is a visitor centre, open in summer months and a path down to the 'Soldiers Leap', where a redcoat is said to have leapt over a ravine to escape from chasing Highlanders. 


And finally, some 28mm figures from the period, from my collection.


Sunday, 13 November 2016

WW2 Italian Infantry

Another dabble into my pile of lead box brought out some 28mm Italians. I could do with another squad of infantry for my Bolt Action army to fight the Greeks, so off they went to the painting desk.

I am not sure when I picked these up, but I think David Burns of Burns Miniatures gave them to me. They came in a plain blister pack, but look as if they are from the Black Tree Designs range. Now these can be a bit hit or miss, but these Italians are very nice with great definition. Ideal for a simple paint job and a wash. 


Sunday, 6 November 2016

Conan

Probably my first fantasy read was one of the Conan books, created by the American author Robert E. Howard in 1932. I bought most of them including the later editions developed by L. Sprague de Camp and Lin Carter. They have long been donated to Oxfam, but I recently bought an anthology of them for next to nothing in Kindle format. Of course, we also have Arnie Schwarzenegger doing his best with the concept - although I admit I actually enjoyed Conan the Barbarian, if not the sequels.

I recall the Meeples podcast referring to a Kickstarter game based on the books, but didn't follow through as I rarely play board games. A pal at the club did and pointed out that this was a hybrid figure and board game. He went for most of the stretch goals that brings an impressive collection of miniatures. We played the game last Sunday, and impressed, I bought the core box on eBay.

With the core box you get two double sided playing boards, with a village, ship, tavern and castle settings. This is the ship board I used in today's game.


The box includes the rules, tile cards with the essential stats and counters. Plus the real selling point, 74 hard plastic figures, fully assembled. They include four heroes, including Conan, various other character figures, monsters and basic troops such as pirates, guards and Picts. The figures are large 28mm, actually 32mm from base to eye. Here a few Photies and as you can see, they are well sculpted with excellent definition for painting.


The game mechanics are not complex and a game last around 90 minutes once you have a grasp of the rules. I can see me using the figures for other game systems, Open Combat in particular. 


Saturday, 29 October 2016

The Madagascar Plan

My latest fiction reading has been The Madagascar Plan by Guy Saville. His first book in the series Africa Reich, was the very first book I read on Kindle and very good it was.

The setting is an alternative history of WW2. The British army is trapped and destroyed at Dunkirk and so Britain sues for peace, leaving the Germans to dominate mainland Europe. They also take over European colonies in Africa and exploit them economically. However, the British colonies are still there as well as resistance forces.


This book takes the story to 1953. It has the same core characters in Burton and Hochburg, the senior Nazi official in Africa. Burton ends up in Madagascar looking for his Jewish lover, who has been sent there by her British secret service husband when he discovers the affair. The Nazis have deported most European Jews there.

There actually was such a plan, devised by Eichmann in 1938 and revised in 1940 after the fall of France made the colony available for this purpose. However, the plan leaked out and was dropped in favour of what became the 'final solution'.

I won't spoil the story, but this volume is a little less frenetic than the first, building more of the context around the action. It is well written and a great read. Alternative history at its best - fiction, but with a credible historical basis. The author is working on the final book in the trilogy, so I will look forward to that.

I mused after reading the first volume on the wargame possibilities. This time I gave it a go, based on the conflict between British and German armoured battlegroups on the Rhodesian border. Centurions for the British and Tigers for the Germans. I used Cold War Commander rules, but you could just as easily use WW2 rules. The figures are 1/200th or 10mm.


The British moved quickly to capture the village, but came under fire from Tigers on the hill. British artillery was effective in destroying the German infantry and the game resulted in a stalemate. The next book in the series will include an open war, with the American's joining in. So that should give an opportunity to try this again.


On the subject of micro-armour, I have been painting some reinforcements for my modern Turkish army in 1/300th. These are painted to represent the Turkish ACV 15 armoured infantry fighting vehicles - recently seen on our news screens, deployed in Syria. They are a licensed version of the US AICV. The models are the nearest I could find - the Dutch YPR-765 from H&R.


Tuesday, 25 October 2016

That pile of lead

My painting has fallen behind of late. All of the usual excuses, but also I do better when I have a target like a show. My next big project is going to be 1848 Hungarian revolution, but the new figures are coming out slowly and I need something to get me back into the groove. 

So, I turned to the that huge box that every wargamer has. You know the one. Full of those half projects you never started, or finished. The odd figure you picked up at a show, thinking, 'that will come in useful', but it never does!

The first figures from this particular project have come off the painting baton. 

First up, some figures for my Game of Thrones project. A couple of Perry's late medieval's as standard bearers for historical units that can be used in a GoT setting. Plus this year's Salute give away.


On the subject of Salute giveaways. My Dragon Rampant goblins lacked a commander. Low and behold the box surrendered a goblin king figure. Just the job!


And finally, while I have only dabbled with Frostgrave, the figures are really nice. I can use this wizard and apprentice for Open Combat.


Now, what else is in the box, or in my case, many boxes!


Monday, 17 October 2016

The Norman Campaigns in the Balkans 1081-1108

Self evidently a book with the title ‘The Norman Campaigns in the Balkans 1081-1108’ is going to be on my must read list. The story of the Normans in Italy, as brilliantly told by John Julius Norwich, inspired my interest in the Normans much more than the Norman conquest. A Sicilian-Norman army served me well for many years on the wargames table.


It is one of history’s great stories. How a handful of Norman knights made their way from mercenaries to rule impressive and multicultural kingdoms.

Norwich covers the Norman conquest of Italy and Sicily, but says little about Robert Guiscard’s invasion of the Byzantine Empire in the Balkans. Georgios Theotokis in this new study (in affordable paperback) covers similar ground in his description of the events in Italy. He describes the Norman and Byzantine institutions and their respective armies. He also covers a neglected subject, the navies of both sides.

The invasion of the Balkans is covered in just two chapters, less than a quarter of the book. In fairness, he covers all the primary sources and therefore there probably isn’t much else to say. None the less, the title is a bit misleading.

The most famous battle is Dyrrhachium 1081, which GDWS did as a display game at the Glasgow Wappinshaw show in 2005. Not forgetting the role played by Guiscard’s wife Sichelgaita in rallying the Normans.


This is a solid academic study, although far removed from Norwich’s glorious narrative that reads more like a work of historical fiction. If you have read nothing about this period, I would read this book first and then move on to the story telling master that is John Julius Norwich.


Saturday, 15 October 2016

IPMS Glasgow Modelfest

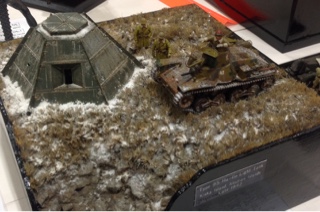
I didn't have enough time today to get up to Forfar for Skelp, so I went to the Glasgow Modelfest IPMS show at Bellahouston. Some very fine modelling on display and picked up some paints and other bits and bobs. 

Here is a selection of the models that caught my eye.


Wednesday, 5 October 2016

Sharp Practice 2 - India

My latest Sharp Practice game takes us back to the 18th Century, with the British in India fighting the Mughals around the time of Plassey in 1757. Another opportunity to use my new Deep Cut desert terrain mousepad mat.

These are the army lists, 52 points a side.


The Mughals are grouped around the village with infantry in the centre and cavalry on the flanks. 'Clive' positions his best regulars on the left with his sepoys on the right.


Three units of Mughal horse storm across the table and hit the British regulars on the left flank.  However, the sturdy redcoats held firm and repulsed the charge. I found a rule I had missed in the last game that says cavalry have to rally off shock after falling back, before advancing again. This makes cavalry a bit weaker, other than in the first charge. There are lots of rules like this dotted around the book. I feel the need for a process chart coming on.

The sepoys were not so sturdy. Swept away in the first charge.


The centre exchanged fire at range to limited effect, before the left wing Mughal cavalry swung around to seriously weaken the British centre.


The game petered out after that largely because of officer wounds. Another rule I didn't play properly last time. It can very quickly reduce the initiative level of officers, making it difficult to do anything. Of course the alternative is to keep officers out of the way!

Overall, another interesting game. In comparison to 'The Men Who Would Be Kings' rules, it is a lot slower and the SP2 has quite a bit of detail that you forget when not playing regularly.